If you’ve ever tried to look up “sailing knots” online, the internet overflows with guides showing knots you’ll never use.
That’s why I put this guide; it’s practical and handles 99% of everything sailing throws at you.
It blends the advice from instructors and reputable sailing orgs like ASA, RYA, and Chapman’s Piloting & Seamanship.
So, here are the 10 best knots for sailing that every sailor should know.
10 Best Sailing Knots: Quick Reference
| Knot | Purpose | Reliabilty | Difficulty |
| Figure 8 | Stopper for sheets and halyards. | High | Easy |
| Square Knot | Reefing sails ONLY (and nothing else). | Low-Medium | Easy |
| Bowline | King of loops, rescue, sheets, dinghies. | High | Medium |
| Anchor Hitch | Anchor rode to the chain or ring. | High | Medium |
| Cleat Hitch | Dock lines and fenders. | High | Medium |
| Clove Hitch | Temporary fenders, quick lashings. | Medium | Easy |
| Sheet Bend | Joining lines, especially of different sizes. | High | Medium |
| Round Turn & Two Half Hitches | Securing to posts or rings. | High | Medium |
| Rolling Hitch | Relieving jammed lines, gripping another rope. | High | Medium |
| Trucker’s Hitch | Adding tension and lashing gear. | Medium | Medium |
*Requires backing up in critical applications.
Figure 8 Knot
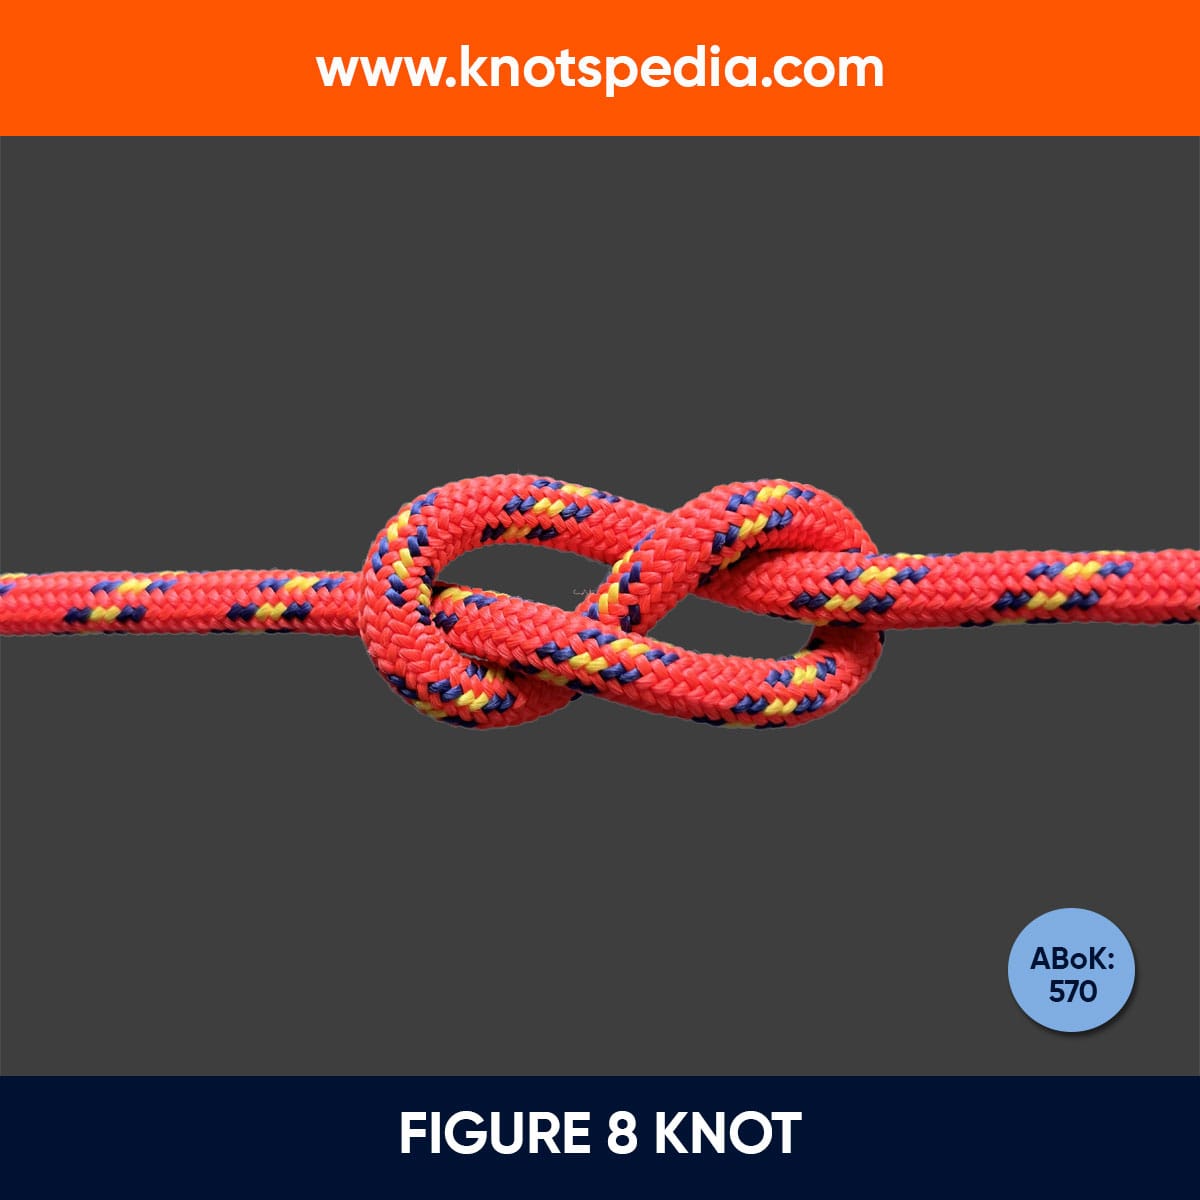
Primary Use: Preventing sheets and halyards from running through blocks.
This is usually the first knot new sailors learn, and for good reason.
Unlike the Overhand Knot, it can be untied even after being loaded wet. You can untie it with wet or cold hands!
Pros & Cons
- Quick to tie even with frozen fingers.
- Easy to untie after loading.
- Perfect for teaching the new crew.
- Tends to shake loose if not tightened properly.
Best for: Stoppers at the end of halyards, sheets, and any line you don’t want slipping out of a block.
Learn figure 8 knotSquare Knot
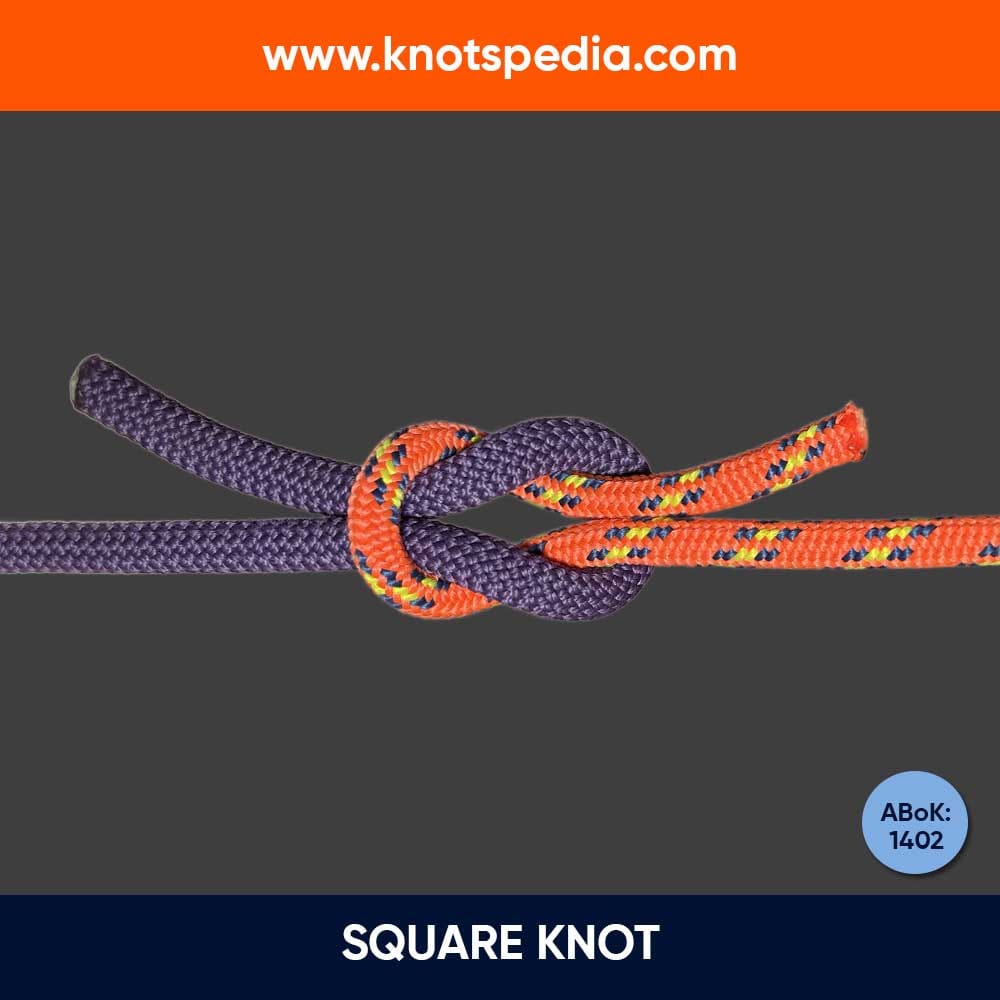
Primary Use: Reefing traditional sails and light lashing ONLY.
The Square Knot has a history. Historically, it’s used by riggers when reefing sails.
It’s quick to tie and untie, great for tying off sail overs or lashing items, but it can capsize under uneven or heavy loads.
Warning: The Square Knot can fail catastrophically under load, especially under modern slippery lines.
Pros & Cons
- Easy to tie and untie.
- Lies flat against the canvas.
- Easy for the green crew to learn.
- Unreliable for joining lines, can spill under heavy load, and with different diameters.
Best for: Temporary bindings for reef points on traditional rigs, sail covers in calm weather. For everything else, use the Sheet Bend.
Learn SQUARE knotBowline
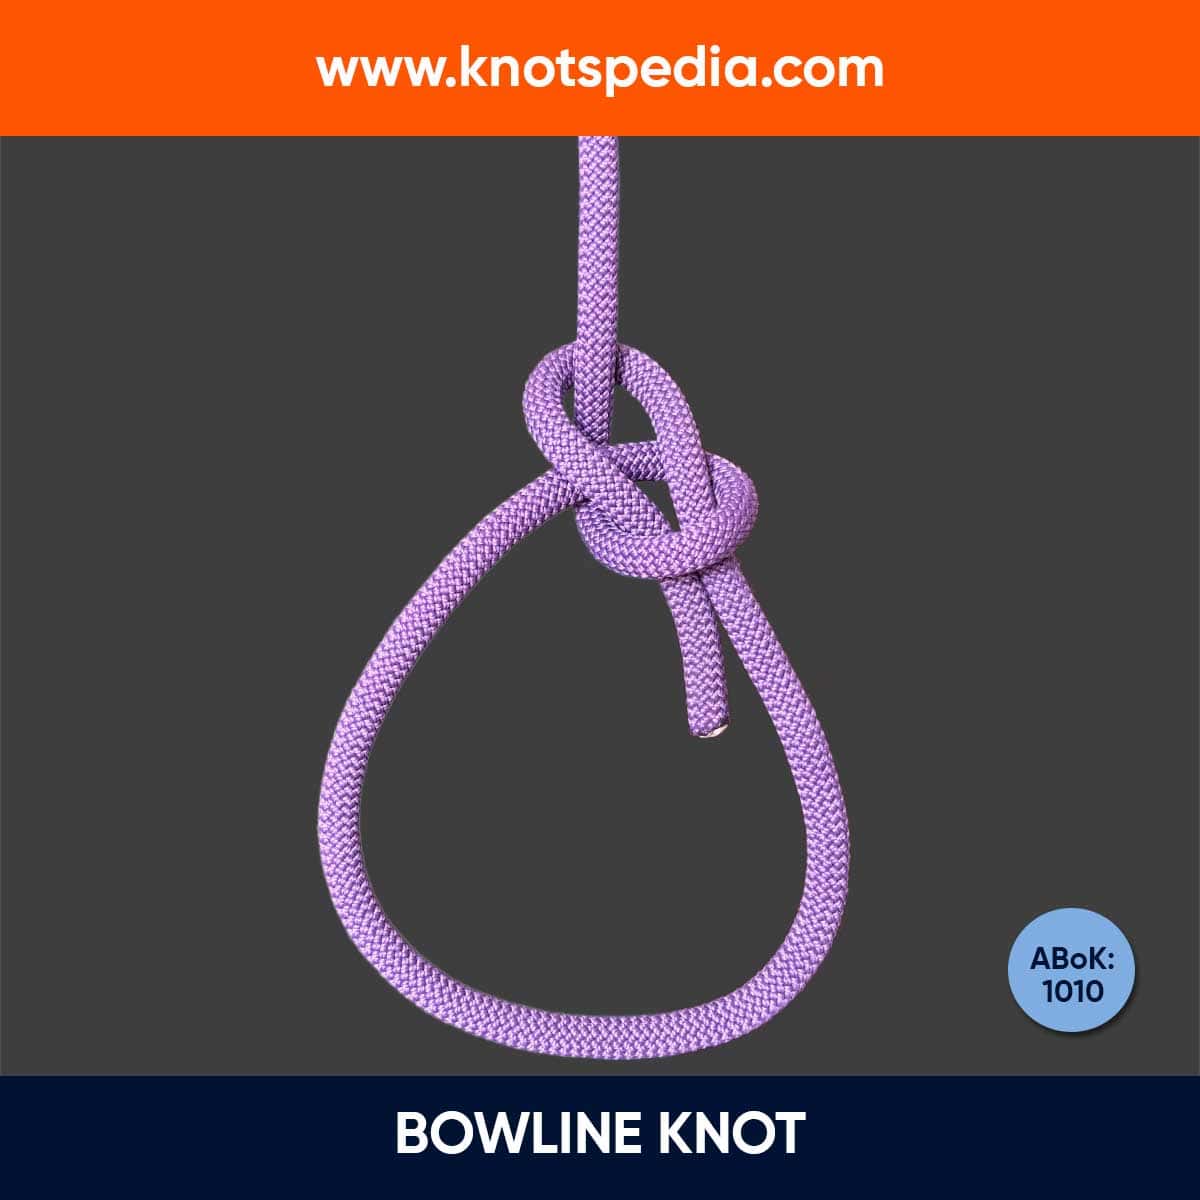
Primary Use: Creating a fixed loop that won’t slip or jam.
If the sailors had a hall of fame for knots, the Bowline would be in it.
The Bowline forms a fixed, non-slipping loop that is easy to untie after heavy loading.
I’ve used it for everything from moorings, towing dinghies to creating a quick rescue loop for going aloft.
In fact, many skippers admit that they could do half a day’s sailing with just the Bowline and a Cleat Hitch.
Pros & Cons
- Hold when loaded and release when you need to.
- Easy to inspect in tied correctly (Bowline has a “look”).
- Works on everything from jib sheets to towing lines.
- Tends to come loose if repeatedly flogged without a load.
- Not great for very slippery modern lines.
Best for: Making a strong loop fast, attaching jib sheets to clews, making a secure loop, and tying dinghy painters.
Learn bOWLINEAnchor Hitch
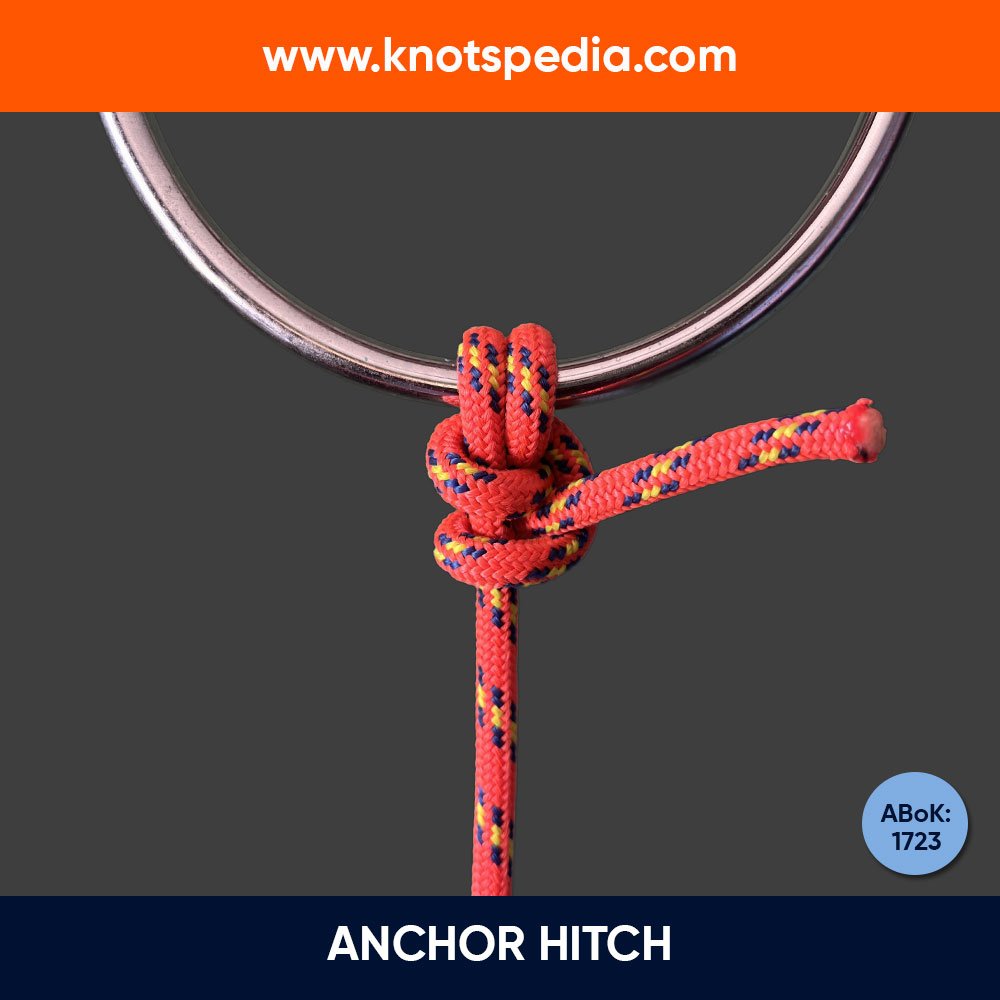
Primary Use: Securing anchor rode to the anchor ring ot chain.
It’s an unsung hero.
The Anchor Hitch is essentially a refined “Round Turn and Two Half Hitches” designed for anchoring loads.
Unlike Bowline, it aligns perfectly with the direction of pull and is less prone to working loose.
Many sailors seize the working end to the standing line with whipping twine for extra security during extended anchoring.
Pros & Cons
- Purpose-built for anchors.
- Compact, align well with loads along the rode.
- Easy to untie.
- Needs proper tail management, many sailors seize the end.
Best for: Tying rope to an anchor or to a chain or eye when you don’t have a splice.
Learn aNCHOR hITCHCleat Hitch
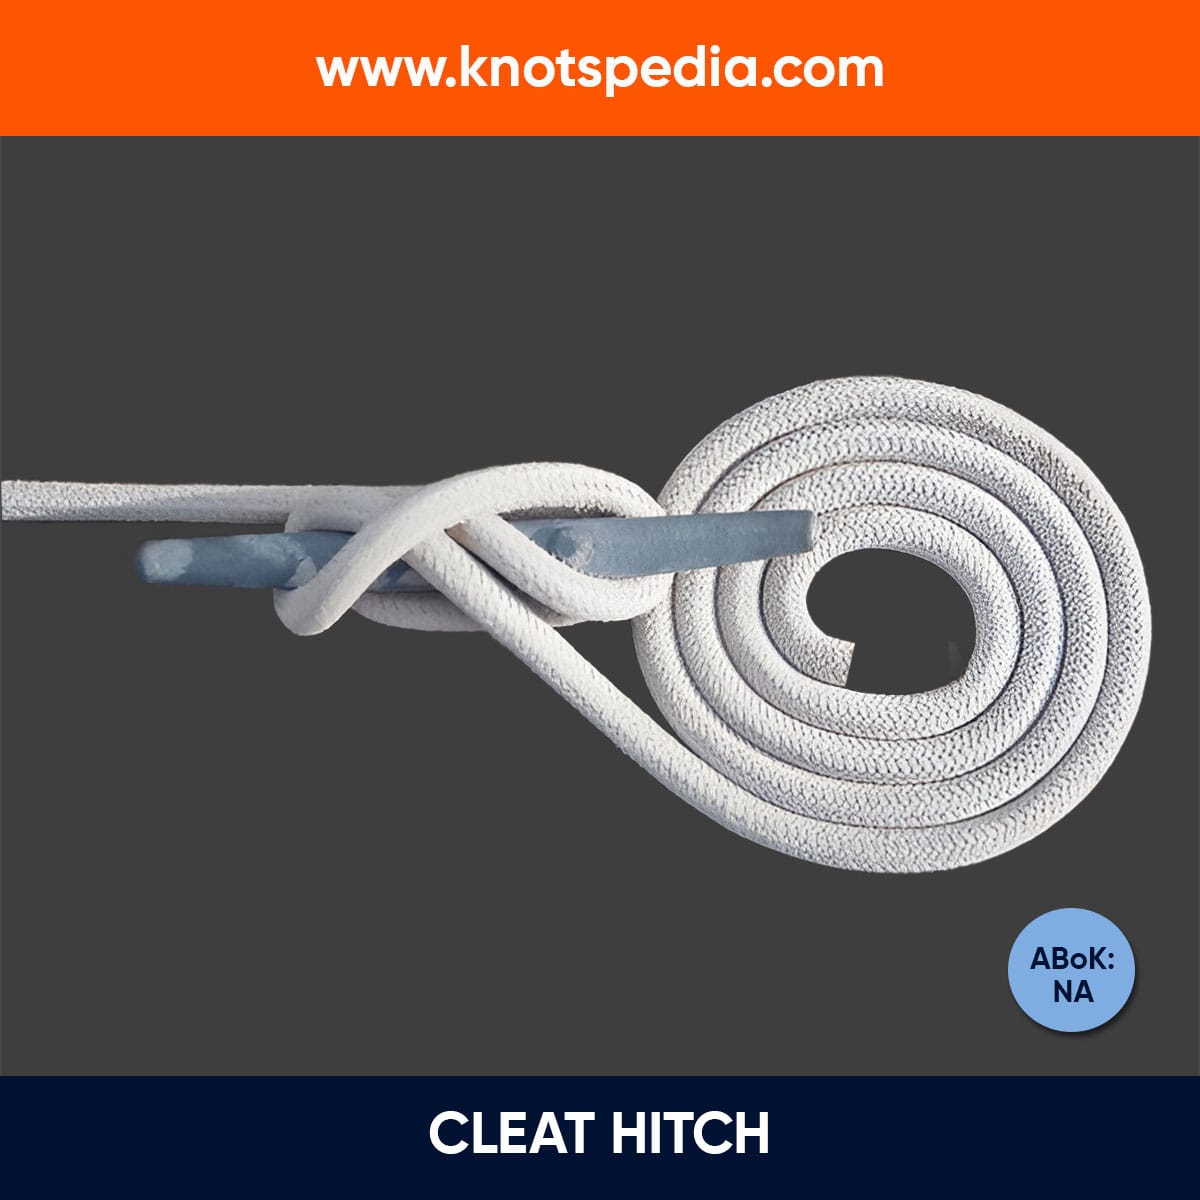
Primary Use: Securing lines to dock cleats and onboard cleats.
If you want to look competent in a marina, learn this knot.
It’s the everyday knot of marinas and mooring fields, and you’ll be judged on whether you cross or just pile wraps on the cleat.
When done right, it’s quick and clean. One wrap around the base, neat figure-eights, then lock it.
Pros & Cons
- Quick to tie and easy to adjust.
- Holds without slipping.
- Easy to inspect.
- Easy to release under load.
- Sloppy crosses and backward wraps can slip or bind.
Best for: Dock lines, spring lines, rafting up.
Learn cLEAT hITCHClove Hitch
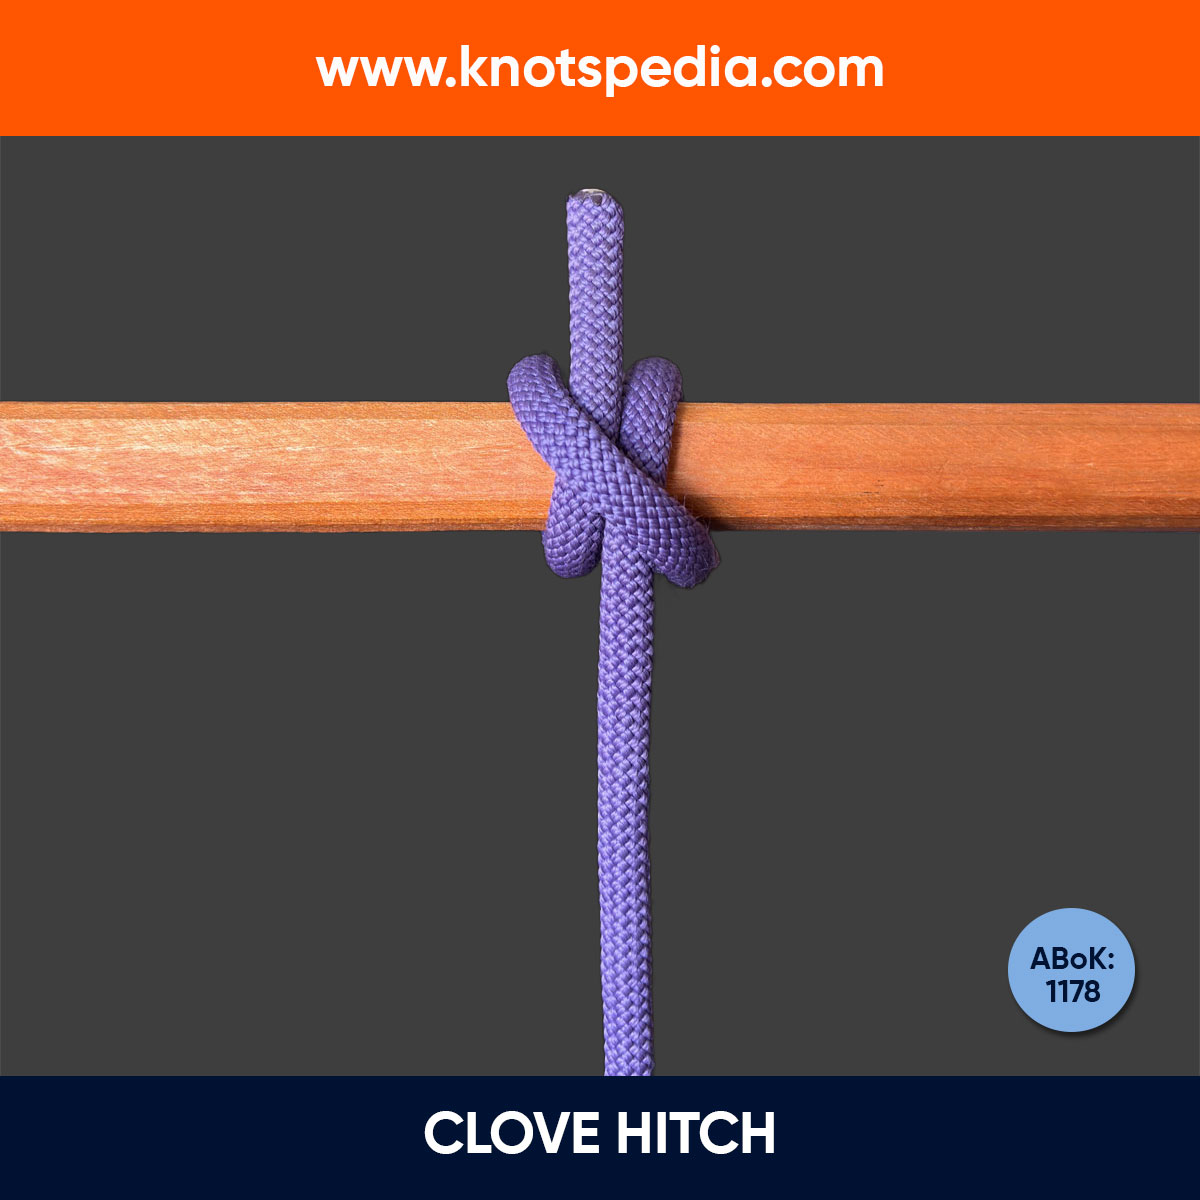
Primary Use: Temporary attachments that need frequent adjustment.
The Clove Hitch is my go-to knot for hanging fenders as we slide into a berth.
It adjusts in a second and grips Ok on round objects, but it can slip if the load changes.
ASA cautions that a single Clove Hitch can slip or bind; add a Half Hitch if the boat is bouncing.
Pros & Cons
- Super fast; height adjustable for fenders.
- Great third hand while you sort something else.
- Can slip under dynamic loads.
Best for: Fenders on lifelines or pulpits, quick lashing to rails you plan to readjust.
Learn cLOVE HITCHSheet Bend
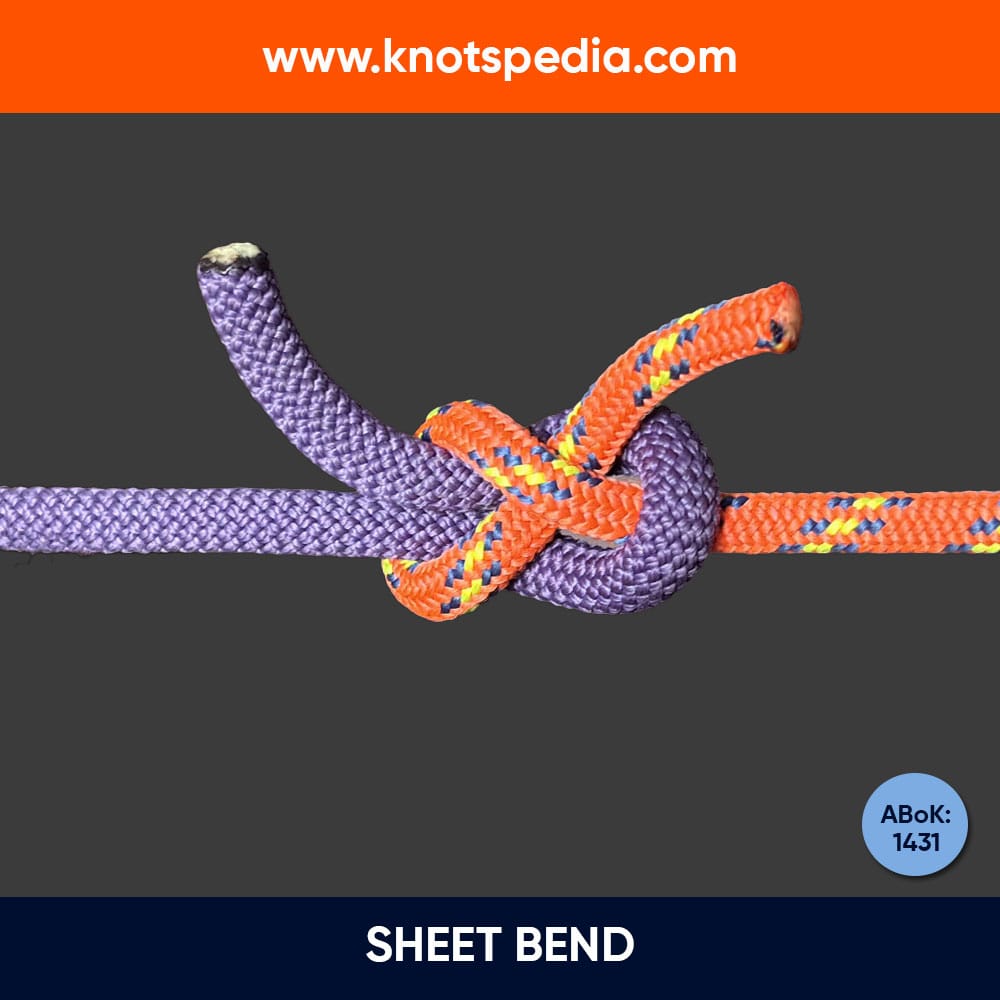
Primary Use: Joining two lines, especially of different diameters and shapes.
If you need to join two ropes of different sizes, the Sheet Bend is far superior than the dangerous Square Knot.
It’s widely recommended in seamanship texts.
Pros & Cons
- Built for joining two mismatched lines.
- Easy to tie and untie.
- Single version can shake loose when completely unloaded and flogging.
Best for: Extending sheets, joining messenge lines to a heavier halyard, jury rigs, or joining mooring wraps.
Learn sHEET BENDRound Turn and Two Half Hitches
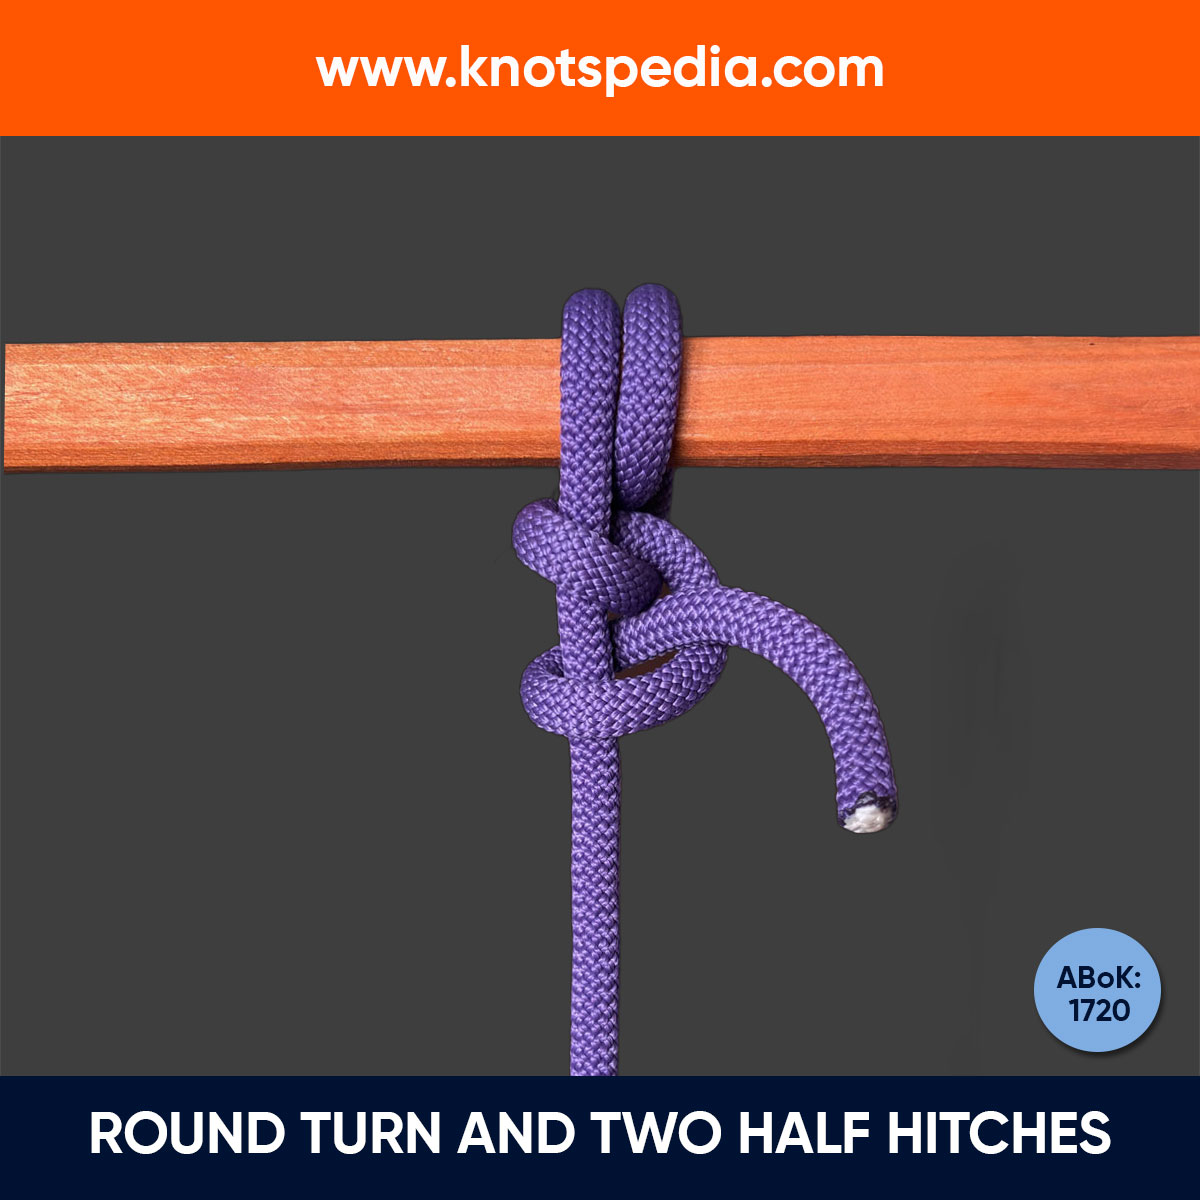
Primary Use: Securing lines to posts, rings, or objects when maximum holding power is needed.
I think of this one as the “set it and forget it” hitch.
The initial round turn gives it the friction and protects the line; the two Half Hitches lock it down.
ASA teaches it as a primary secure hitch for posts or rings and just about any fixed anchor point when you require holding power over adjustability.
Pros & Cons
- Easy to tie, even when the line is under tension.
- Round turn reduces chafing and makes untying easier.
- Secure and strong.
- Slower to tie than other hitches and difficult to adjust.
- Can jam badly if left for a long period.
Best for: Tying to rings, rails, or posts. Commonly used for mooring buoys or piling tie-ups.
Learn rOUND tURN & TWO HALF HITCHESRolling Hitch
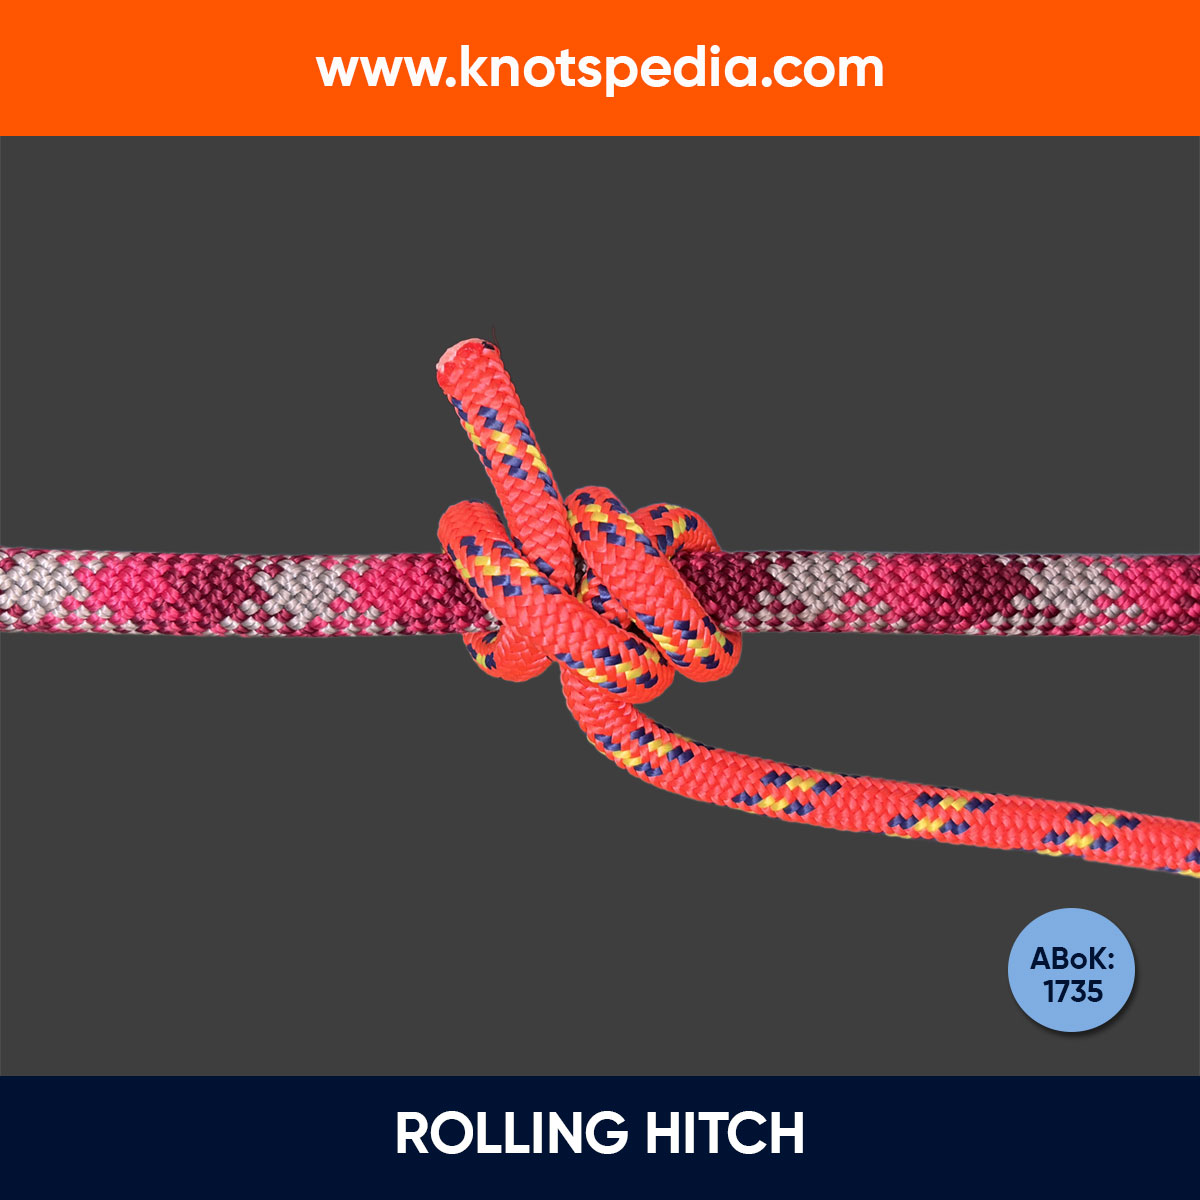
Primary Use: Transferring load from a jammed or damaged line.
This knot has saved my bacon more times than I can count.
When a jib sheet jams on a winch, the Rolling Hitch lets me transfer the load to another line and shift the strain.
It grips in one direction, making it perfect for emergencies.
Pros & Cons
- Bites the rope along the line, can be tied midline.
- Easy to release afterward.
- Can slip on a chain or very slick rope.
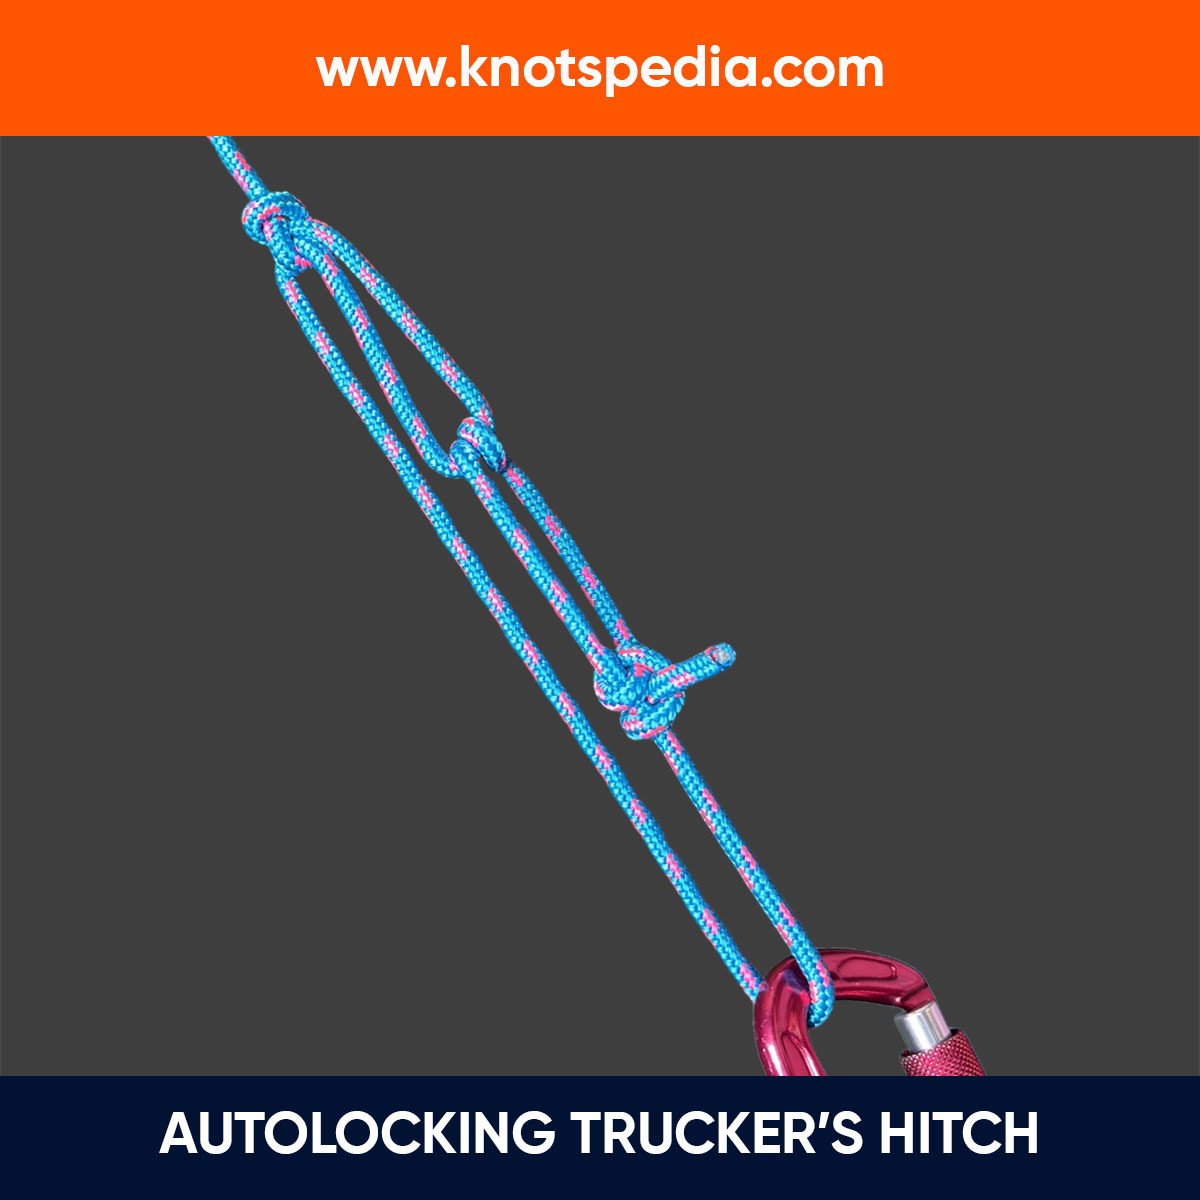
Best for: Taking the load of a jammed line or shifting the load from a damaged line.
Learn ROLLING HITCHTrucker’s Hitch
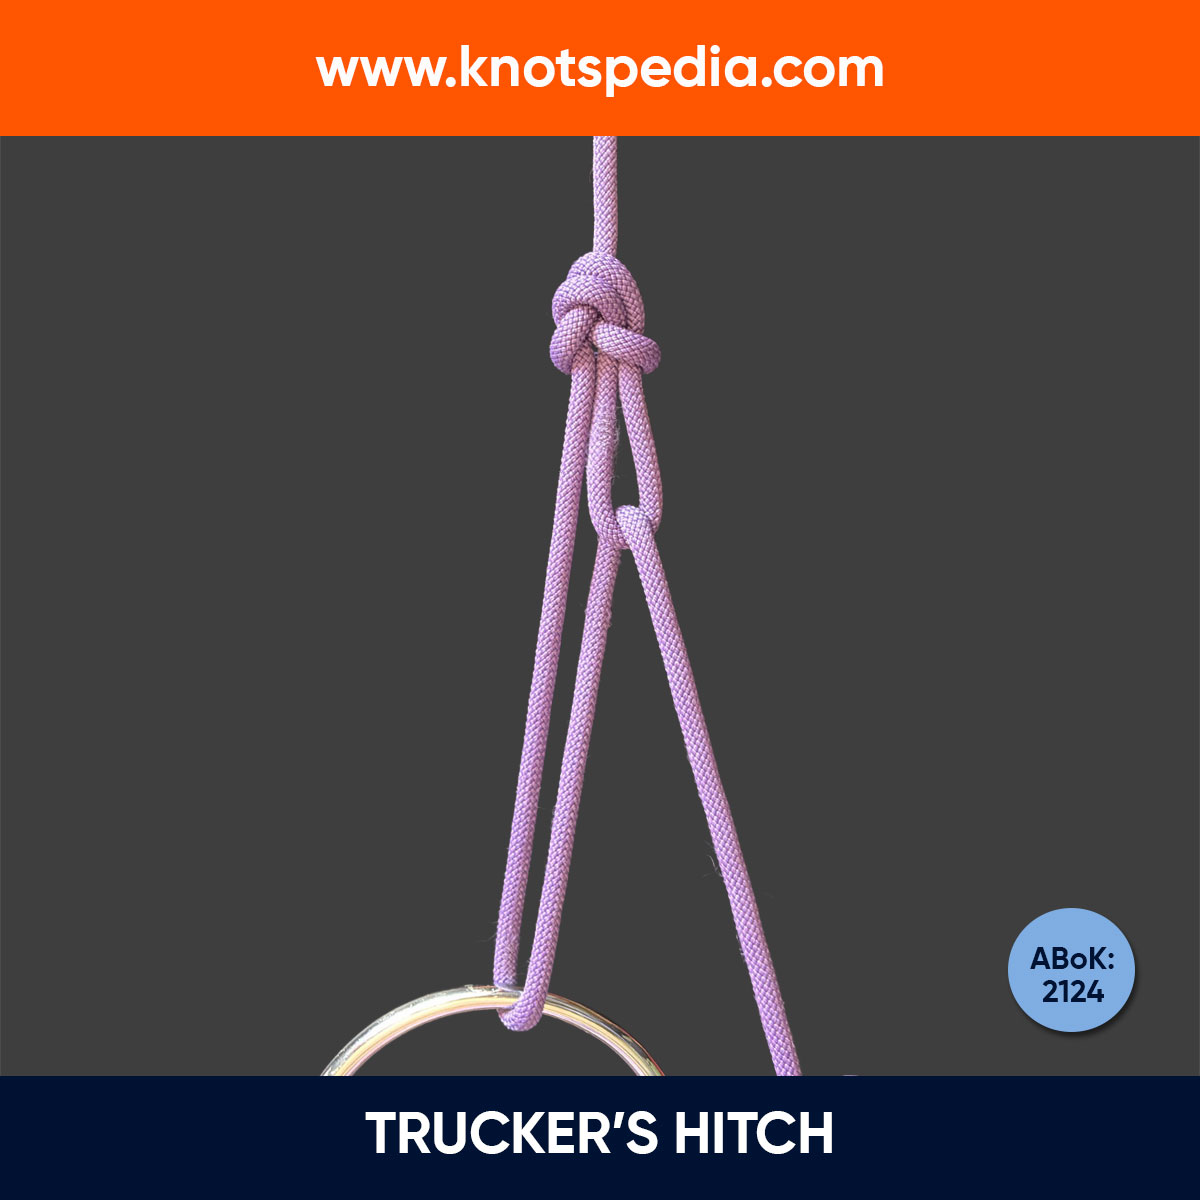
Primary Use: Creating a mechanical advantage for tensioning lines.
Don’t let the name fool you, it belongs on every sailor’s deck.
It’s a built-in pulley with a 3:1 purchase for making things tight.
I use it for lashing a dinghy on the foredeck, strapping paddleboards to lifelines, or pinning a cooler that wants to migrate downwind.
Just remember to tie it clean and check for chafe.
Pros & Cons
- Provides mechanical advantage, fast to rig anywhere on a line.
- Adjustable before you lock it off.
- Can damage soft ropes if you always cinch at the same point.
Best for: Securing deck loads (dinghy, boards, gas cans), tensioning taps or covers, quick tie down ashore.
Learn tRUCKER’S hITCHWhen to Use Which Sailing Knot?
| Purpose | Knots |
| Docking and rafting | Cleats: Cleat Hitch. Posts/pilings: Round Turn & Two Half Hitches. |
| Sail control and safety | Line stoppers: Figure 8 Stoppers. Sheet attachment: Bowline Emergency: Rolling Hitch. |
| Fenders tie off | Clove Hitch. |
| Reefing and light lashing | Square Knot, only for reef ties and sail covers, but not for heavy lines. |
| Joining lines | Sheet Bend or Double Sheet Bend. |
| Anchoring without a splice | Anchor Hitch. |
| Jammed winch or load transfer | Rolling Hitch to a second winch. |
| Securing deck loads | Securing gear: Trucker’s Hitch. Temporary lashings: Clove Hitch. |
These 10 knots cover almost everything you’ll need.
Master them, practice until they’re second nature.
And you’ll not only look sharp on deck, you’ll also save yourself (and your crew) when things go wrong.
Sources: American Sailing Association (ASA) Knot Guidelines, Royal Yachting Association (RYA) Seamanship Manual, Chapman’s Piloting & Seamanship..


