Free eBook Coming Soon. Sign Up for Early Access!

Shake Hands Bend

Updated on:

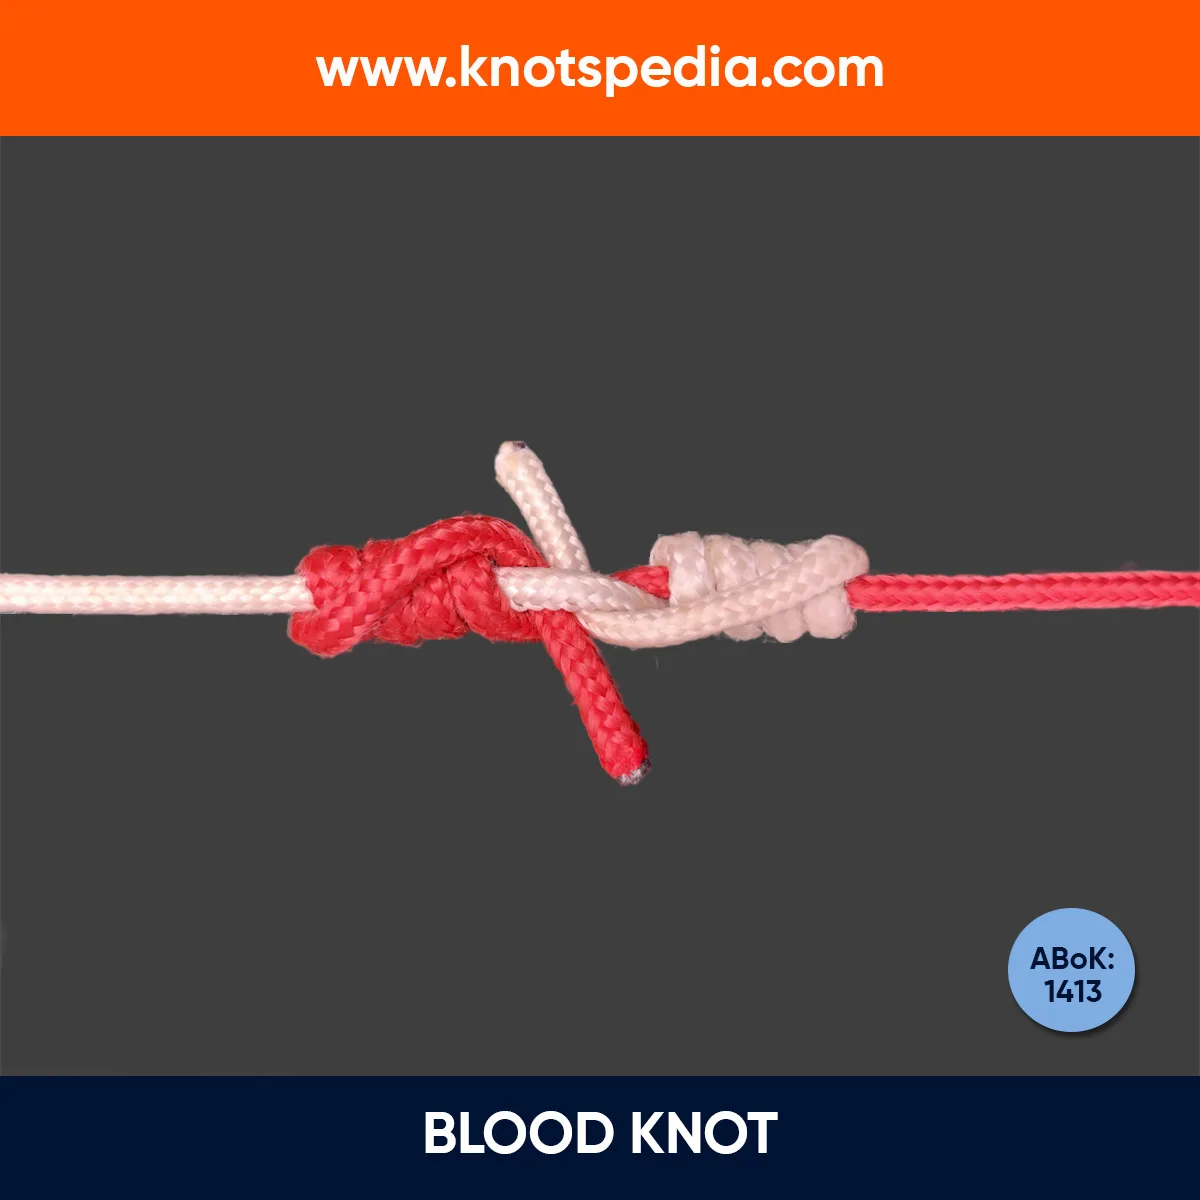
The Shake Hands Bend is used to connect two ropes together.

It falls into the category of bend knots formed by interlocked Overhand knots just like the Alpine Butterfly Bend, Zeppelin Bend, Hunter’s Bend, and Ashley Bend.

It’s just as strong as the other bend knots in its group.

What makes it stand out is its neat appearance with the working ends appearing alongside the standing parts.

Let’s break it down!

Shake Hands Bend Details

Type: Bend

Other Names: None

ABoK Reference: Not Available

How to Tie the Shake Hands Bend Knot

  1. Form an underhand loop with the BLUE rope, feed the RED rope from the right and through the first loop, and bring the working end on top of the standing end.
  2. Bring the RED rope behind and feed it through the loop.
  3. Bring the BLUE rope to the front and feed it through the same loop.
  4. Tighten the knot.

You have done this knot right if you end up with the working ends on the same side and parallel to the standing ends.

Shae Hands Bend Step by Step

SHAKE HANDS BEND STEP BY STEP
Image: Shake Hands Bend Diagram

Application and Uses

The Shake Hands Bend is used in applications where you need to join two ropes together.

It has a streamlined profile which means if you seize the ends it effortlessly passes through the narrow openings.

Pros & Cons

  • Easy to tie and untie
  • Works on slippery ropes
  • Tricky to dress and inspect 

Other Knots Based on Interlocking Overhand Knots

Zeppelin Bend

zeppelin-bend

The Zepplin Bend is the most popular bend knot.

It’s strong, easy to tie and won’t jam after bearing heavy loads. 

A solid alternative to the Shake Hands bend. 

Hunter’s Bend

HUNTER'S-BEND-KNOT-DIAGRAM

The Hunter’s Bend has a structure similar to the Zeppelin Bend.

It tends to jam after heaving loading.

Alpine Butterfly Bend

ALPINE-BUTTERFLY-BEND-DIAGRAM

The Alpine Butterfly Bend is popular because of its connection with Alpine Butterfly Loop.

It’s easy to tie, easy to remember, and does not jam even after heavy loading.

Ashley Bend

ASHLEY-BEND-KNOT-DIAGRAM

The Ashley Bend looks similar to the Alpine Butterfly Bend.

It’s strong and secure but tends to jam and may be difficult to untie.

RELATED: 10 Best Knots to Join Two Ropes Together

If you like the article, Bookmark it or Share it with family and friends!

🎉 Free Ebook: The Most Essential Knots 🎉

Master the essential knots with clear, step-by-step instructions and illustrations! Download our free ebook "The Most Essential Knots"—perfect for beginners and outdoor enthusiasts.

Download Your Free Ebook Now

YOU MAY ALSO LIKE

surgeon's-knot-diagram-how-to-tie-the-surgeon's-knot-knotspedia

Fishing Knots

Surgeon’s Knot

The Surgeon’s Knot is a quick, reliable way to join two fishing lines of equal or different diameters. Easy to tie, strong, and ideal for leaders and tippets.

nail-knot-diagram-how-to-tie-the-nail-knot-diagram-knotspedia

Fishing Knots

Nail Knot

The Nail Knot securely joins two fishing lines of different diameters, creating a slim, strong, and smooth connection ideal for fly fishing setups.

blood-knot-diagram-how-to-tie-the-blood-knot-knotspedia

Fishing Knots

Blood Knot

The Blood Knot is a strong and reliable fishing knot used to join two lines of similar diameter. It forms a smooth, barrel-shaped profile ideal for fly fishing.

double-uni-knot-diagram-how-to-tie-a-double-uni-knot-knotspedia

Fishing Knots

Double Uni Knot

The Double Uni Knot joins two fishing lines securely. It’s strong, quick, and easy to tie, perfect for connecting braided mainline to mono or fluoro leader.

albright-knot-diagram-how-to-tie-the-albright-knot-step-by-step-knotspedia

Fishing Knots

Albright Knot

The Albright Knot joins two fishing lines of different sizes or materials—ideal for connecting braided mainline to mono or fluorocarbon leaders.

AUTOLOCKING-TRUCKER'S-HITCH-KNOT

Hitch Knots

Auto Locking Trucker’s Hitch

The Auto Locking Trucker’s Hitch is a friction-based variation of the standard hitch that locks itself under tension, offering a 3:1 mechanical advantage and easy release.