Some say the Flat overhand bend is dangerous. Others use it all the time without complaints.
So, how safe is it for climbing?
How do you tie this knot, where does it fail and how to improve its security?
Let’s learn this bend in detail.
Flat Overhand Bend Details
Type: Bend
Other Names: Overhand Bend, European Death Knot, Offset Overhand Bend, Openhand Knot, Thumb Knot
ABoK Reference: #1410
What is Flat Overhand Bend?
The Flat Overhand bend knot is used to join two ropes together.
It’s tied by tying an Overhand knot with two ropes as if they were a single rope.
In Ashley’s Book of Knots, it is considered as a very weak knot.
In fact, Ashley writes “It is used in joining the ends of rope yarns by which hams, bacon and bananas are hung.”
Its use in climbing is a recent discovery.
That’s because the knot is less likely than other knots to catch on obstructions like rock edges and cracks.
It’s called as the European Death Knot (EDK), but the name is misleading as the knot is not dangerous and it is not a death knot.
There is another inferior bend knot called the Flat Figure 8 bend that caused both knots to be branded with the EDK name.
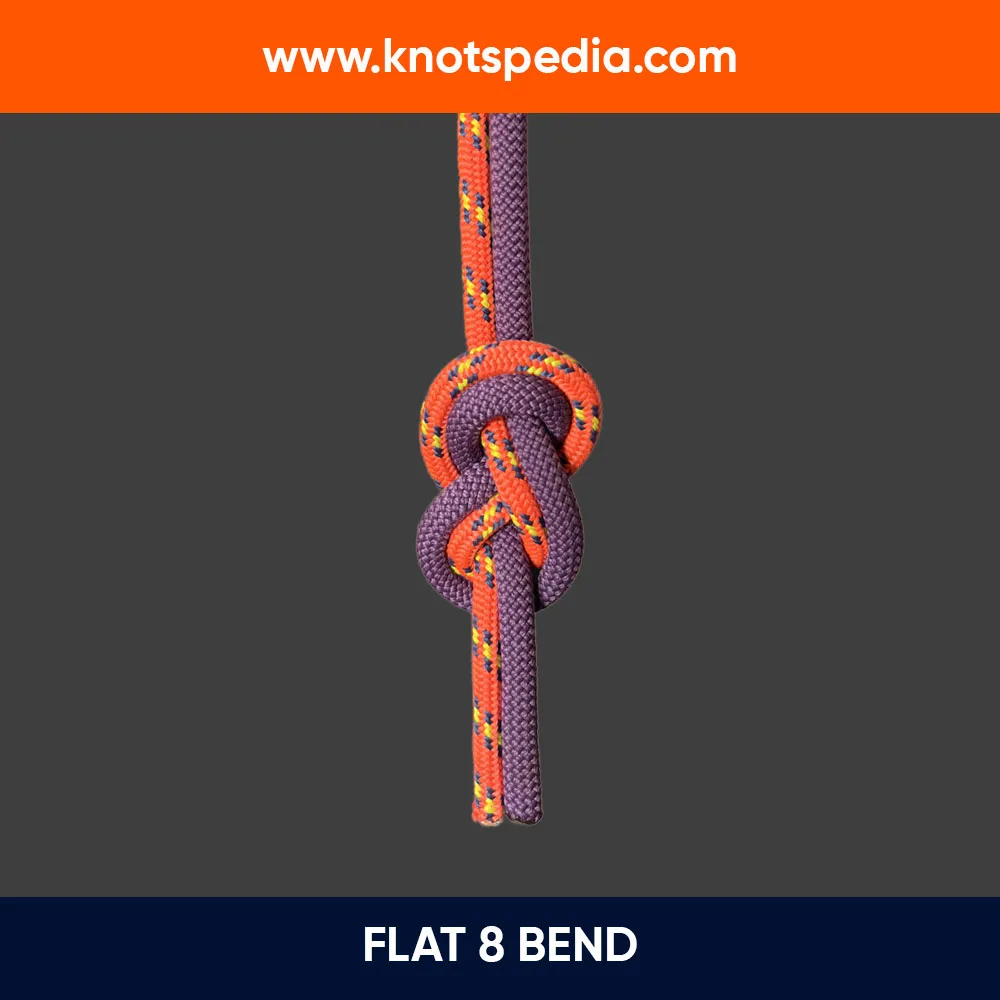
But, both are two different knots—more on it later.
First, let’s see how to tie the Flat overhand bend knot.
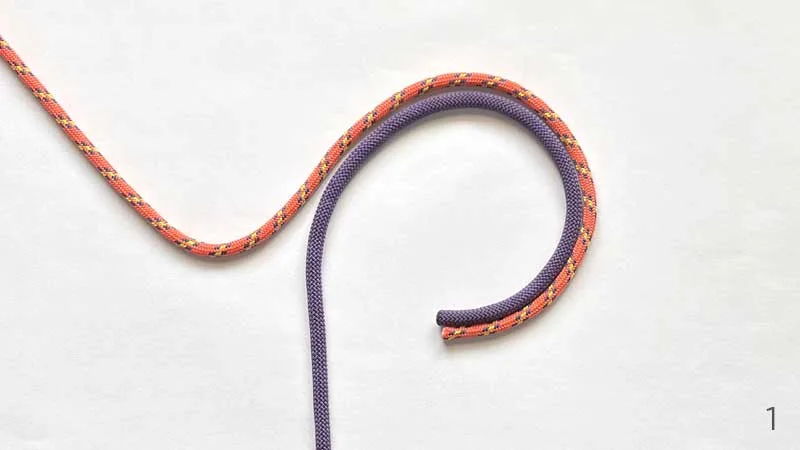
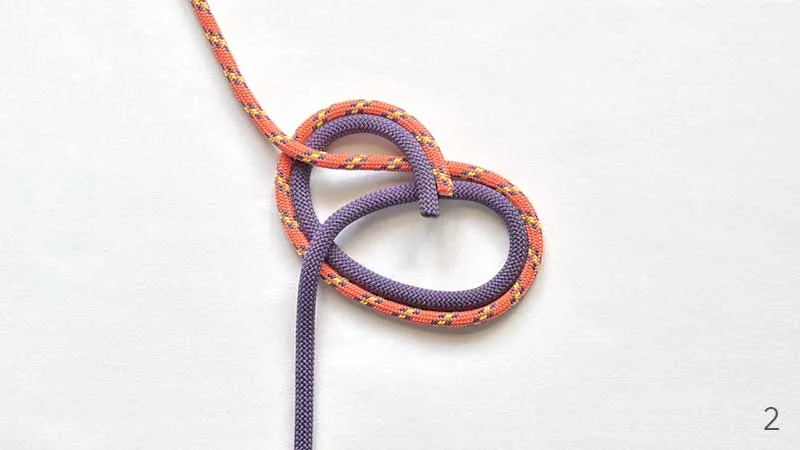
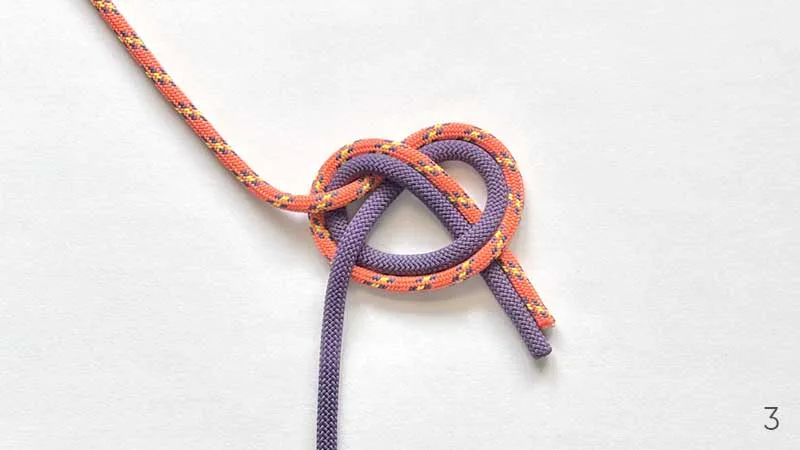
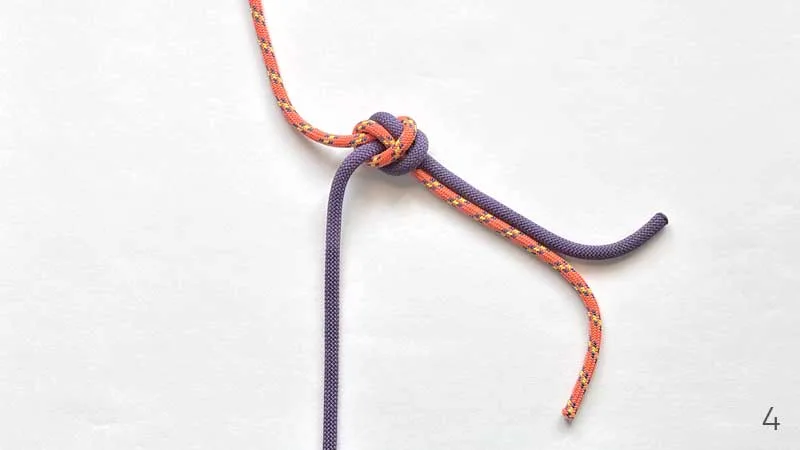
How to Tie a Flat Overhand Bend (European Death Knot)
Note: The tail is left short intentionally for animation purpose only.
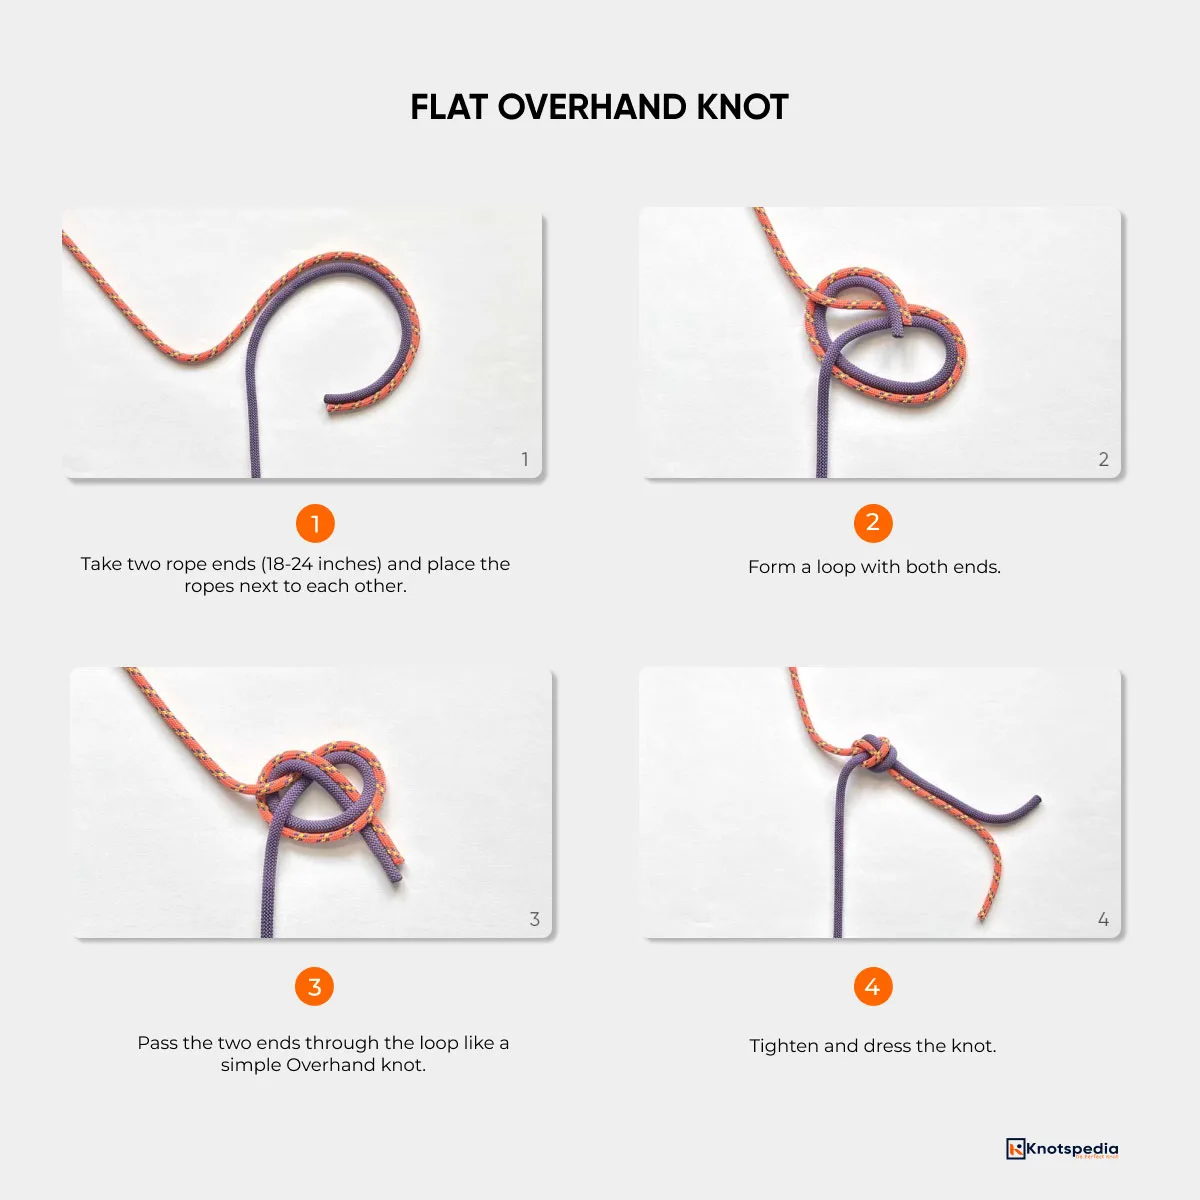
- Take two rope ends (18-24 inches) and place the ropes next to each other.
- Form a loop with both ends.
- Pass the two ends through the loop like a simple Overhand knot.
- Tighten and dress the knot.
You have tied this knot correct if there are two sets of parallel lines on one end and one set of parallel lines on the other.
Dress the knot by pulling on the opposite strands and make sure the strands are aligned and no crossings in the knot is present.
Note: To account for the slippage, always leave at least 18-24 inches of tail.
Flat Overhand Bend Step by Step
Pros & Cons
- Simple to tie and check—it’s just an extension of the Overhand knot.
- It’s low-profile design helps pass smoothly over the edges and reduces the risk of snagging.
- Roll and capsize under heavy loading or if untied improperly.
- Difficult to untie after heavy loading.
Application and Uses
In the Ashley Book of Knots, it’s mentioned that the Flat overhand bend is long used by weavers to join the ends of yarn.
Today, it’s used as a bend knot in rock climbing to join two ropes.
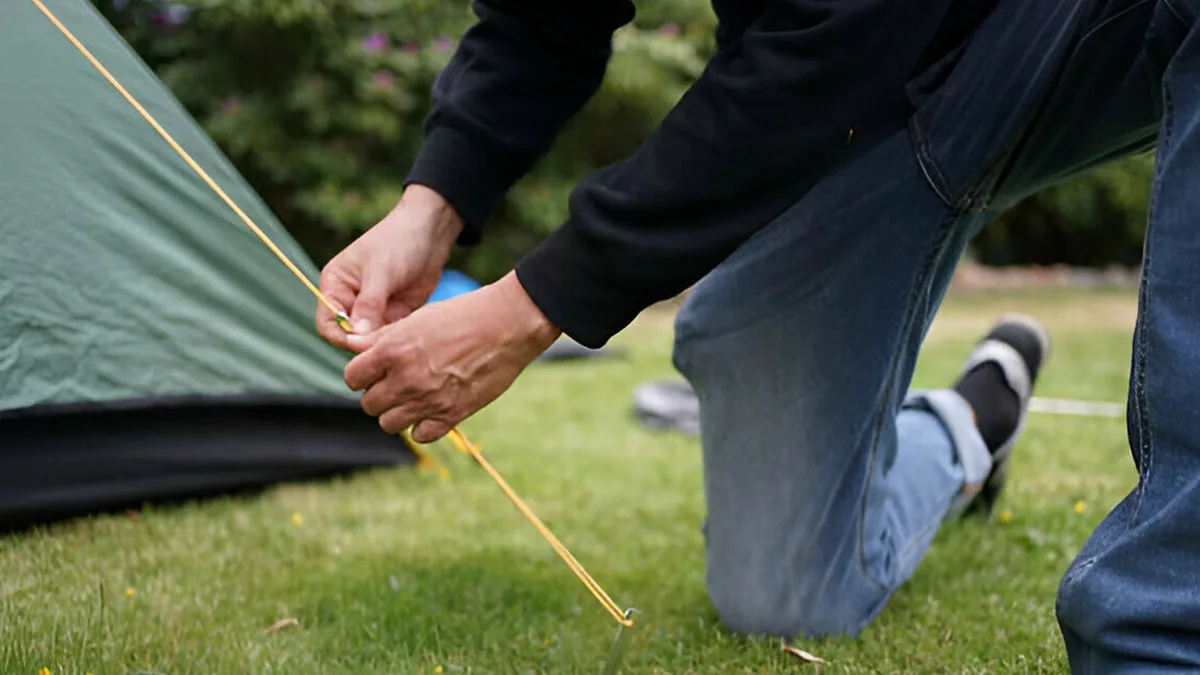
In camping and bushcraft, it is used to join two ropes for securing tarps and shelters or extending lines when setting up tents or clotheslines.
Scouts also learn it as one of the basic knot tying skills.
Failure Mechanism
The Flat overhand bend can fail in the following ways:
- The first one is if the knot isn’t tightened. If the individual strands are not tightened, it can capsize under load.
- The other one is if there isn’t enough tail left. The Flat overhand bend is weak and tends to fail.
- The third way is if the tails are left too long. Climbers can mistake the tails for the actual rope and clip into them.
- Finally, the knot can also fail if loaded improperly.
Securing the Flat Overhand Bend
The strength of the Flat overhand bend is below 40%, and when it does fail, it always fails with the bend rolling.
You can increase its performance by trying one of the following variations:
Stacked Overhand Knot
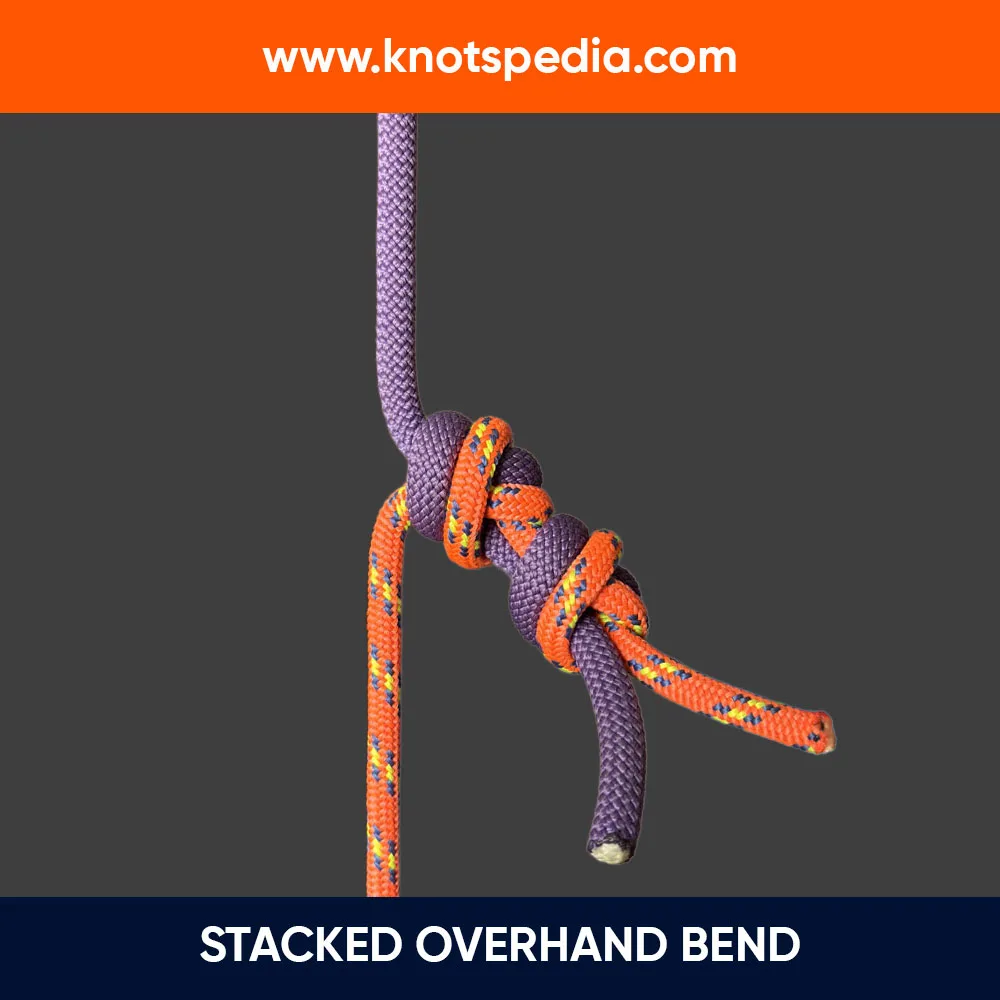
One way to improve the performance is tied by tying another overhand knot in the same direction above the Flat overhand knot.
It improves the strength of the knot (upto 50%) and changes the failure method from rolling to breaking the rope at the bend.
It’s a huge improvement over the normal Flat overhand bend.
But it’s a little harder to tie.
Double Flat Overhand Knot
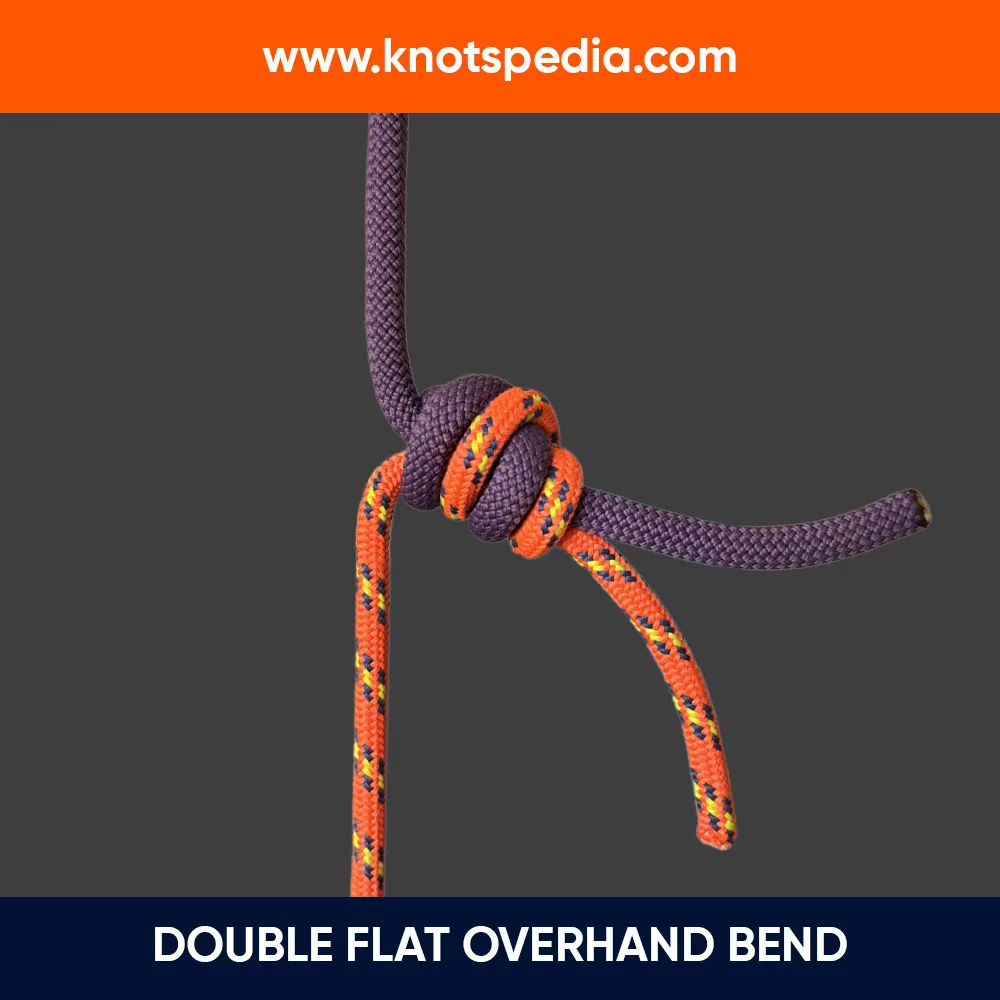
Other way to increase the strength of the knot (upto 60%) is by tying a Double flat overhand knot.
This knot is also called as Double overhand knot, but that’s actually a different knot.
It only fails by breaking the rope at the bend, but it’s a little harder to tie.
Flat Overhand Bend vs Flat Figure 8 Bend
Some people think that the Flat 8 Bend and the Flat Overhand Bend are the same—they are NOT.
The Flat 8 bend is tied using a Figure 8 knot rather than an Overhand knot—that’s the first difference.
The other difference is super important—research shows that the Flat 8 rolls easily than the Flat Overhand bend and will fail much quicker.
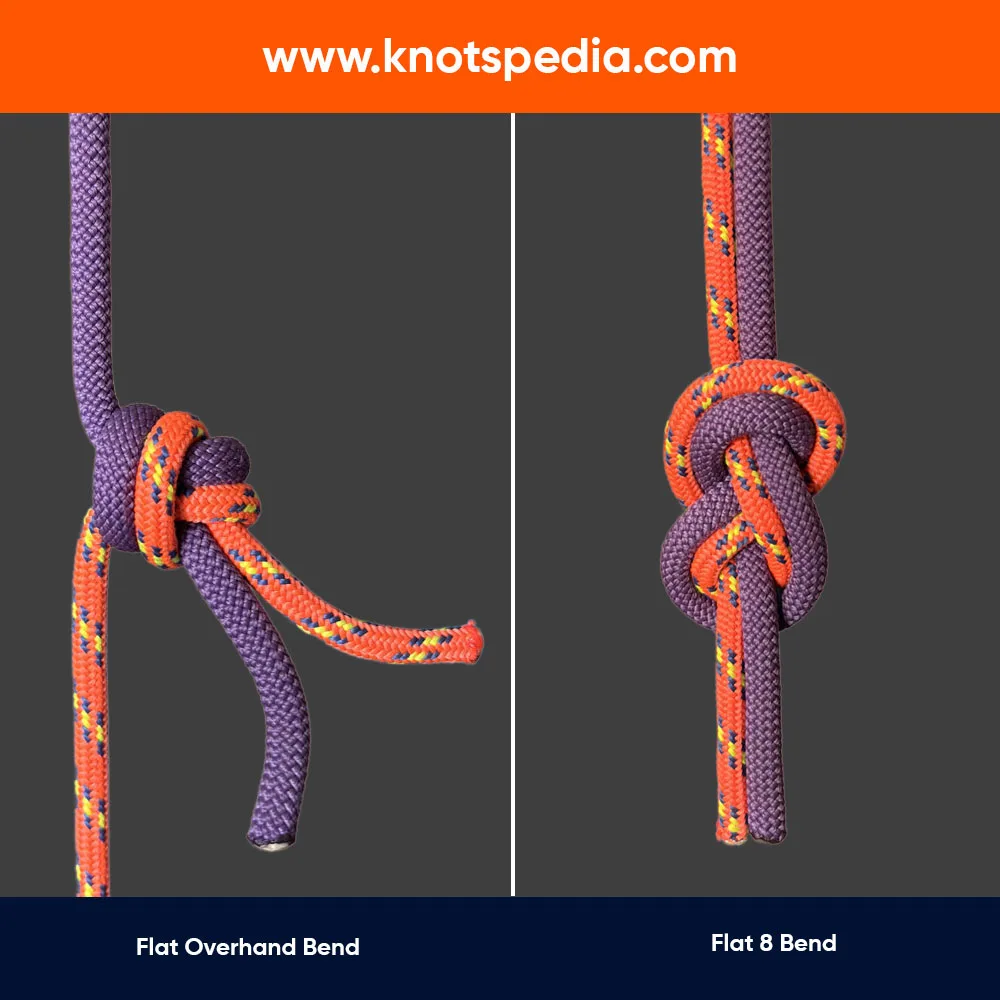
The Flat Figure 8 Bend can roll at quite a low tension (tests show it rolls with as little as 110 lbs!).
Because of these risks, it should NEVER be used to tie two ropes together for rappelling. Several accidents and deaths have been reported.
There are better options like Flat Overhand Bend/EDK or Double Fisherman’s knot.
Climbing expert Thomas Moyer tested both knots and reported that the incidents took place due to user error rather than physical failure.
He assured climbers that millions of rappels have taken place on these knots without failures, and as he aptly puts it, “The flat-overhand will ever fail under body weight if it is tied well.”
Other Bend Knots
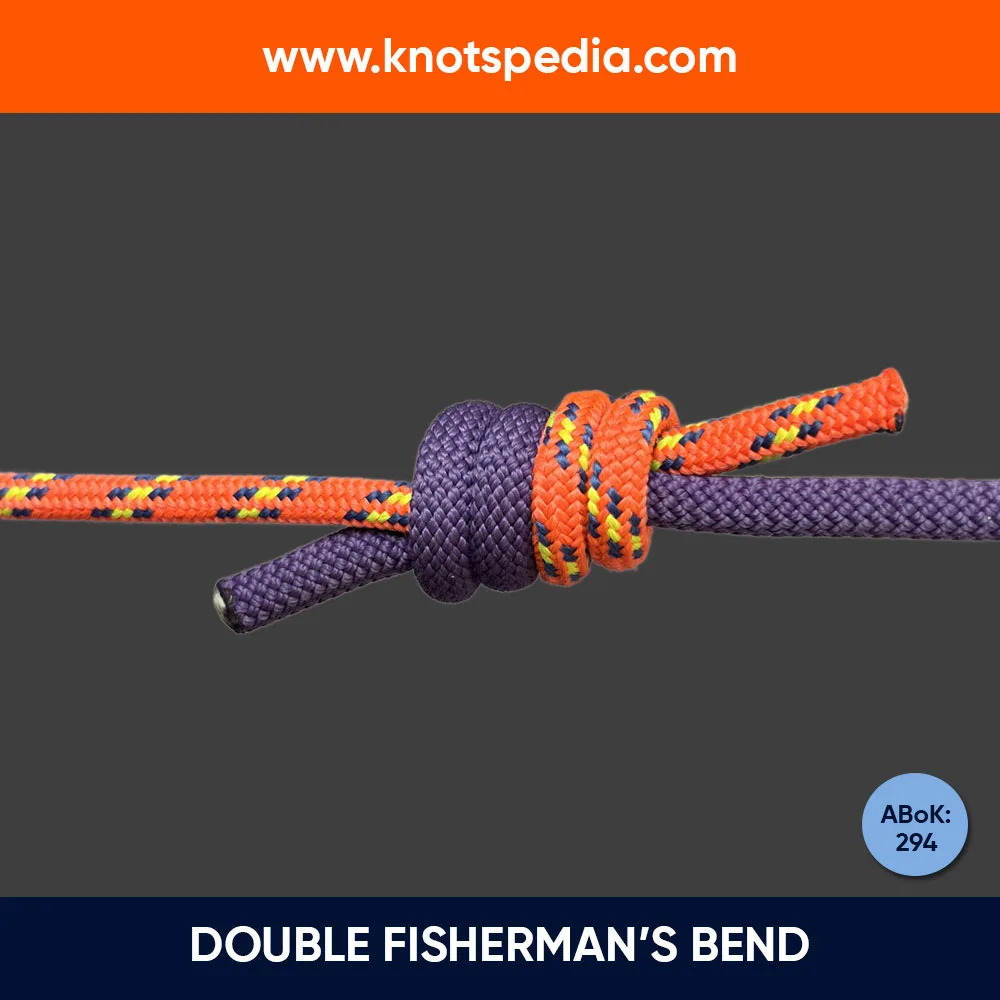
Double Fisherman’s Knot
A Double Fisherman’s Bend is the most reliable bend knot.
It’s used for heavy-loading climbing applications, but can be hard to untie after loading.
It’s also easy to tie incorrectly.
Figure 8 Bend
The Figure 8 Bend (the Figure 8 follow through loop, don’t confuse with the Flat figure 8 bend) can be used for climbing.
But it MUST include stopper knots to prevent the knot from untying itself under opposing loads.
It’s easy to untie but has a large profile in comparison to the EDK.
Share this Article!
