The Bowline forms a fixed loop at the end of the rope.
It is widely regarded as the ‘King of knots‘ among sailors, climbers, and rope workers worldwide. And honestly, it lives up to that name.
It’s easy to tie, doesn’t slip or jam under tension, holds well under load, and comes apart easily when you want it to.
Let’s learn this knot in detail.
Bowline Knot Details
Type: Loop
Other Names: Boling Knot
ABoK Reference: #1010, #1716
How to Tie a Bowline Knot


- Make a loop in the rope.
- Feed the working end through the loop.
- Pass it behind the standing line.
- Feed it through the loop.
- Tighten the knot.
You have tied this knot correctly if you have the working end in the middle of the loop and not outside the loop.
For safety, the length of the tag end should be about 12 times the circumference. If you use a ½” diameter rope, leave at least 18” long tail.
Bowline Knot Step by Step

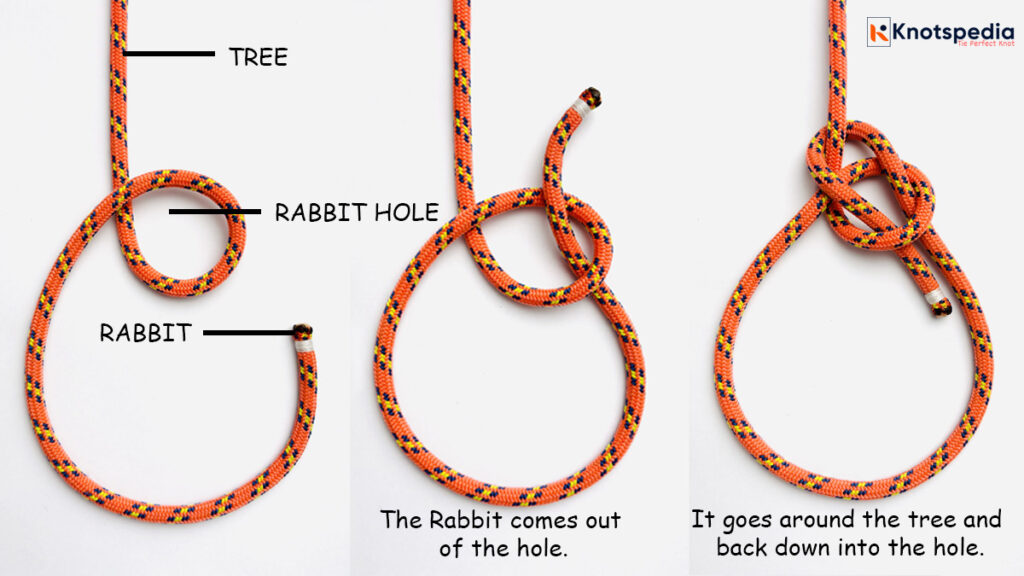
Easy Way to Remember the Bowline Knot (Memory Aid)
If you want Bowline to be a permanent skill, just remember this classic mnemonic:
“The rabbit comes up out of the hole, goes around the tree, and goes back down into the hole.”
Think of the loop as a “rabbit hole.” The standing part coming off the loop is the “tree.” And your working end? That’s the “rabbit.”
Here are a few tips that make this knot easier to tie.
- Don’t make the rabbit hole large
- The tree should lie behind the loop
- When the rabbit goes back down the hole, it goes down the same side
- Pull both the rabbit and the tree to tighten the knot.
Pros & Cons
- Easy to tie and untie
- Does not jam
- Does not slip or bind
- Can be tied with a single hand
- Can’t be tied and untied when there’s a load on the standing line
- Can get loose when not loaded
- Can capsize when pulled sideways
Applications and Uses
- General application: Make a secure loop around an object.
- Boating and Sailing: Tie a mooring line around a tree, post, or anchor. Tie a jib sheet to the clew of a jib or fasten a halyard to the head of a sail.
- Search and rescue: Throw a large loop bowline to the person in an emergency to pull them to safety.
- Bend Knot: Joining two ropes.
- Camping and outdoor activities: Secure tarps, set up shelters, hammocks, or hang camping gear.
How to Tie the Bowline Knot Around the Object in front?

You might think there’s just one way to tie a Bowline, right? Well, not exactly!
The classic Bowline works fine when the object is behind you.
But when it’s in front of you, the game changes. The “rabbit hole” story still applies, but the direction of your first loop decides whether your Bowline holds or slips.
Here’s the step by step guide:

The Bowline Knot Isn’t Perfect
The Bowline Knot is solid. But it’s not flawless. Here are three inherent weak spots:
- It tends to come loose under load (cyclic loading)
- Slip when pulled sideways
- Bight capsizes in certain situations
But you can fix these with a few tweaks. Let’s talk about the popular backup options.
Stronger Bowline Knot variations
Double Bowline Knot
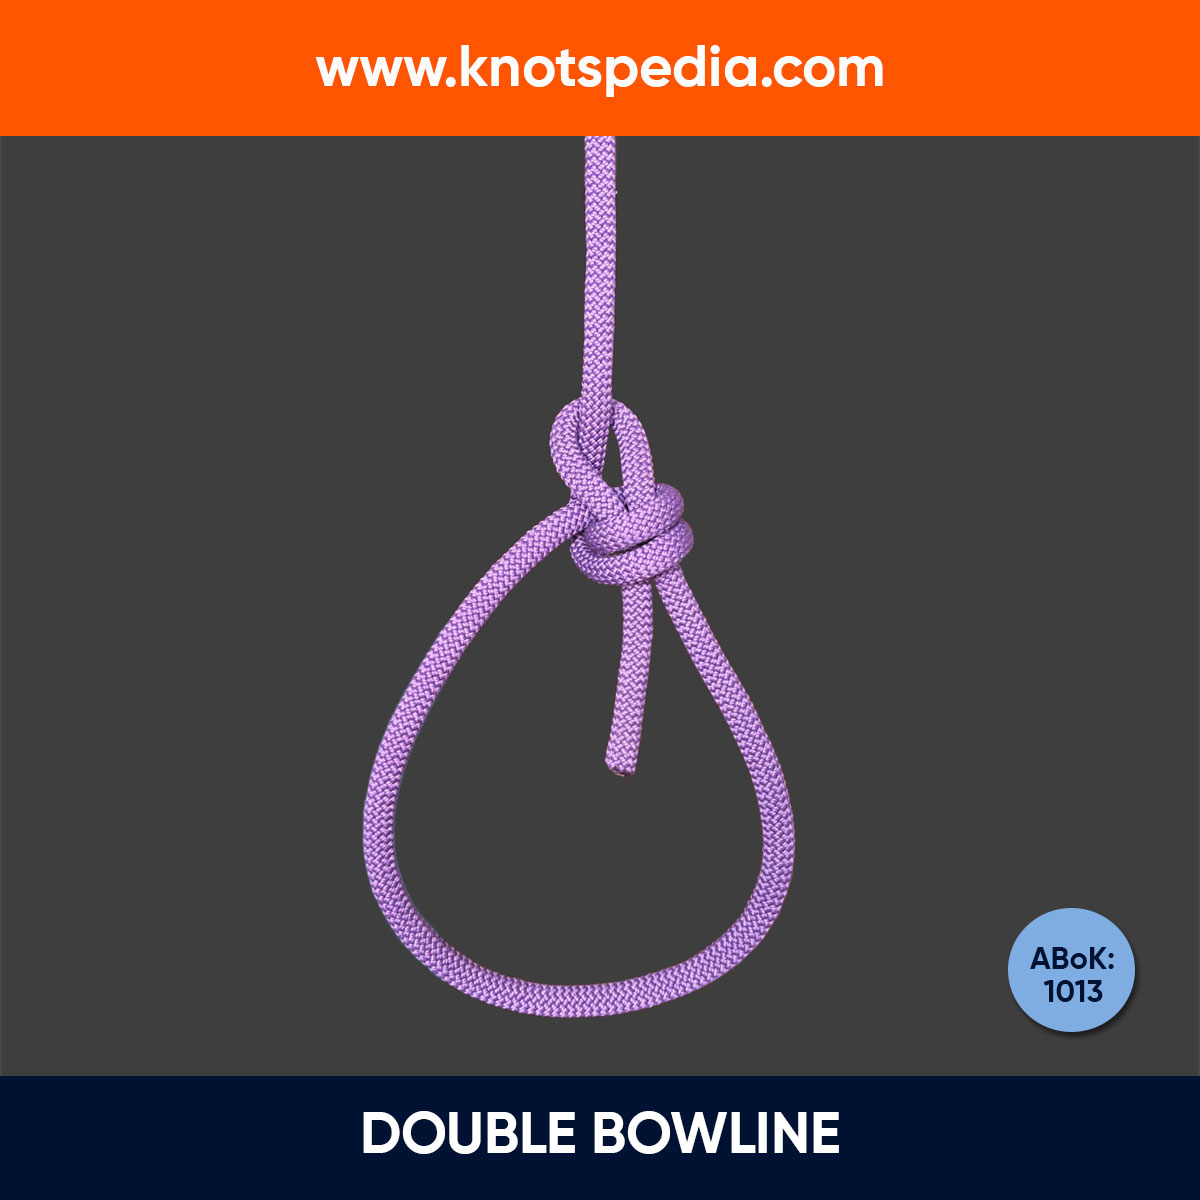
The Double Bowline (ABoK #1013) is similar to the standard Bowline, but you loop the end of a line around the bight twice for extra security.
Another knot, the Triple Bowline, also exists. It forms three loops that can be tied to different anchor points.
Water Bowline Knot

The Water Bowline (ABoK #1012) is the secure variation of the Bowline designed for use in wet conditions.
It performs better than the Double Bowline.
Yosemite Bowline Knot
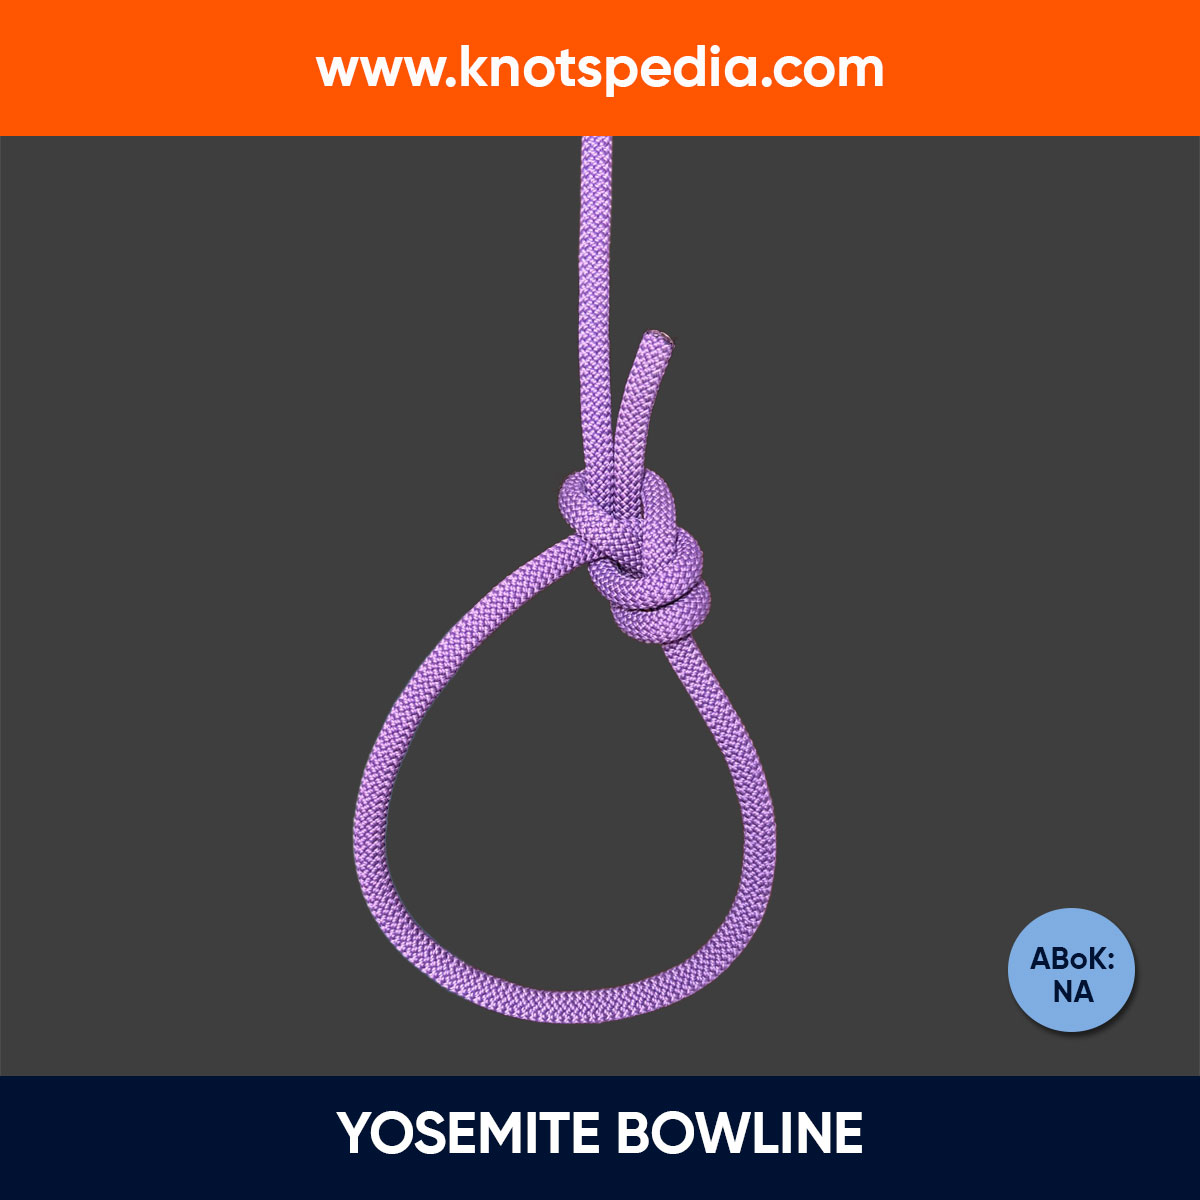
The Yosemite Bowline is a standard bowline locked with a Yosemite finish.
The tail is passed around outside the loop and back through the knot a second time to form a Yosemite Tie-off.
It holds better, but is easy to get wrong. It’s difficult to visually inspect than the Figure 8 follow through loop.
Bowline Knot with a Stopper
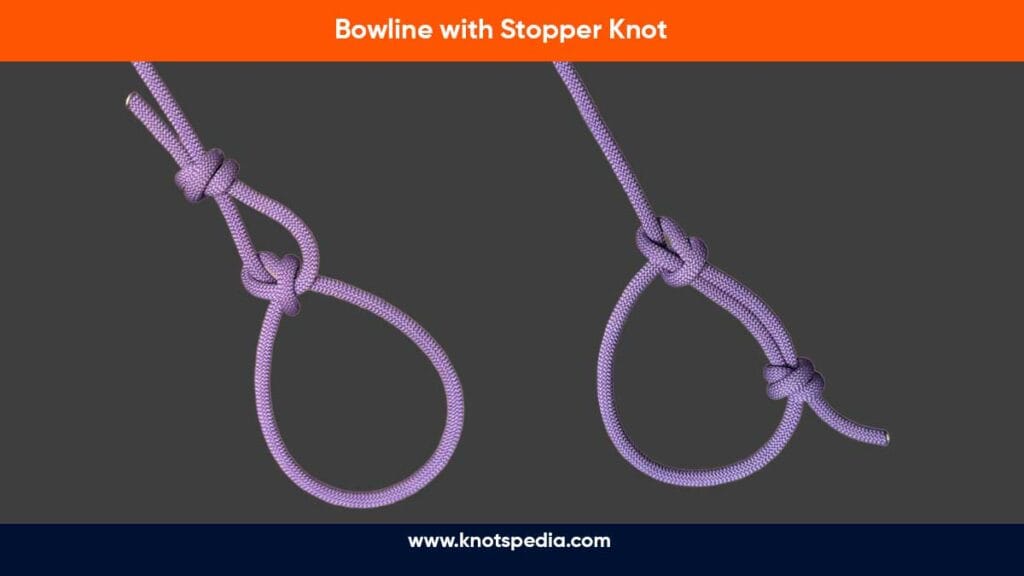
To make the Bowline knot secure, tie the stopper knots like a Double overhand knot around the standing end or around the loop.
How to Tie the Bowline Knot Fast with the Snap Bowline
The Snap Bowline is the fastest way to tie the Bowline.
Instead of threading the end through loops, you make the loop in the rope, snap the working end through, and pull it through in one move.
It’s faster, cleaner, and gives you a solid Bowline.
Learn snap bowlineHow to Tie the Bowline Knot with One Hand
The One Handed Bowline is a popular rescue knot useful for rescuing people who might have fallen down a hole or off a cliff.
Rescue teams use this method in an emergency when both hands are not available or the other hand is injured or occupied.
Learn One handed bowlineBowline Knot with Two Loops
Bowline isn’t just a single loop knot. Here are some Bowline Knots with two loops that you might run into.
Bowline on a Bight
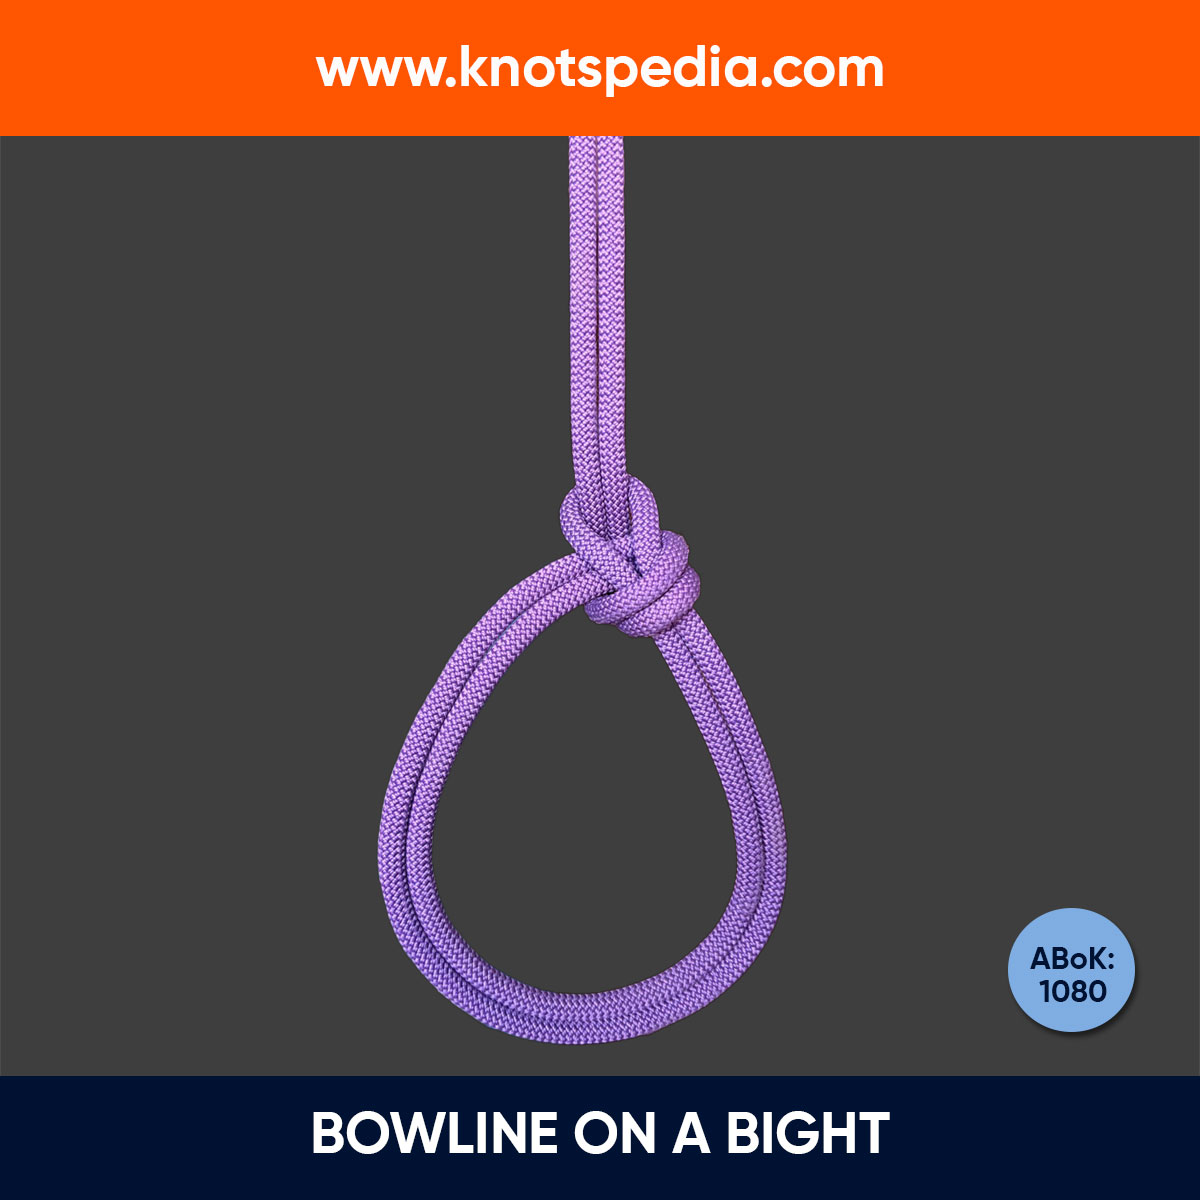
The Bowline on a Bight (ABoK #1080) makes two fixed-sized loops at the middle of the rope, which can be tied without access to the ends.
It’s used as a tie-in knot taught by the German Alpine Club (DAV). It’s also used in rescue situations to make an emergency Bosun’s chair or a secure foothold in the middle of the rope.
Spanish Bowline Knot
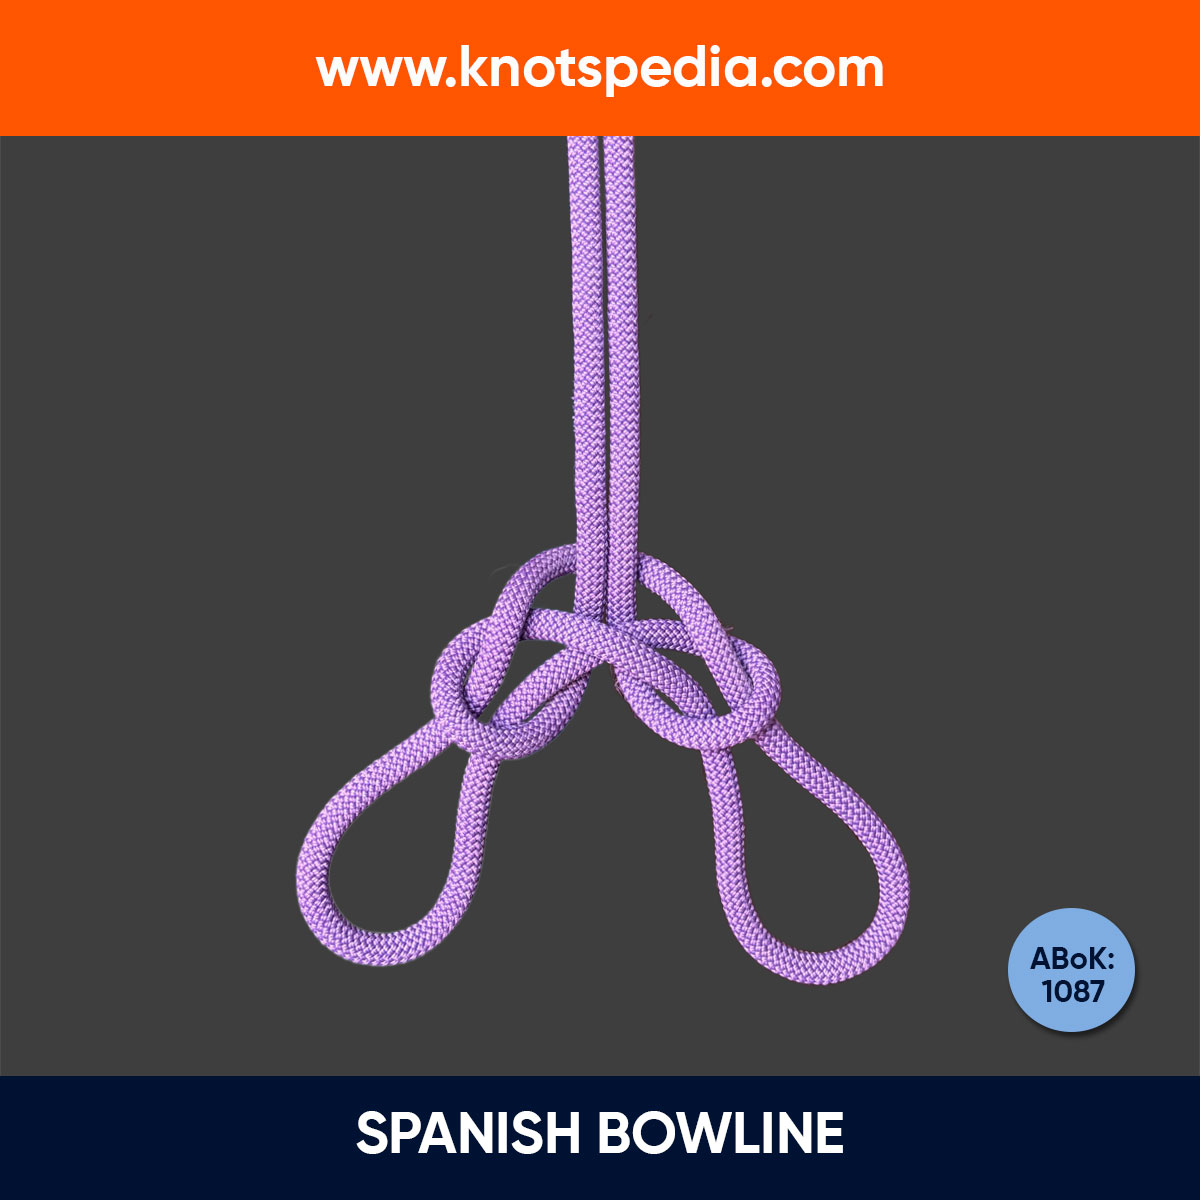
The Spanish Bowline (ABoK #1087) has two fixed loops instead of one. It’s tied in the middle of a rope without access to the ends.
It is often used in rescue situations for lifting people.
French Bowline Knot
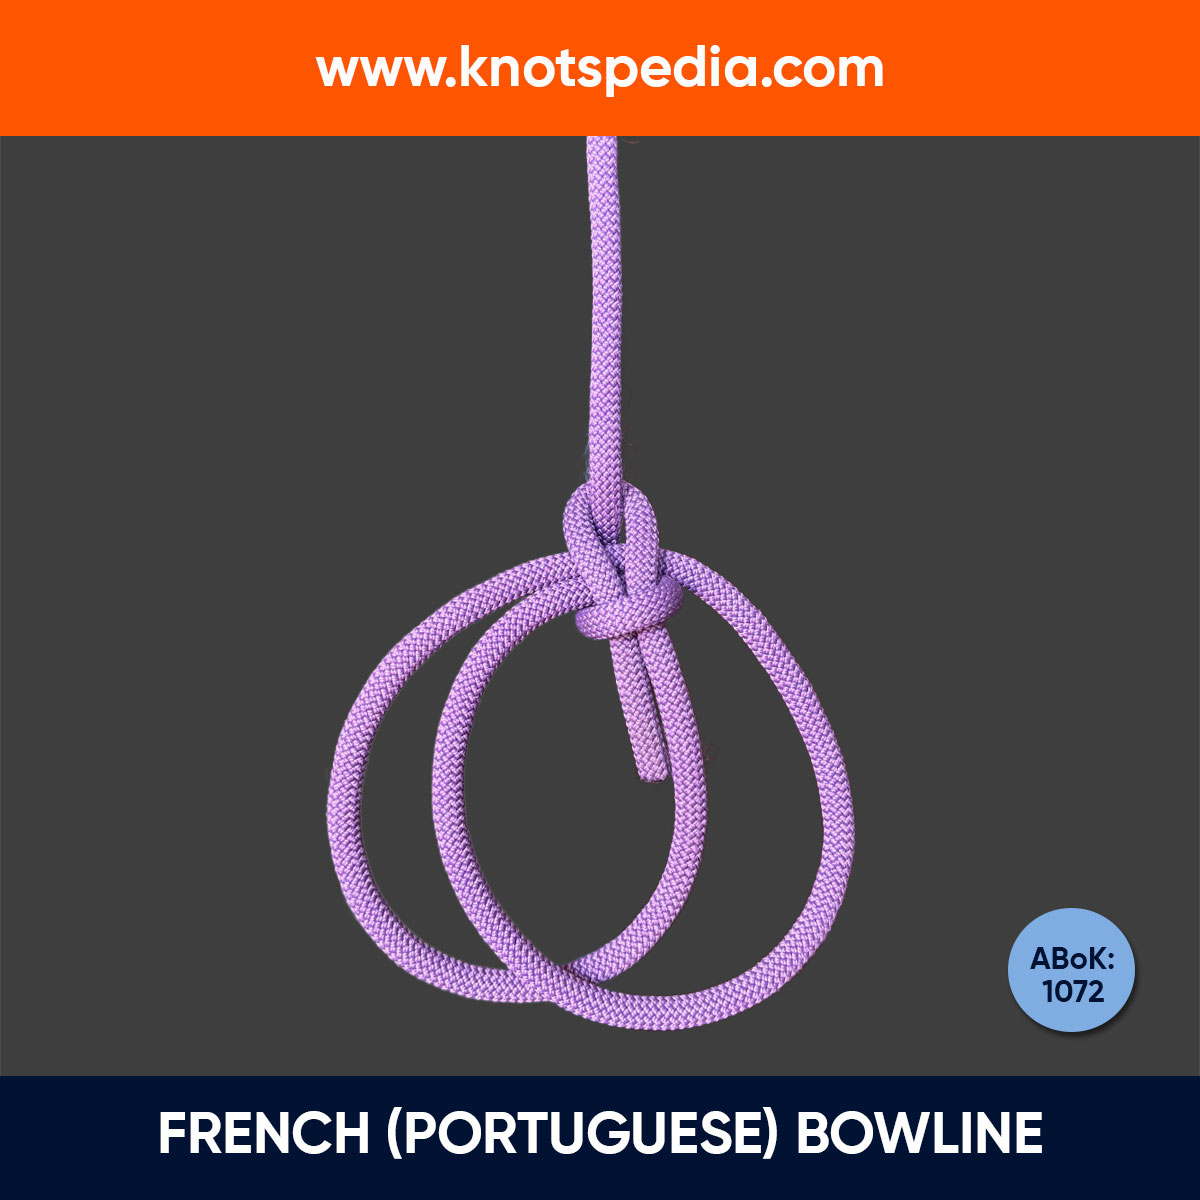
The French Bowline (also known as the Portuguese Bowline) forms two loops similar to the Spanish Bowline, but the loops are adjustable in size.
Birmingham Bowline Knot
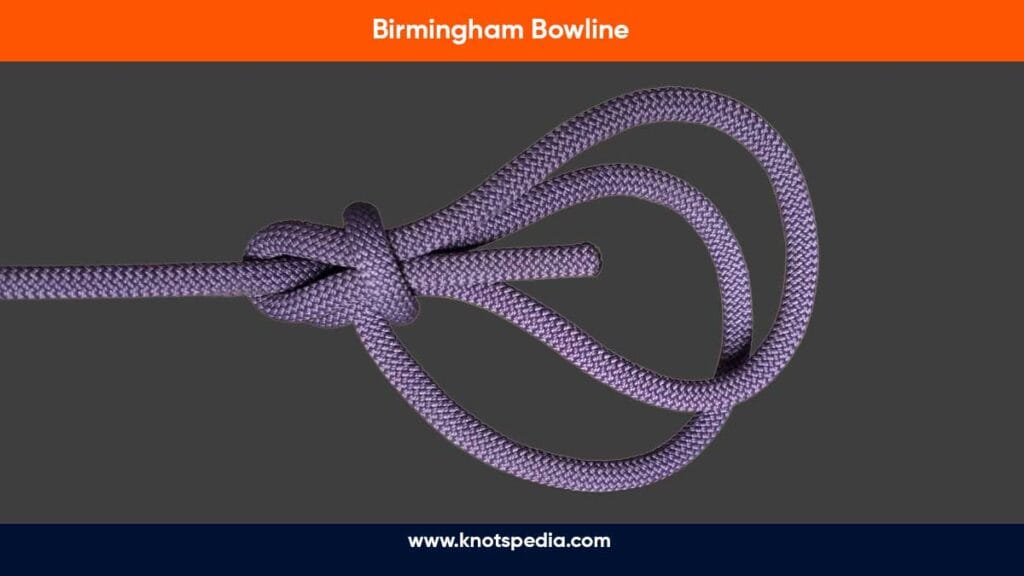
The Birmingham Bowline has two loops.
The working part is passed around the standing part two times (the “rabbit” makes two loops out of the hole and around the tree).
Other Bowline Knots
Eskimo Bowline Knot

The Eskimo Bowline (Cossack knot) is an alternative way to create a loop at the end of the rope.
The slipped version of this knot is called the Kalmyk Loop.
Cowboy Bowline Knot
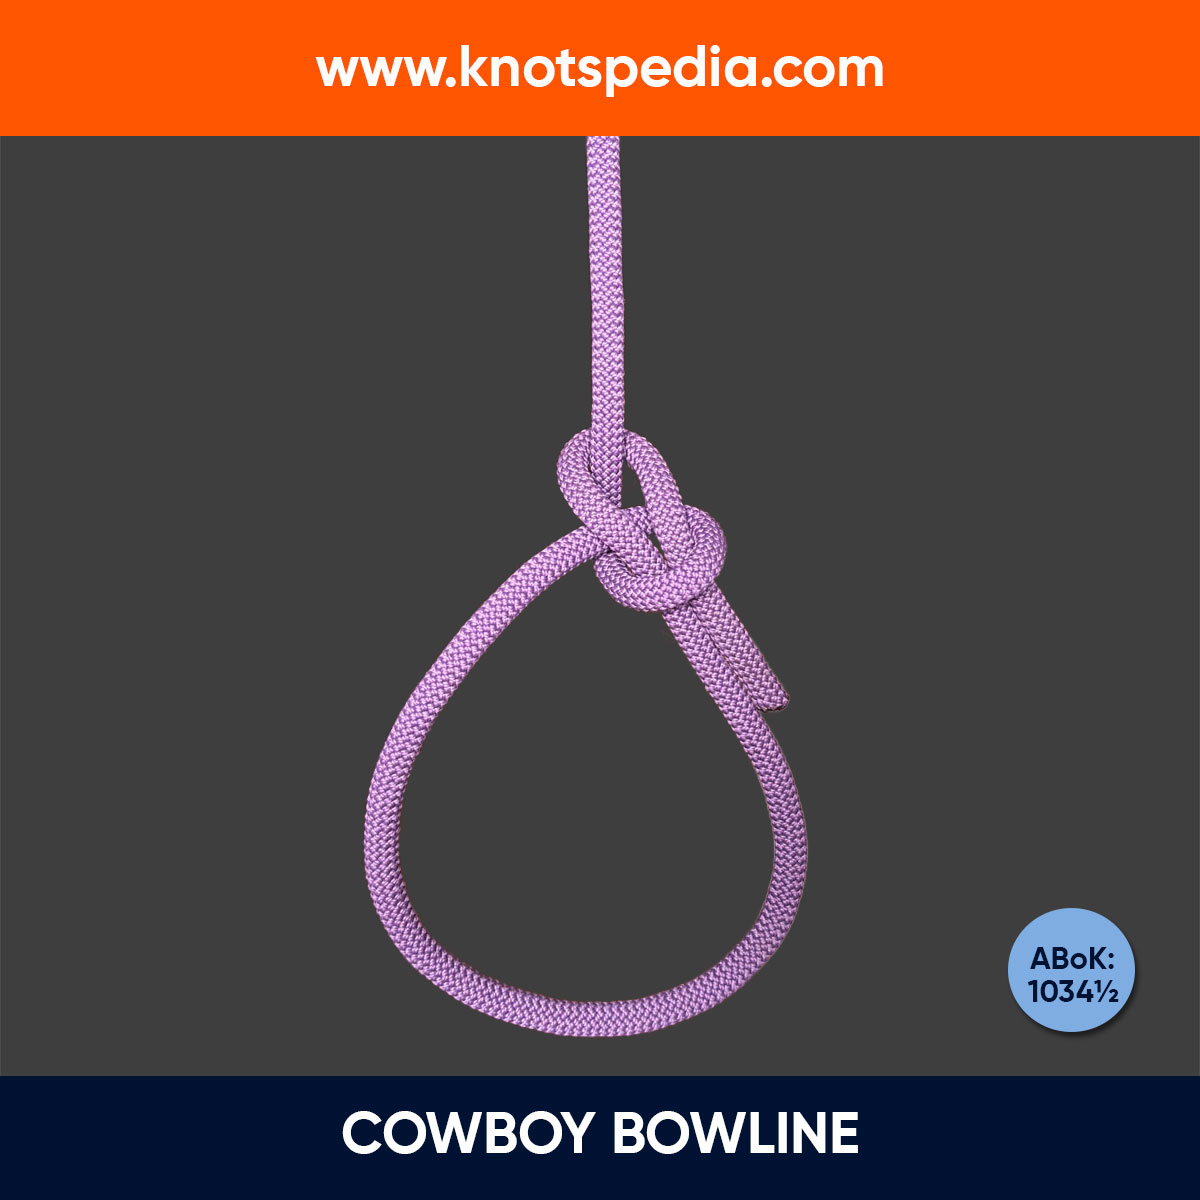
The normal Bowline has a tail end at the center of the loop.
If the tail is passed the opposite way round the standing end, it forms a Left Handed Bowline (ABoK 1034 ½).
It performs better than the Bowline when subjected to the ring tension.
Running Bowline Knot
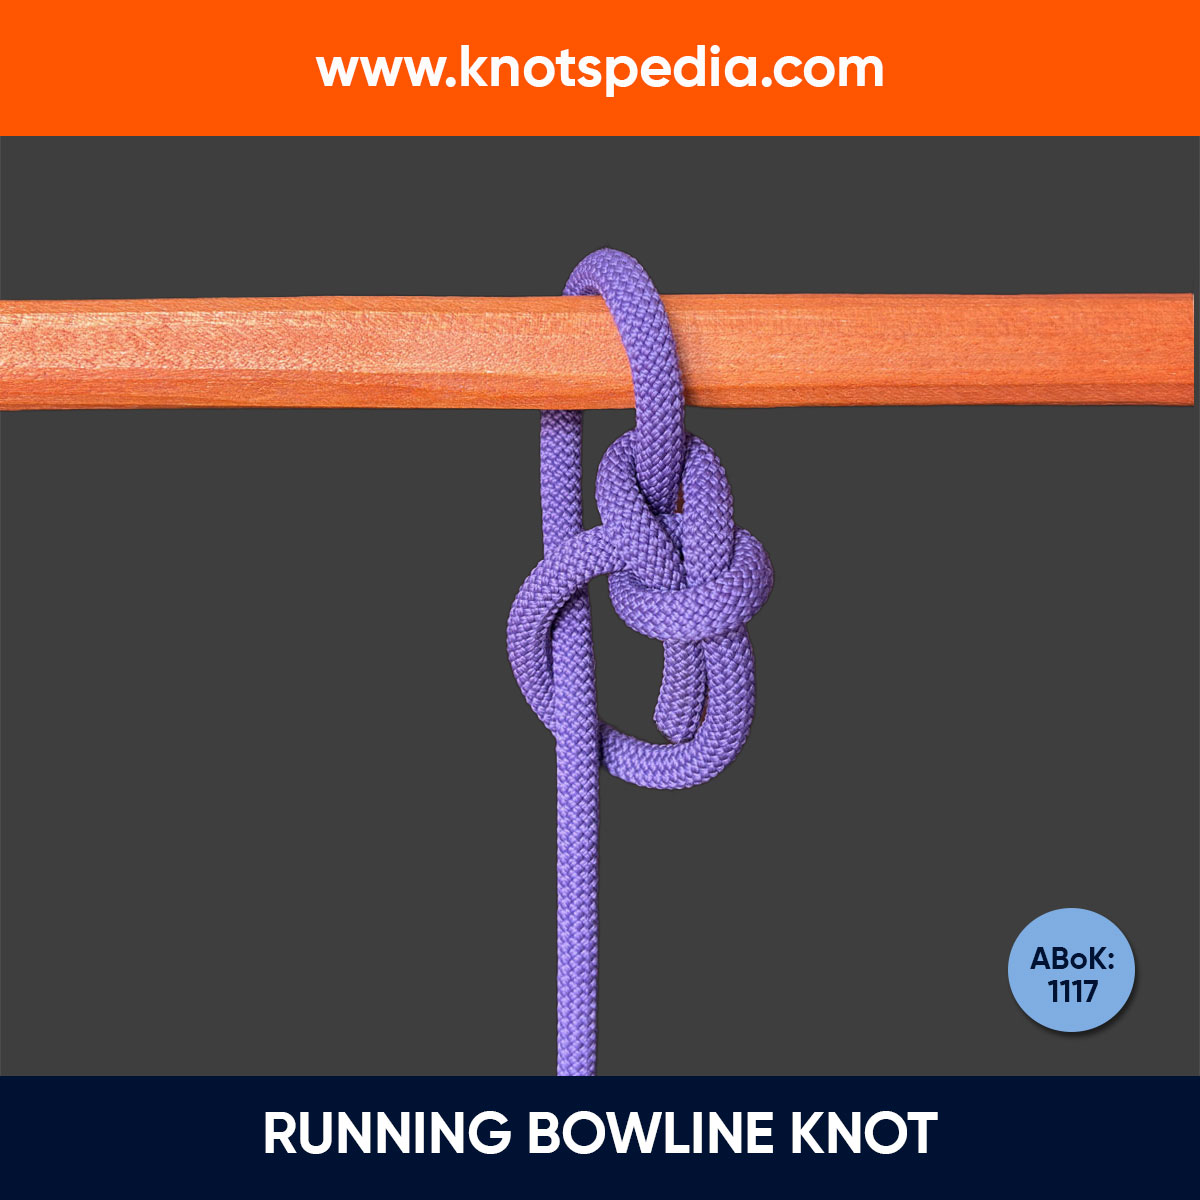
The Running Bowline (ABoK #1117) forms a sliding loop (Noose) which tightens up when tension is applied on the standing part of the rope.
It’s handy for cinching rope around the tree to set up a tree swing.
Quick History
The Bowline Knot goes way back, like the age of sails (1571-1862).
The name comes from the word “bow line.“ It’s a rope used to pull the square sail forward so it doesn’t flap backward into the wind.
The knot was mentioned in the Book Sea Grammar (1627) by John Smith.
But John used the term “Boling Knot.”
Related Questions
How secure is the Bowline Knot?
Mostly, Yes.
It’s not recommended for critical applications where you might expect a dynamic and cyclic load.
The Bowline Knot retains the rope’s strength by about 60%.
Is Bowline Knot suitable for climbing?
Yes, but extreme caution is needed.
The Bowline Knot used in climbing MUST be backed up with a stopper knot or tied with a Yosemite finish.
Many accidents have happened due to incorrect tying. Always double-check.
Warning: The use of the Bowline has resulted in several critical failures at times when proper precautions have not been taken. So, when you are using a Bowline, take extreme caution.
That’s it for this article.
If you are just starting out, make it your go-to loop knot. Then, practice other variations of the Bowline.
Try tying it blindfolded. Do it left-handed and right-handed. Try it with one hand. Wrap it around a pole or around yourself.
Regular practice with these variations will develop proficiency.