In my previous article, I highlighted why knot tying isn’t just for climbers and sailors—it’s a skill anyone can benefit from. Today, we are pushing forward.
I have compiled 25+ essential knots.
These are knots I have tied in real life. Some have been lifesavers, others just made my life easier.
I’ll cover all types of knots—bends, loops, stoppers, hitches, binding knots, quick release knots, and a few extras.
Let’s do it!
Basic Knot Tying Terminology
Before we get into the knots, let’s clear the basics first:
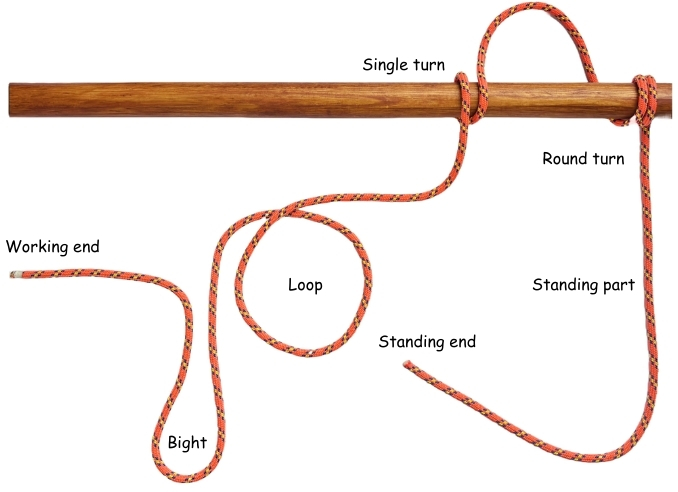
- Working end: The free end of the rope used to tie the knot. Also called the tag end, running end, or just the end.
- Standing end: The end of the rope that remains passive during knot tying.
- Standing part: The section of the rope between the standing end and the working end.
- Turn and round turn: A single wrap around the object is a turn. If another turn is added, it’s a round turn.
- Bight: The slack portion of the rope when it’s doubled back on itself.
- Loop: When two parts of the rope cross each other, a loop is formed.
- Bend: Joins two ropes together.
- Hitch: Secures a rope to an object.
- Binding knot: Secures objects together.
- Stopper knot: Prevents the rope from slipping through.
Need more knot terminology? Check out the comprehensive guide here or download the Printable cheatsheet.
Types of Knots and Their Uses
| Types of Knots | Knots | Purpose |
| Stopper Knots | Figure 8 Knot | Simple Stopper Knot |
| Ashley Stopper Knot | Bulky Stopper Knot | |
| Loop Knots | Bowline Knot | Fixed loop at the end of the rope |
| Alpine Butterfly Loop Knot | Secure loop in the middle of the rope | |
| Tautline Hitch | Adjustable loop knot | |
| Figure 8 on a Bight | Single secure loop knot at the end of the rope | |
| Bowline on a Bight | Two secure loops | |
| Hitches | Two Half Hitches | Simple Hitch knot for basic hitching |
| Round Turn and Two Half Hitches | Secure than Two Half Hitches | |
| Clove Hitch | Adjustable Hitch Knot | |
| Buntline Hitch | General utility quick-release knot | |
| Lark’s Head | Secure the rope to the object quickly | |
| Timber Hitch | Hoisting and dragging items | |
| Rolling Hitch | Lengthwise pull along the rope | |
| Bends | Sheet Bend | Shortening the length of the rope |
| Double Fisherman’s Knot | Permanent joining of two ropes | |
| Zeppelin Bend | Perfect bend knot, unties easily | |
| Water Knot | Joins two webbings together | |
| Binding Knots | Square Knot | Simple binding knot |
| Constrictor Knot | Strong binding knot | |
| Packer’s Knot | Secure binding knot, unties easily | |
| Quick Release Knots | Mooring Hitch | General utility quick release knot |
| Highwayman’s Hitch | Exploding type quick release knot | |
| Slip Knot | Simple quick release knot | |
| Utility Knots | Trucker’s Hitch | Useful tensioning knot |
| Marlinspike Hitch | Making rope ladders | |
| Prusik Knot | High utility friction hitch | |
| Chain Sinnet | Shortening the length of the rope |
I’ll start with some basic go-to knots that are useful for general tasks. After that, I’ll cover the Hitch knots.
Then, I’ll move on to the bends, loops, and stopper knots. I’ll finish off with a few special utility knots.
Two Half Hitches

The Two Half Hitches is used to temporarily secure a rope around an object.
It’s one of the simplest knots you can imagine. Just go around the object, then tie two half hitches around the standing line. That’s it!
Best for:
- Securing guylines, clotheslines, and banners at campsites
- Tying mooring lines to docks or boats
- Creating vertical, diagonal, and horizontal patterns in macrame
- Locking down loads in the final step of a Trucker’s Hitch.
Pros & Cons
- Easy to tie
- Can jam if loaded heavily
Round Turn and Two Half Hitches

Need a more secure hitch to attach a rope to a post, pole, or tree? The Round Turn and Two Half Hitches is your go-to.
Best for:
- Securing mooring lines to posts, trees, or rings.
- Tying off the ends of a ridgeline or tarp line.
- Setting up a clothesline.
- Attaching a hammock to a tree.
Pros & Cons
- Can be tied and untied under load, rarely jams
- Need more rope than the Two Half Hitches
Figure 8 Knot

The Figure 8 Knot is the most basic yet highly efficient stopper knot that retains most of the rope’s strength.
You’ll tie this at the end of the rope to prevent it from slipping through or unreeving.
Best for:
- Stopper knot in boating and climbing
- Foundation for other knots
Pros & Cons
- Easy to tie and untie than the Overhand Stopper Knot
- Tends to shake loose over time
Slip Knot

The Slip Knot is an Overhand Knot with a draw loop. It’s quick and easy to tie, and you can yank it loose instantly.
Best for:
- Making an initial loop when casting on for crochet.
- Making a loop for Trucker’s Hitch.
- Securing the ends of sacks or bags for quick release
Pros & Cons
- Easy to tie and untie
- Not safe for critical applications
Square Knot (Reef Knot)

The Square Knot is a simple knot to join two ropes of similar size or secure them around an object.
Best for:
- Tying shoelaces and bows for shoes or packages.
- Securing bandages over wounds.
- Sealing plastic bags.
- Holding a rolled-up tent in place while camping.
- Creating decorative patterns in macrame.
Pros & Cons
- Quick and easy to tie
- Not suitable for critical loads, doesn’t bind well with rope of unequal diameter, tends to capsize when pulled unevenly
Clove Hitch

The Clove Hitch is a quick and easy knot for securing a rope to an object using Two Half Hitches.
It’s not the strongest of knots as it tends to slip and jam at an inappropriate moment.
Best for:
- Temporary mooring to a post or buoy.
- Securing fenders to a rail.
- Starting or finishing lashings like square, diagonal, or tripod lashings.
- Forms a secure knot for an arm sling in emergencies.
Pros & Cons
- Easy to tie, untie, and adjust
- Can come undone when there’s no tension in the line, not good for square posts
Bowline Knot

The Bowline Knot forms a fixed loop at the end of a rope.
It’s one of the few knots people learn (along with the Overhand Knot and Figure 8 Knot) because it’s old school and reliable.
Best for:
- Forming a fixed loop, large or small, at the end of the line.
- Rescue situations
- Securing mooring lines to a tree, post, or anchor.
- Tying tarps, setting up shelters, tying one end of the clothesline, hanging gear, or attaching a hammock.
- First step of a tie down for trucker’s hitch.
Pros & Cons
- Easy to tie and untie, doesn’t jam, can be tied with one hand
- May capsize when pulled sideways, can get loose when not loaded
Sheet Bend

The Sheet Bend is used to join two ropes of different sizes, materials, or rigidity.
It’s not particularly known for its strength, but it holds up well under moderate loads.
Best for:
- Temporarily joining two ropes.
- Making climbing or cargo nets.
- Creating decorative knots.
- Securing tarps or poncho corners.
Pros & Cons
- Easy to tie and untie, works with different-sized ropes
- Not safe for critical loads, can loosen when not under load
Tautline Hitch

The Tautline Hitch forms an adjustable loop at the end of a rope.
This knot will come in handy when the length of the rope needs to be periodically adjusted in order to maintain tension in the line.
Best for:
- Securing tarp and tent lines or hanging a hammock.
- Tying down loads on vehicles.
Pros & Cons
- Easy to adjust the tension
- Loses grip over time, less effective with modern synthetic ropes.
Lark’s Head (Cow Hitch)

The Lark’s Head is used to attach rope to a post, poles, or other ropes.
It’s a simple knot that can be tied with the rope’s end or a bight.
Best for:
- Attaching a rope to a ring
- Tying animals to the post.
- Attaching tags to zippers
Pros & Cons
- Quick and easy to tie
- Not safe for critical applications
Constrictor Knot

The Constrictor Knot is a strong binding knot used to bundle up items, like tightening up loose materials.
It grips so well that it usually requires a knife to get rid of it.
Best for:
- Holds fibers together when finishing rope ends.
- Ties the neck of sacks or bags securely.
- Temporary cable tie or hose clamp.
Pros & Cons
- Strong and versatile
- Can jam if heavily tightened, does not grip well on a flat surface
Buntline Hitch

The Buntline hitch is used to attach rope to a ring, eye, or post.
It’s your go-to when you need a compact knot that tightens itself when there is tension in the line.
The slipped version of the Buntline hitch is more popular as it gives you the ability of a quick release.
Best for:
- Attaching a halyard to a shackle or a sail
- Securing rope to rings and railings when a compact knot is needed
Pros & Cons
- Strong and secure, compact in size
- Jams under extreme load
Timber Hitch

The Timber Hitch is used for dragging or hoisting logs across the ground.
It grips harder and harder as you apply more tension in the line.
Bonus: Try the Killick Hitch if you want more purchase out of the Timber Hitch. It’s similar but has an additional Half Hitch Knot.
Best for:
- Hoisting and dragging branches or logs.
- Secure ridgelines for tarps, tents, and clotheslines.
- Attach strings to the lower end of the English longbow and instruments like the guitar and ukulele.
Pros & Cons
- Easy to tie and untie even under load, does not jam
- Only secure under tension
Rolling Hitch

The Rolling Hitch is a friction knot that’s used for lengthwise pulls along an object.
You’ll use this knot to tighten the slack line without untying the knot holding the line.
Best for:
- Tightening the clotheslines.
- Hoisting or hauling objects.
- Tie a fender to the boat rails.
Pros & Cons
- Can be tied under load, does not bind and slip if pulled in the correct direction
- May slip in modern synthetic ropes
Packer’s Knot

The Packer’s Knot is a binding knot used with thinner ropes to secure parcels or bundles.
You’ll use this when you need a knot that functions like a Zip Tie—easy to tie and equally strong and secure.
Best for:
- Bundling parcels, firewood, or even meat.
- Zip tie alternative.
- Camping, bushcraft, and general everyday use.
Pros & Cons
- Strong and secure, easy to tie and untie, less prone to jamming
- Not as secure as other binding knots
Double Fisherman’s Knot

The Double Fisherman’s Knot is used to join two ropes of similar size using two double Overhand knots.
It’s difficult to untie the knot once loaded, so only use it if you intend to use this for permanent use.
Best for:
- Joining two climbing ropes
- Creating a Prusik loop for attaching ropes to carabiners.
- Making grab handles for kayaks and canoes.
- Making adjustable lanyards, bracelets, and necklaces.
Pros & Cons
- Strong and secure, easy to inspect
- Difficult to untie after loading
Zeppelin Bend

The Zeppelin bend is the most secure method to join two ropes.
It’s a solid alternative to Double Fisherman’s Knot as it is jam-resistant and easy to untie after loading.
Best for: Joining two lines under heavy load.
Pros & Cons
- Safe and secure, easy to untie
- Resembles other bends like the Hunter’s bend, so easy to mess up
Water Knot

The Water Knot is used to join two webbing straps together.
It’s one of the secure bend knots commonly used by climbers to make a sling for rappel anchors.
Best for:
- Making a sling for rappel anchors
- Extending the length of the webbing
- Making grab handles
- Tying up hammocks
- Joining flat materials like leather
Pros & Cons
- Easy to tie, strong and secure
- Can slip on certain materials like Dyneema, and jams, and is difficult to unite
Alpine Butterfly Knot

The Alpine Butterfly Knot is used to create a secure loop in the middle of a rope.
You can load it in either direction alone or together, and it’s easy to untie this knot even after heavy loading.
Best for:
- Isolating a damaged section of rope.
- Creating hand and foot loops for climbing.
- Making a midline attachment for clipping gear like lanterns or pots.
- Securing carabiners to climbing harnesses.
- Setting up clotheslines or hanging tools in the garage.
- As a component of the Trucker’s Hitch.
Pros & Cons
- Easy to tie and untie after loading, can be loaded in multiple directions.
- Not ideal for beginners, does not work well with stiff and thick ropes
Figure 8 on a Bight

Need a strong and reliable knot at the end of a rope? The Figure 8 on a Bight is your go to.
It’s one of the secure loop knots commonly used in climbing.
Best for:
- Attaching the rope to the carabiner, climbing harness, or belay device.
- Firefighter rescue work
- Anchor building
- Fixing ropes for rappelling
Pros & Cons
- Strong and easy to tie
- Difficult to untie after heavy loading
Bowline on a Bight

The Bowline on a Bight forms two fixed and secure loops in the middle of the rope.
Caution: This knot might fail if you load the single loop only.
Best for:
- Emergency Bosun’s chair.
- Making a toe hold in the middle of a rope
- As a harness tie in knot—an alternative to the Figure 8 follow through knot.
- Hoisting multiple people
Pros & Cons
- Can be tied in the middle of the rope, easy to tie and untie after heavy loading.
- May fail if only one loop is clipped.
Mooring Hitch

The Mooring hitch is a quick-release knot for tying small boats or kayaks to a tree, pole, or other objects.
It’s easy to tie and super easy to untie.
Best for:
- Mooring small boats and kayaks.
- Tethering animals to a post.
- Setting up a ridgeline for tarps or tents.
Pros & Cons
- Secure and does not slip
- Difficult to untie under tension, may jam, may undo if tension is not maintained.
Highwayman’s Hitch

Unlike the Mooring Hitch, the Highwayman’s Hitch is exploding in nature. The knot collapses with a tug of the standing end.
You’ll probably need this when you need to cast off quickly without having to untie the knot by hand.
Best for:
- Temporary mooring for boats
- Tying kayaks to docks
- Tethering animals like horses to posts or rails.
Pros & Cons
- Easy to tie, can be untied under tension
- May come loose by accident, fails when tied around a large diameter object.
Ashley Stopper Knot

The Ashley Stopper knot is a bulky stopper knot that prevents the rope from slipping through an opening.
Use this instead of a Figure 8 or an Overhand Knot.
Best for:
- Keeping mooring lines from pulling through narrow openings.
- Securing shelters and other gear.
Pros & Cons
- Bulky profile with a unique 3-lobed structure
- Easy to get it wrong
Trucker’s Hitch

The Trucker’s Hitch is a high-tension knot used to secure loads on trucks and trailers.
It provides a 3:1 mechanical advantage so you can tighten the load easily.
Best for:
- Securing canoes, kayaks, and other loads on vehicles.
- Tightening tent and tarp ridgelines.
- Setting up hammocks.
- Making a clothesline.
Pros & Cons
- Strong, easy to tie, easy to tension the line
- Damages the rope if pulled tightly
Prusik Knot

The Prusik knot is a friction knot used to attach a loop of cord called the “Prusik loop” around the rope.
It grips when you load the knot and slides easily when not under tension.
Best for:
- Ascending ropes
- Gripping the rope securely.
- Securing tarps, shelters, or gear to a ridgeline without damaging the rope.
- Climbing activities
Pros & Cons
- Strong, locks in both directions, lightweight and easy to carry
- Does not work well with frozen wet ropes
Marlinspike Hitch

The Marlinspike hitch is a temporary knot that quickly turns a rope into a handle or ladder step.
It’s an interesting little knot that is super useful in bushcraft and survival situations.
Best for:
- Creating handles for tightening knots like the Constrictor Knot.
- Making a makeshift ladder.
- Hammock suspension systems and whoopie slings.
Pros & Cons
- Quick and easy to tie and untie
- Capsize and jam when not loaded properly
Chain Sinnet

The Chain Sinnet is used to shorten rope length and prevent tangling.
It’s one of the knots you can introduce to children. It’s amazing how the rope unravels when the working end is pulled.
Best for:
- Shortening ropes for storage or washing ropes without tangling.
- Coiling long extension cords neatly.
- Braided bracelets and macrame projects.
- Military uniform decorations.
Pros & Cons
- Easy to tie and super easy to untie
- Rope uncoils with kinks and twists
Which Knots Should You Learn First?
Let’s be honest. 25+ knots is a lot.
You probably don’t need all of them right away. So, here’s a shortcut to help you focus.
If you are new to knots: Bowline, Square Knot, and Two Half Hitches
If you are into camping, check this article on “12 Best Camping Knots Every Camper Needs to Know.”
If you are into survival, 15 Best Survival Knots Every Outdoorsman Must Know
If you climb: Figure of 8 on a Bight, Alpine butterfly Knot, and Water Knot
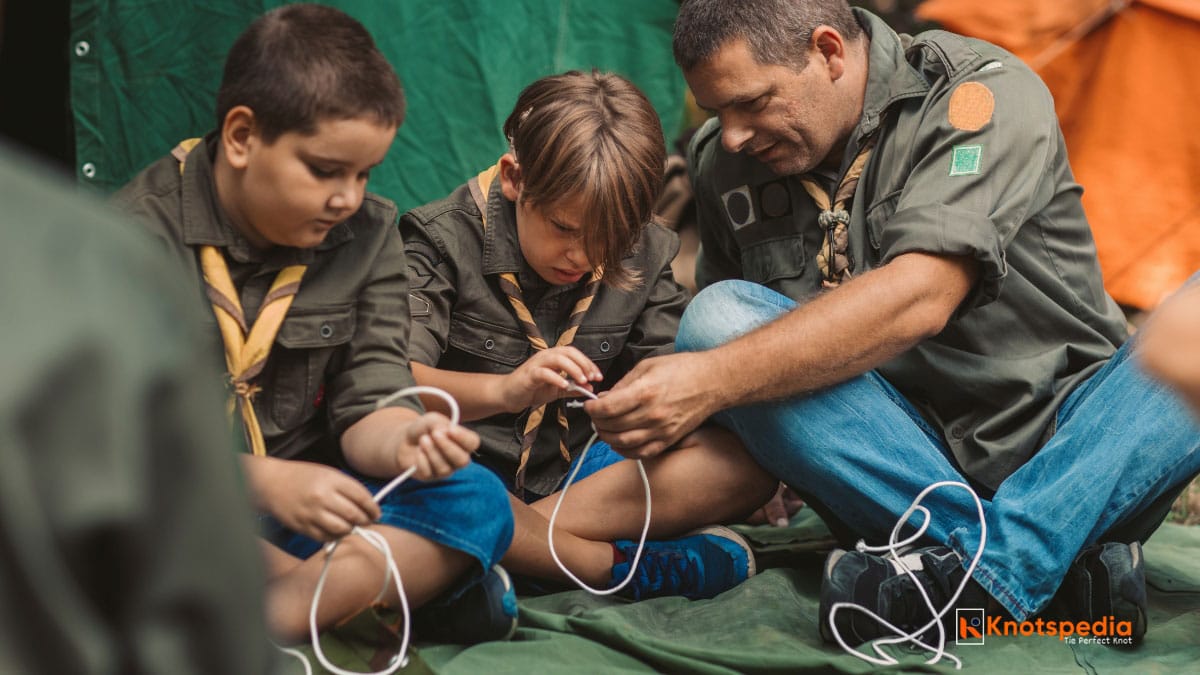
If you are into Scouting, check out this article, “How to tie the 8 basic knots in Scouting” or “Knot Tying for Kids.”
Bonus: If you just want to learn three knots that work almost anywhere, go with the Bowline, Clove Hitch, and Figure 8 Knot. They’ll cover most situations.
For more, check out the complete list of knots on our website.
Did you find the article helpful? If there’s a knot you think deserves a spot in the list, do tell me in the comments below!
Happy Knotting!


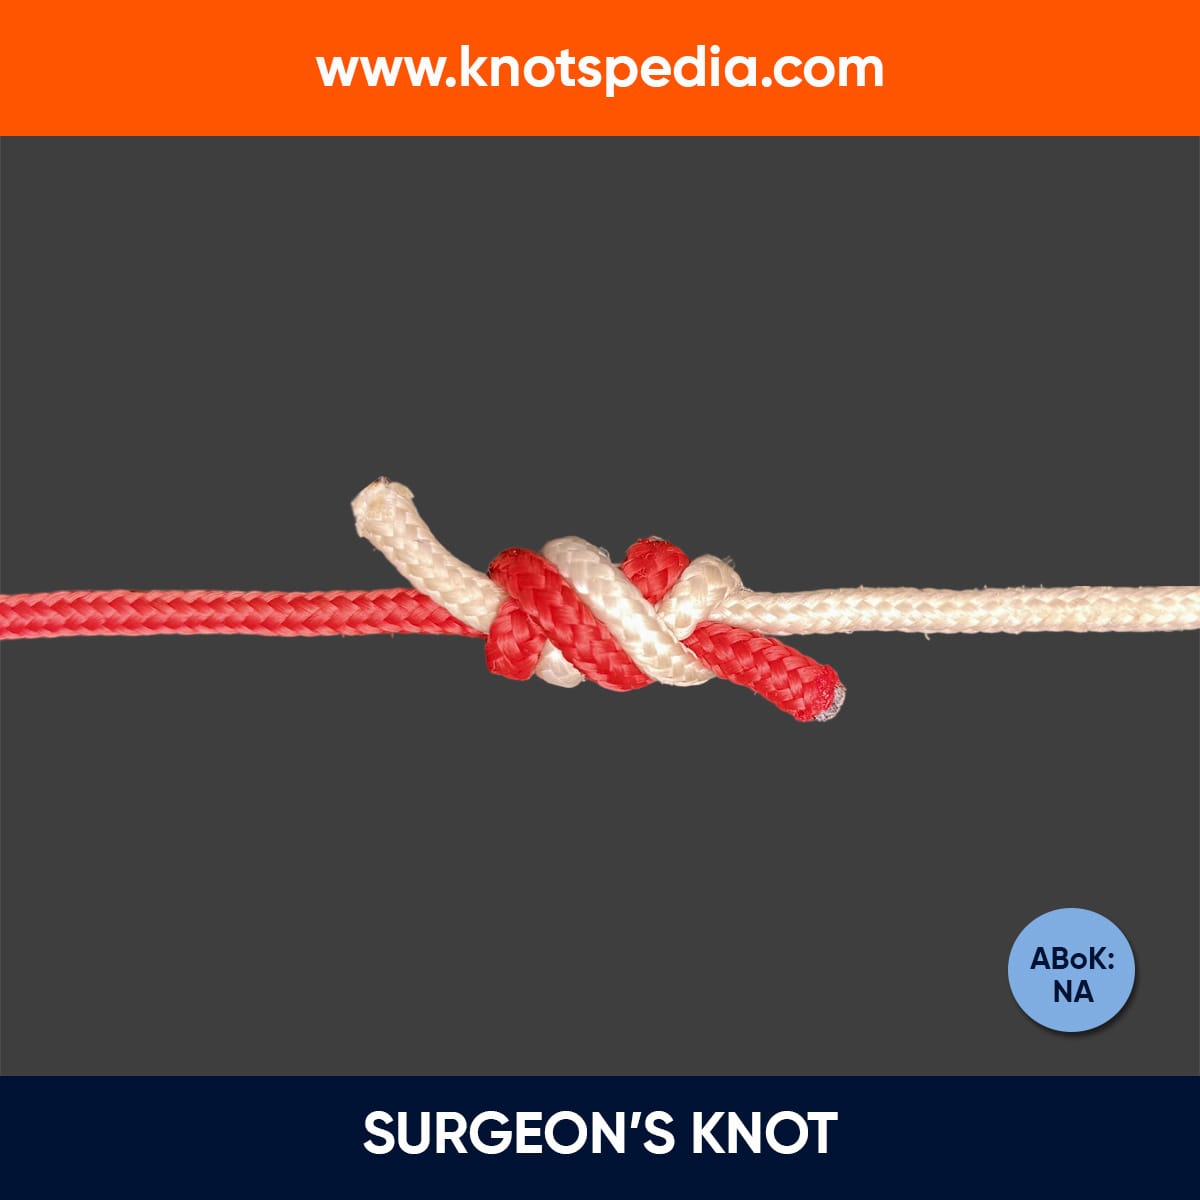


Simple Simon UNDER
is much more secure
than the
old sheet bend
and serves
the same purpose…
You’re absolutely right! The Simple Simon Under is a more secure alternative to the classic Sheet Bend. It grips tighter under load—especially with slippery ropes—which makes it great for more permanent joins, though a bit trickier to untie. Thanks for the insight!