Binod Gautam
Binod Gautam is the founder of Knotspedia and has over 10 years of experience tying and testing knots for camping, fishing, hiking, and daily use. He launched Knotspedia to share his extensive experience and help others master the art of knot tying. Binod breaks down each knot with step-by-step guides and real-world tips you can actually use. Whether you’re just getting started or want to sharpen your skills, Binod’s guides are made to be useful, accurate, and easy to follow.
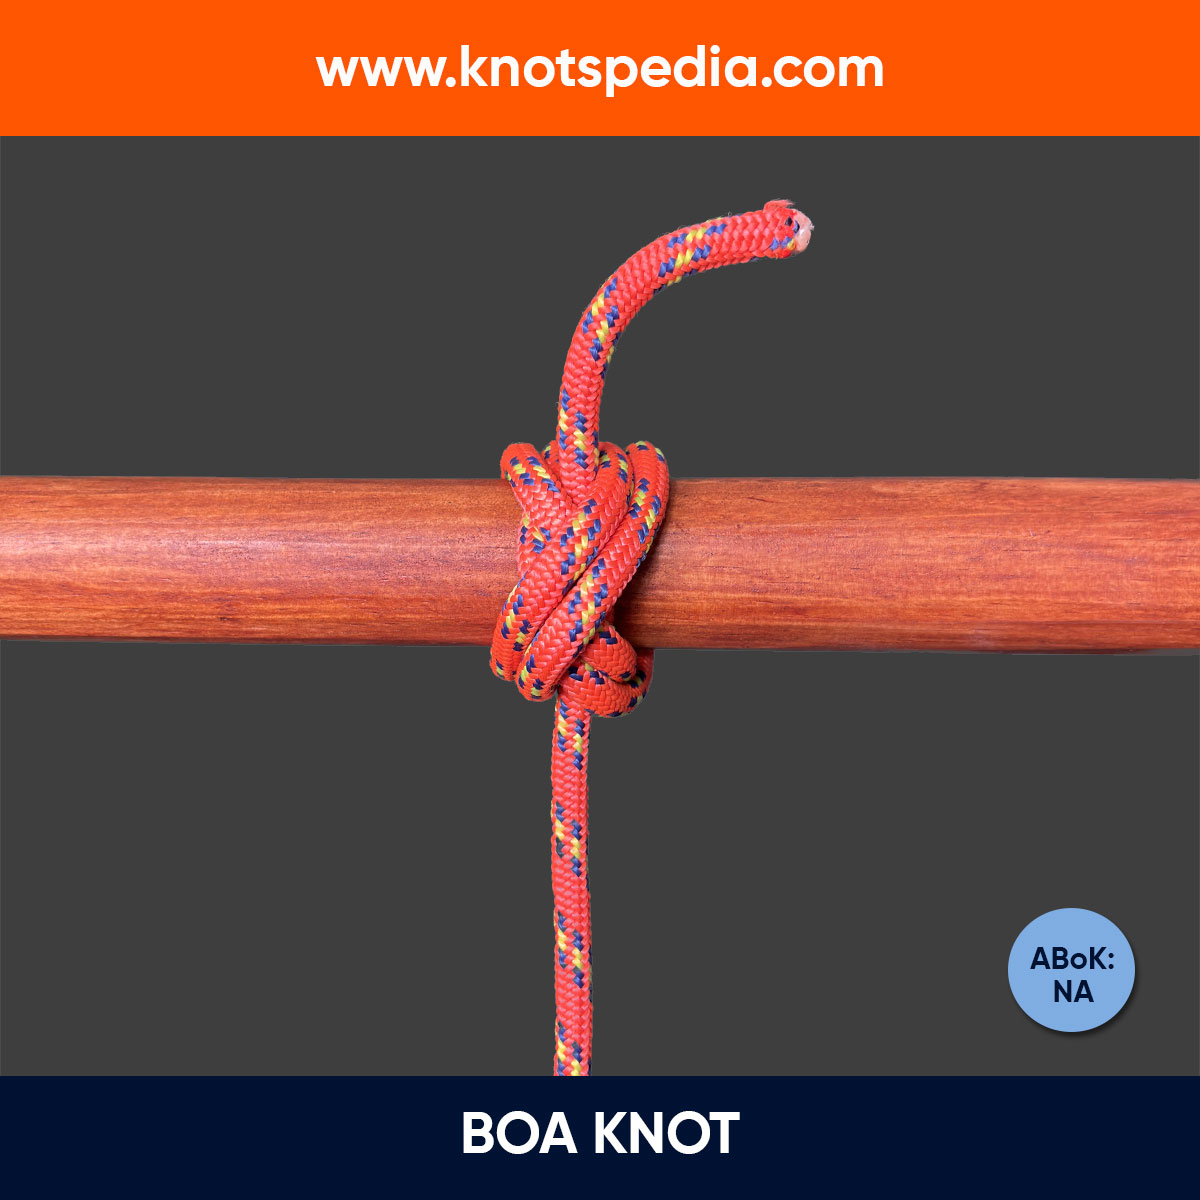
Boa Knot
The Boa Knot is a robust binding knot that grips tightly and won’t budge—ideal for permanent fixes around cylindrical objects. Hard to tie, harder to undo!
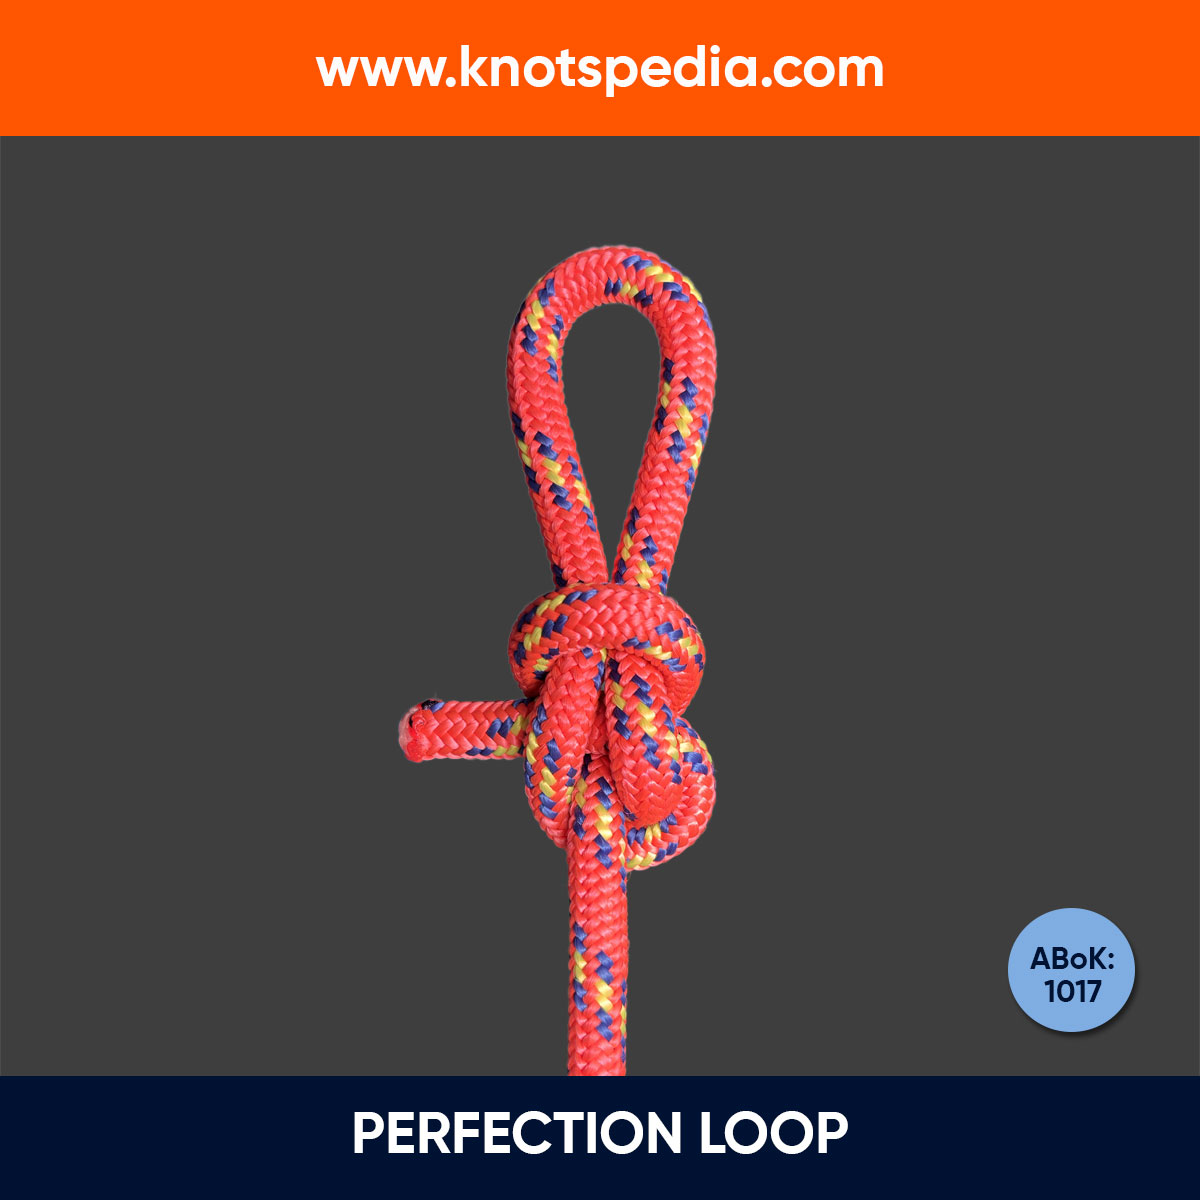
Perfection Loop
The Perfection Loop (ABoK #1017) is a reliable fishing knot that forms a strong, in-line loop—perfect for attaching fly or lure with natural movement in water.
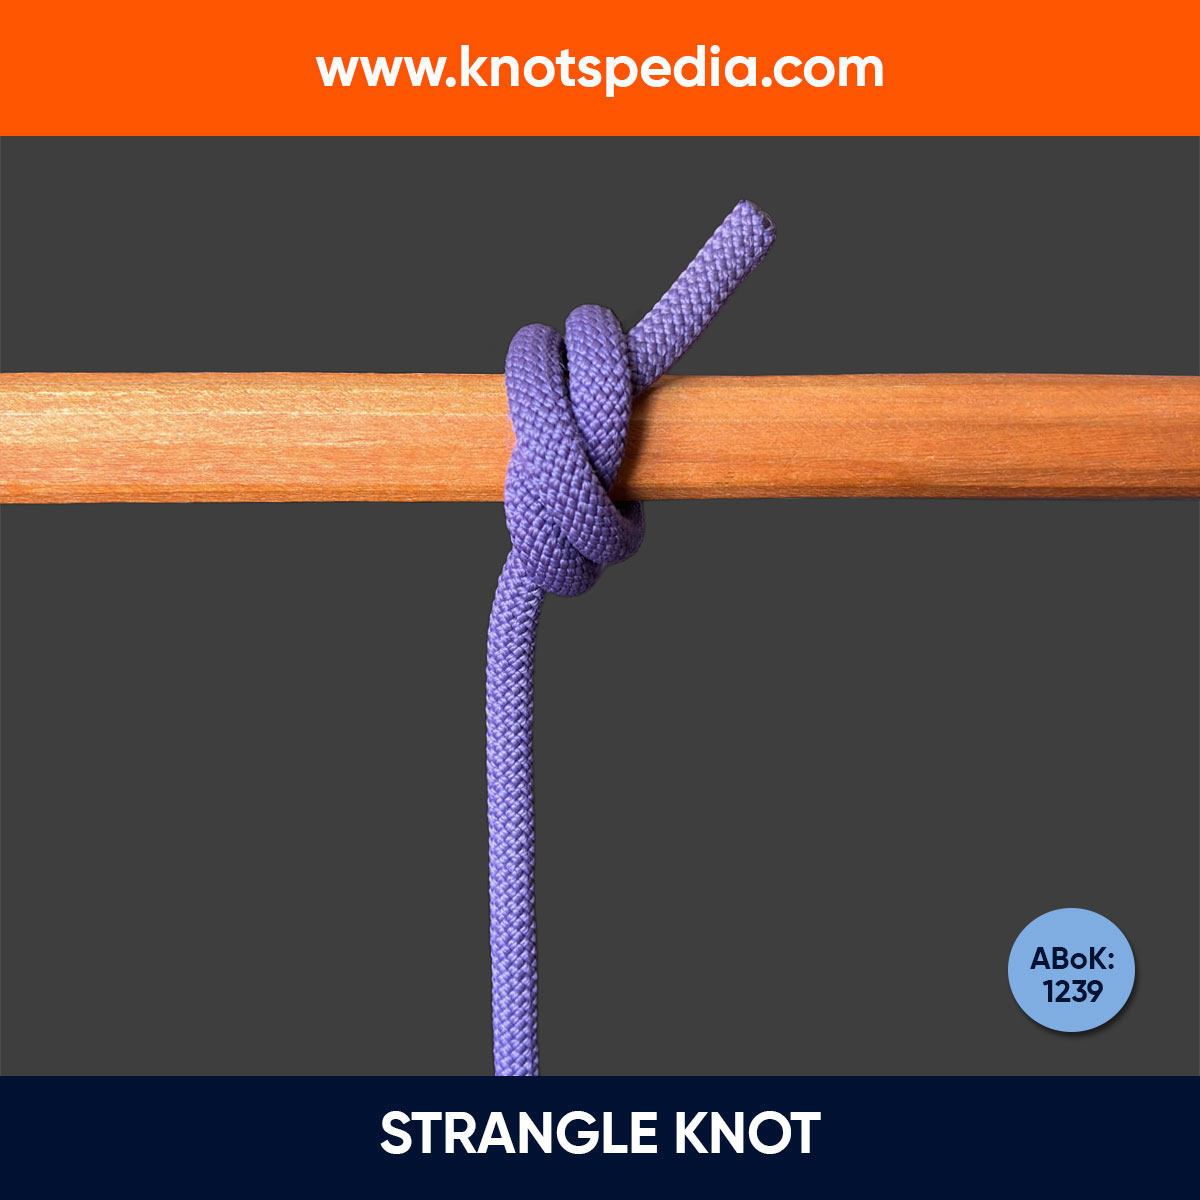
Strangle Knot
The Strangle Knot (ABoK #239) is a compact, flat binding knot ideal for securing sacks, poles, or bundles. Easy to tie, but tough to untie once tightened.
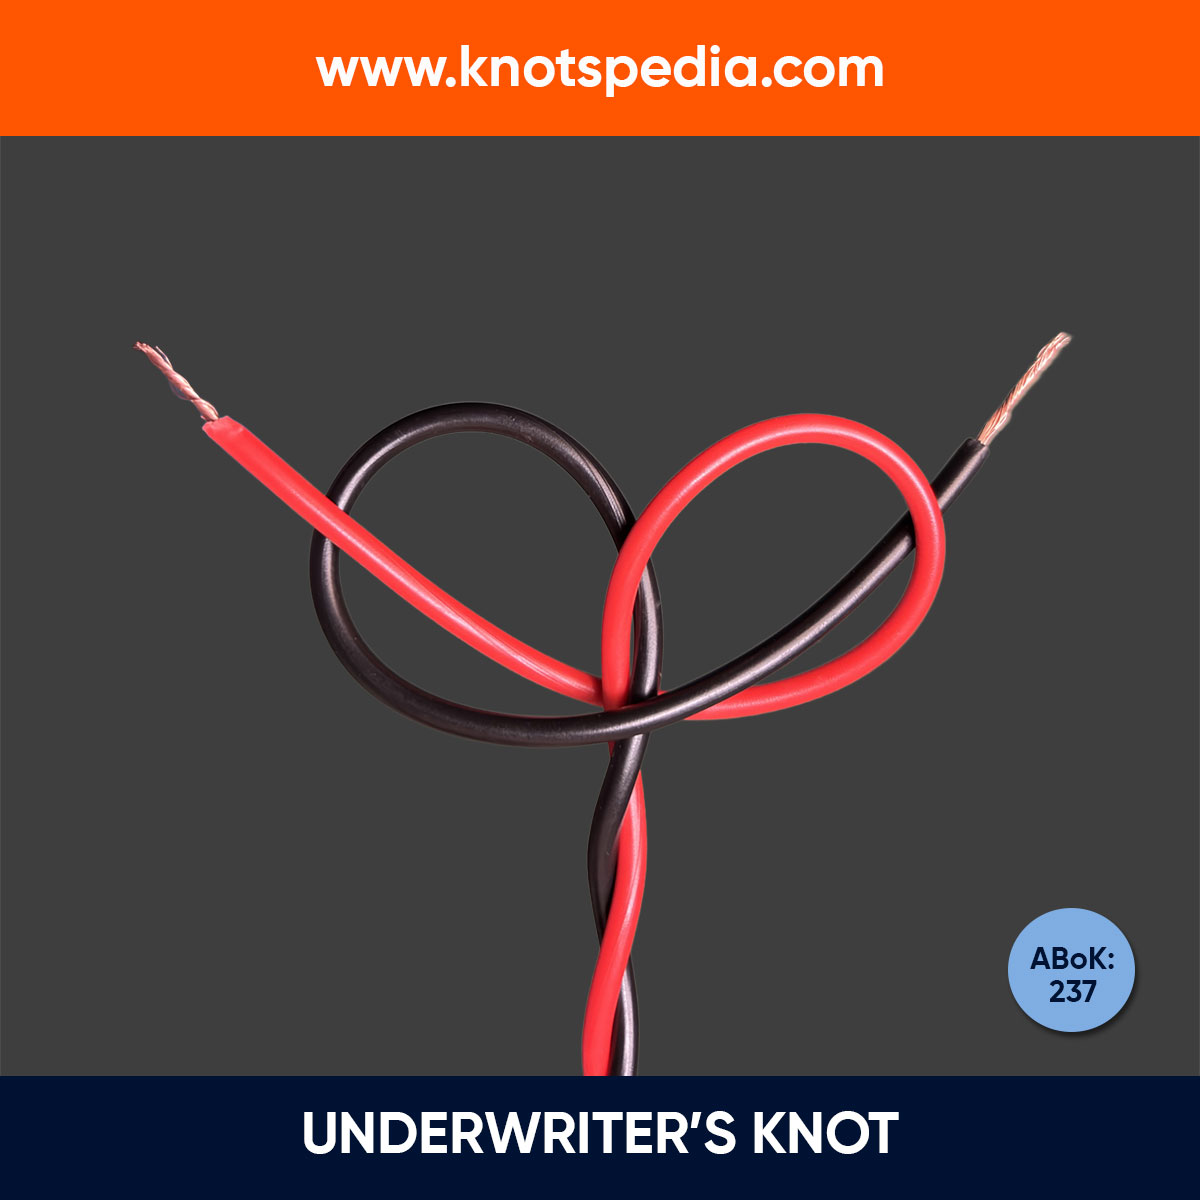
Underwriter’s Knot
The Underwriter’s Knot (ABoK #237) is a stopper knot in electrical wiring that prevents wires from pulling out of terminals, reduces strain and short circuits.

How to Tie the 8 Basic Knots in Scouting
Master 8 basic knots in scouting—essential for Scout ranks and perfect for camping, tying, lashing, hauling gear, and everyday outdoor tasks.
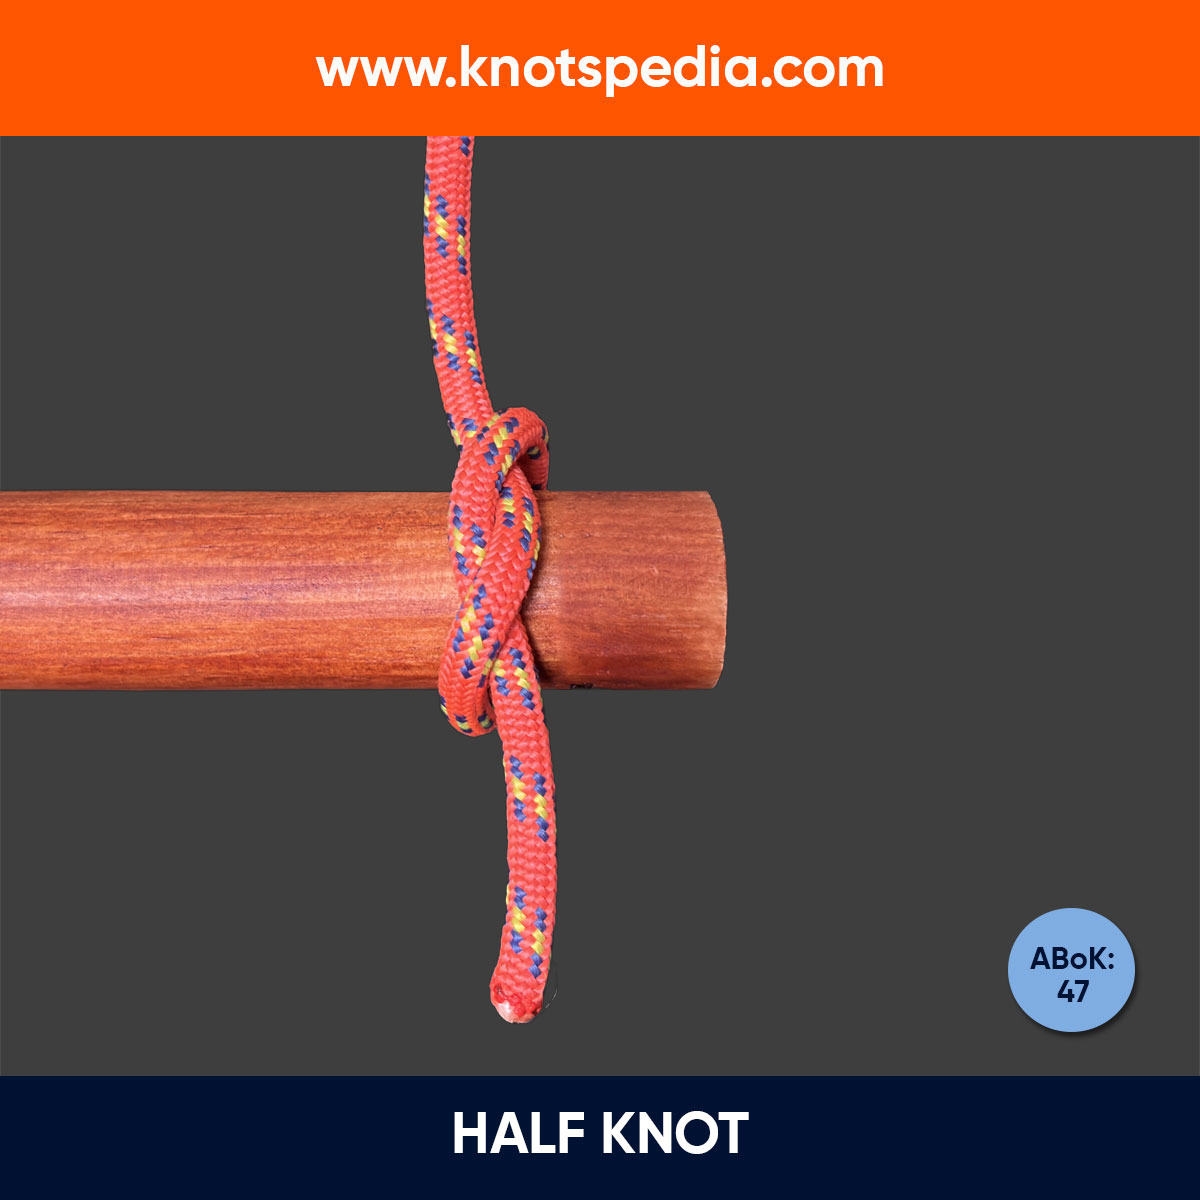
Half Knot
The Half Knot (ABoK #47) is a binding knot made with two rope ends, often used in macrame, bracelets, and scarves. It's the first step in tying a Square Knot.
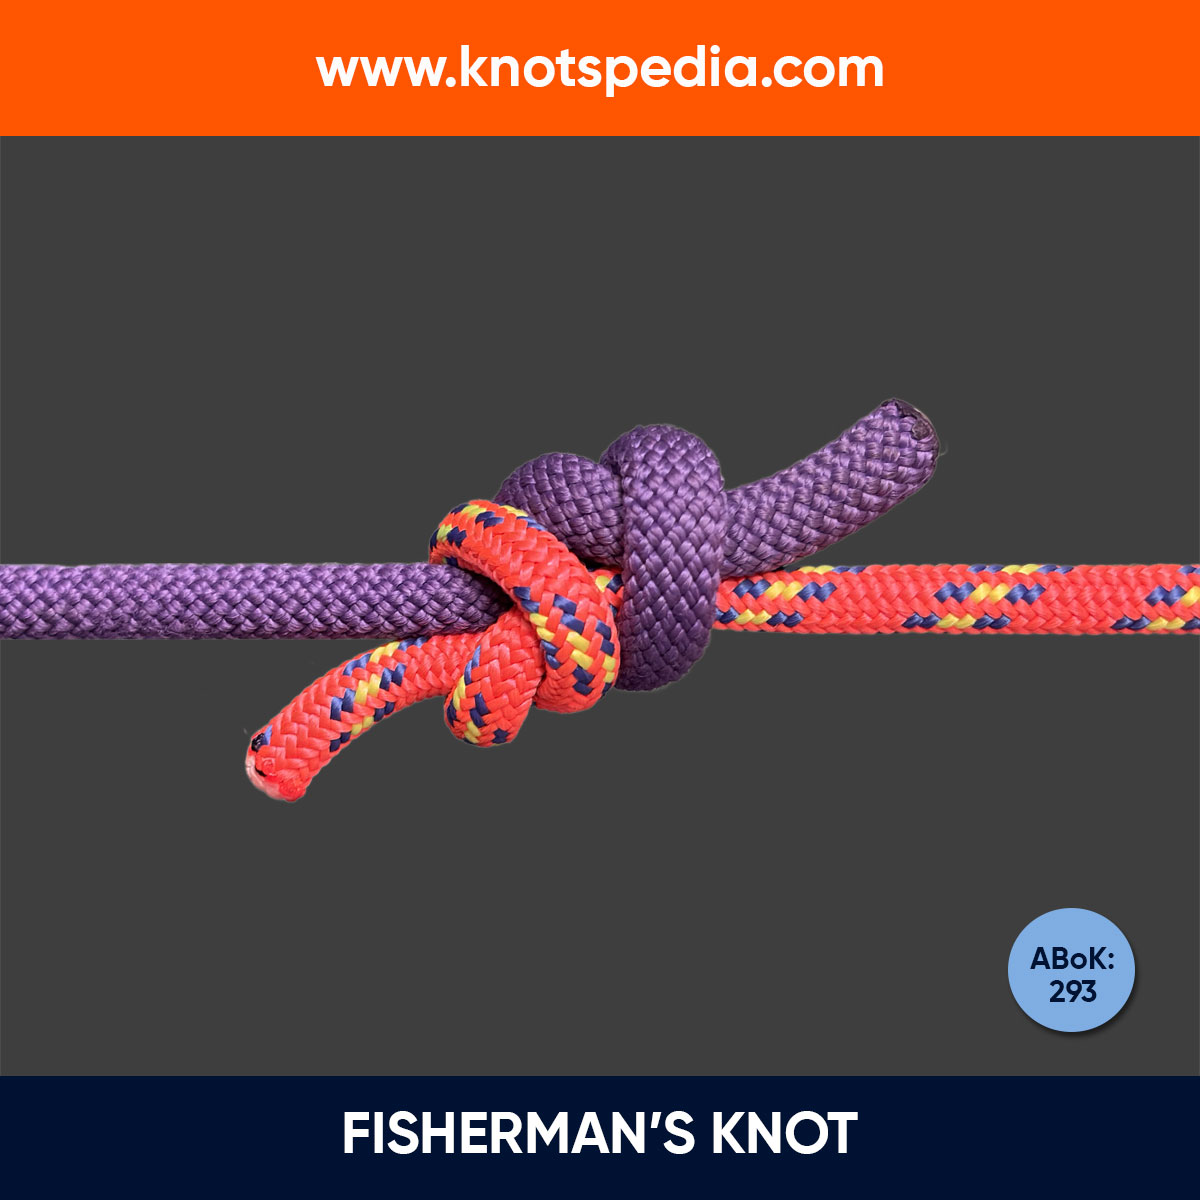
Fisherman’s Knot
The Fisherman’s Knot(ABoK #293, #1414) joins two ropes or lines. Simple, strong, and trusted in fishing, climbing, crafts—and even in some wedding traditions.
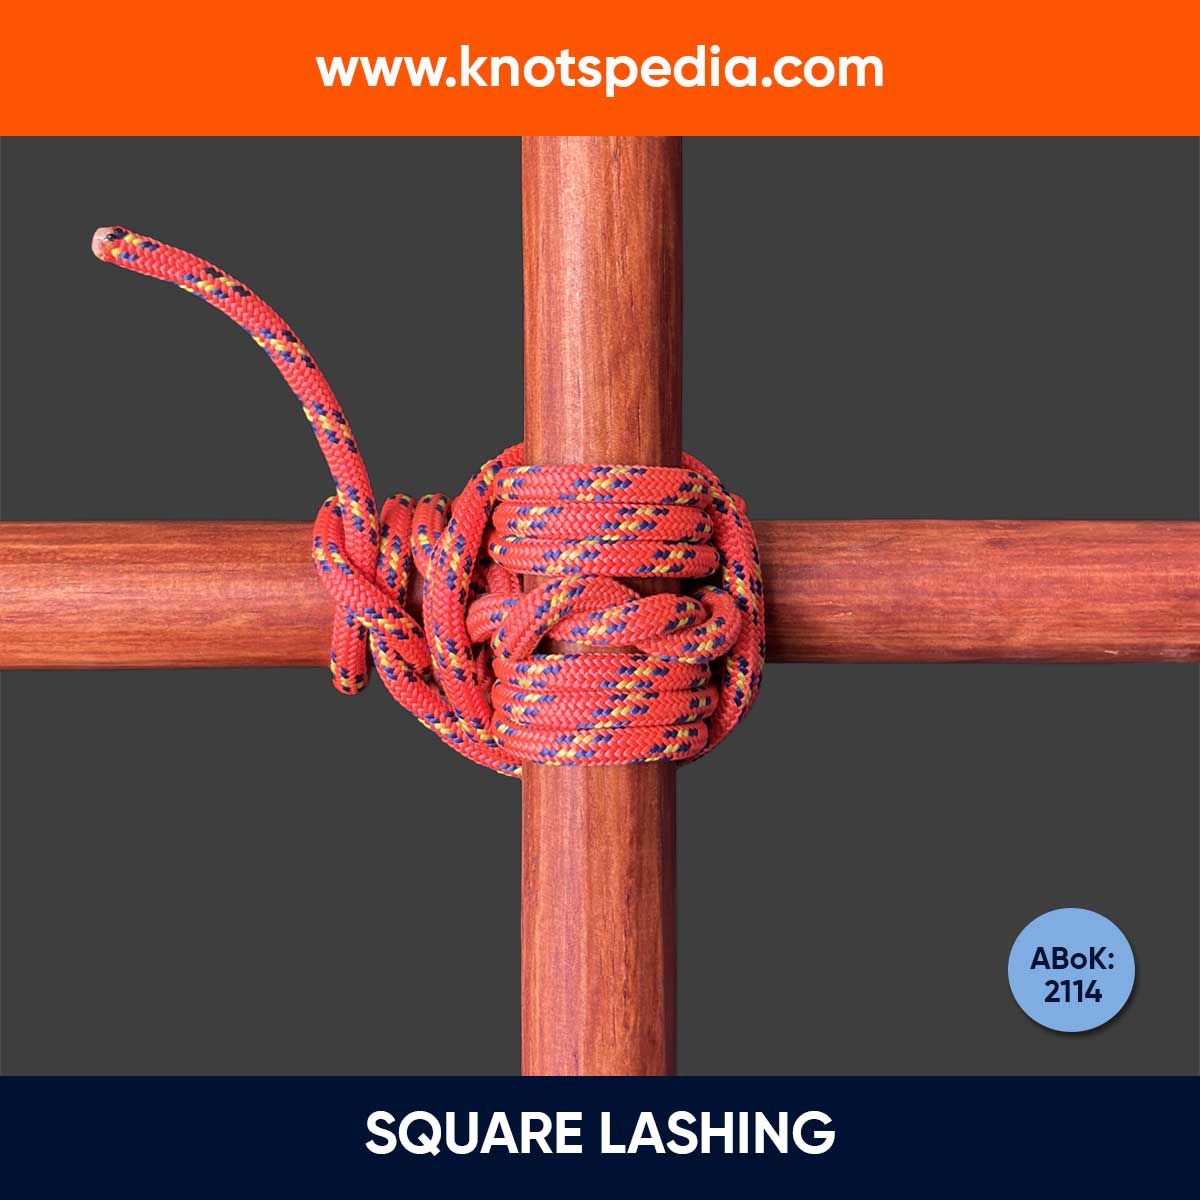
Square Lashing Knot
The Square Lashing Knot (ABoK #2114) is used to bind two poles at right angles, ideal for building frameworks, rafts, fences and more in load-bearing tasks.
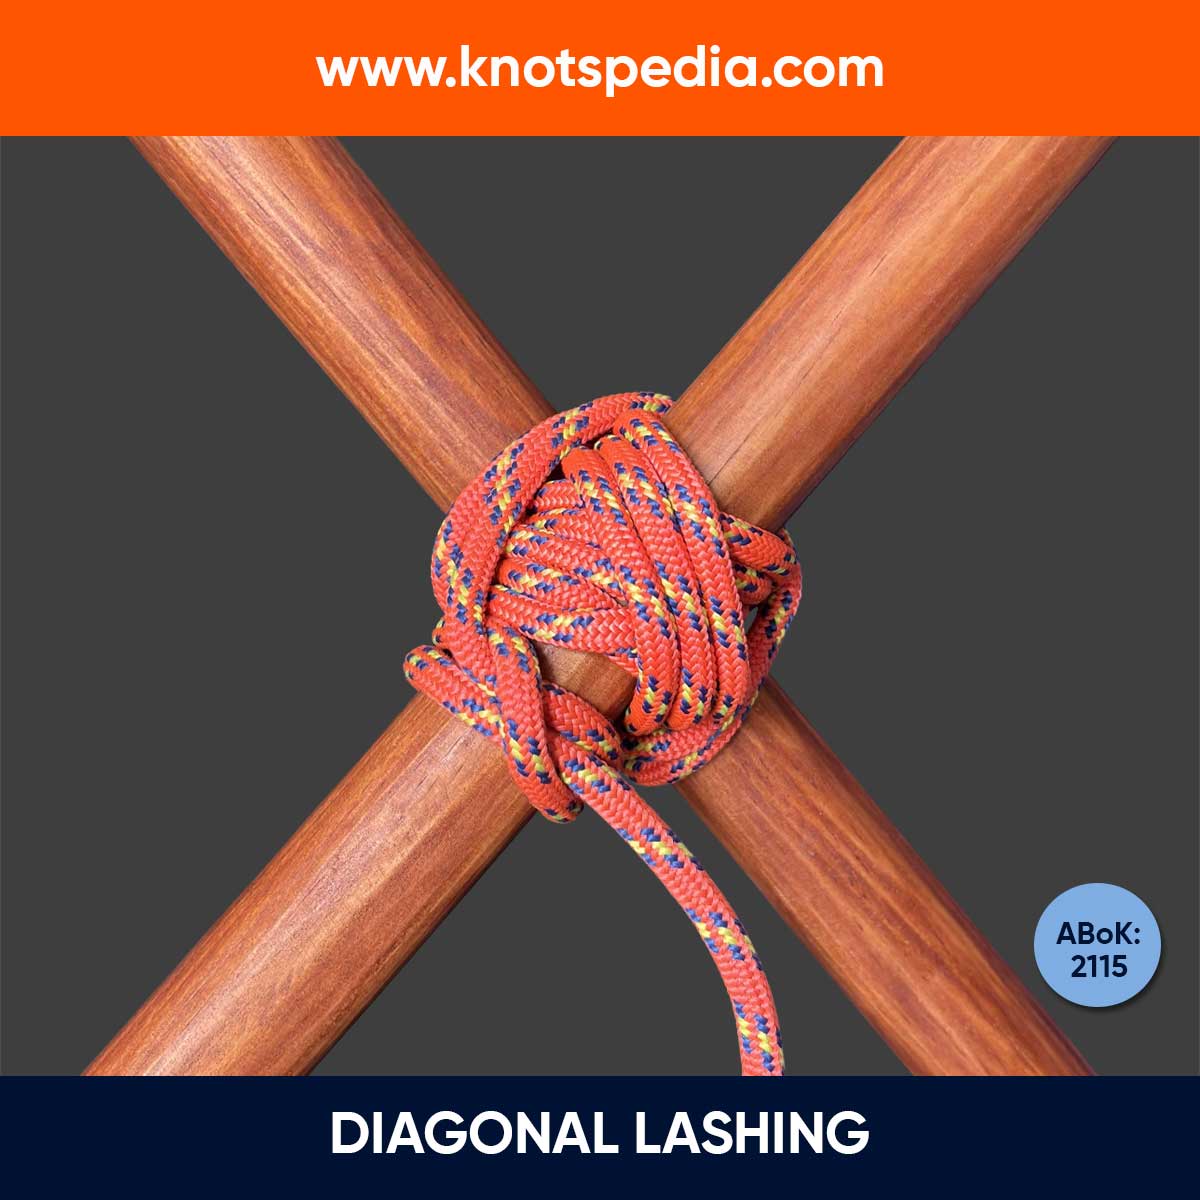
Diagonal Lashing
The Diagonal Lashing Knot (ABoK #2115) secures two poles at an angle (45-90 degrees). It includes a Timber Hitch, wraps, frapping turns, and a Clove Hitch.
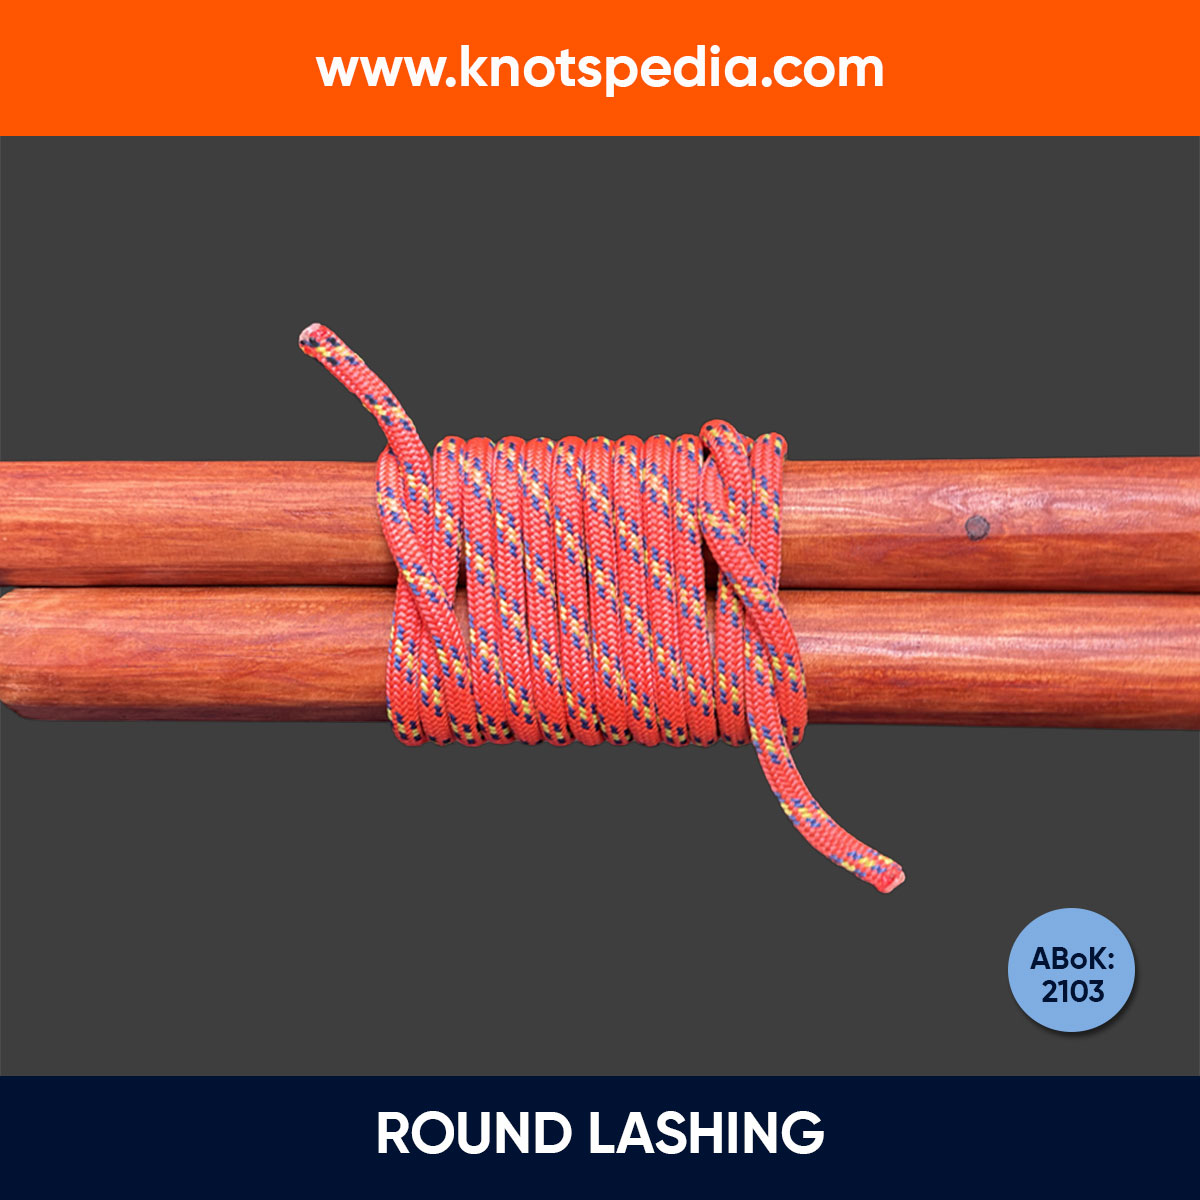
Round Lashing
The Round Lashing (ABoK #2103) is used to join two poles together. It's simple and helps extend the length of poles for pioneering or build flagpoles.
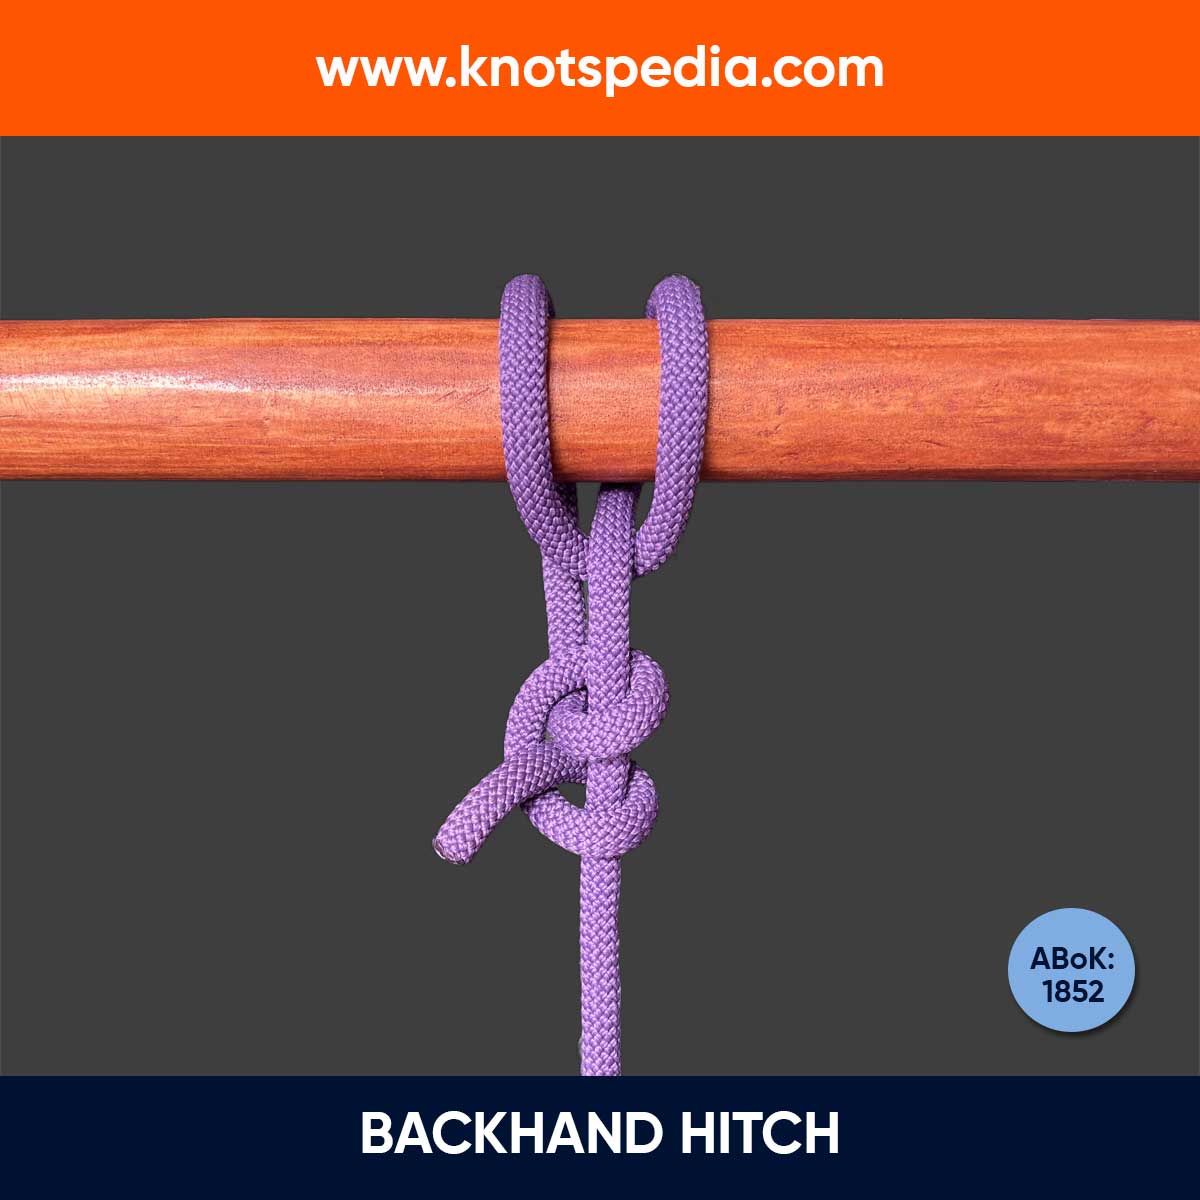
Backhand Hitch
The Backhand Hitch is a strong knot featuring a Munter Hitch core secured with two Half Hitches. It’s easy to tie, untie under load, and perfect for hauling.
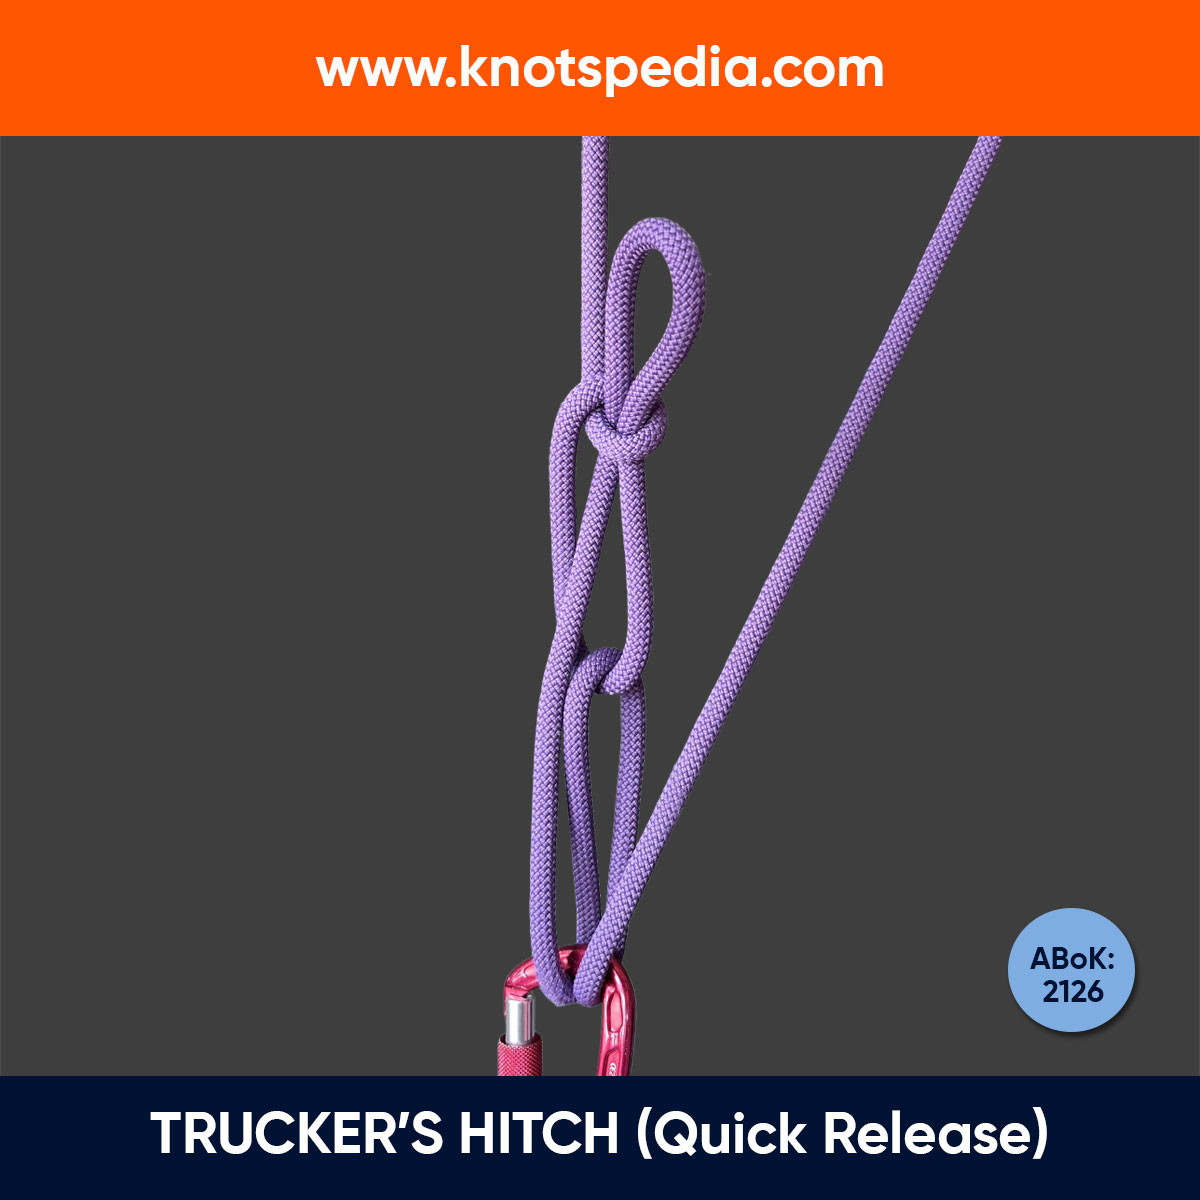
Quick Release Trucker’s Hitch
The Quick Release Trucker’s Hitch secures loads with strong tension and a quick-release loop. Best for trucks and trailers—works well with natural ropes.
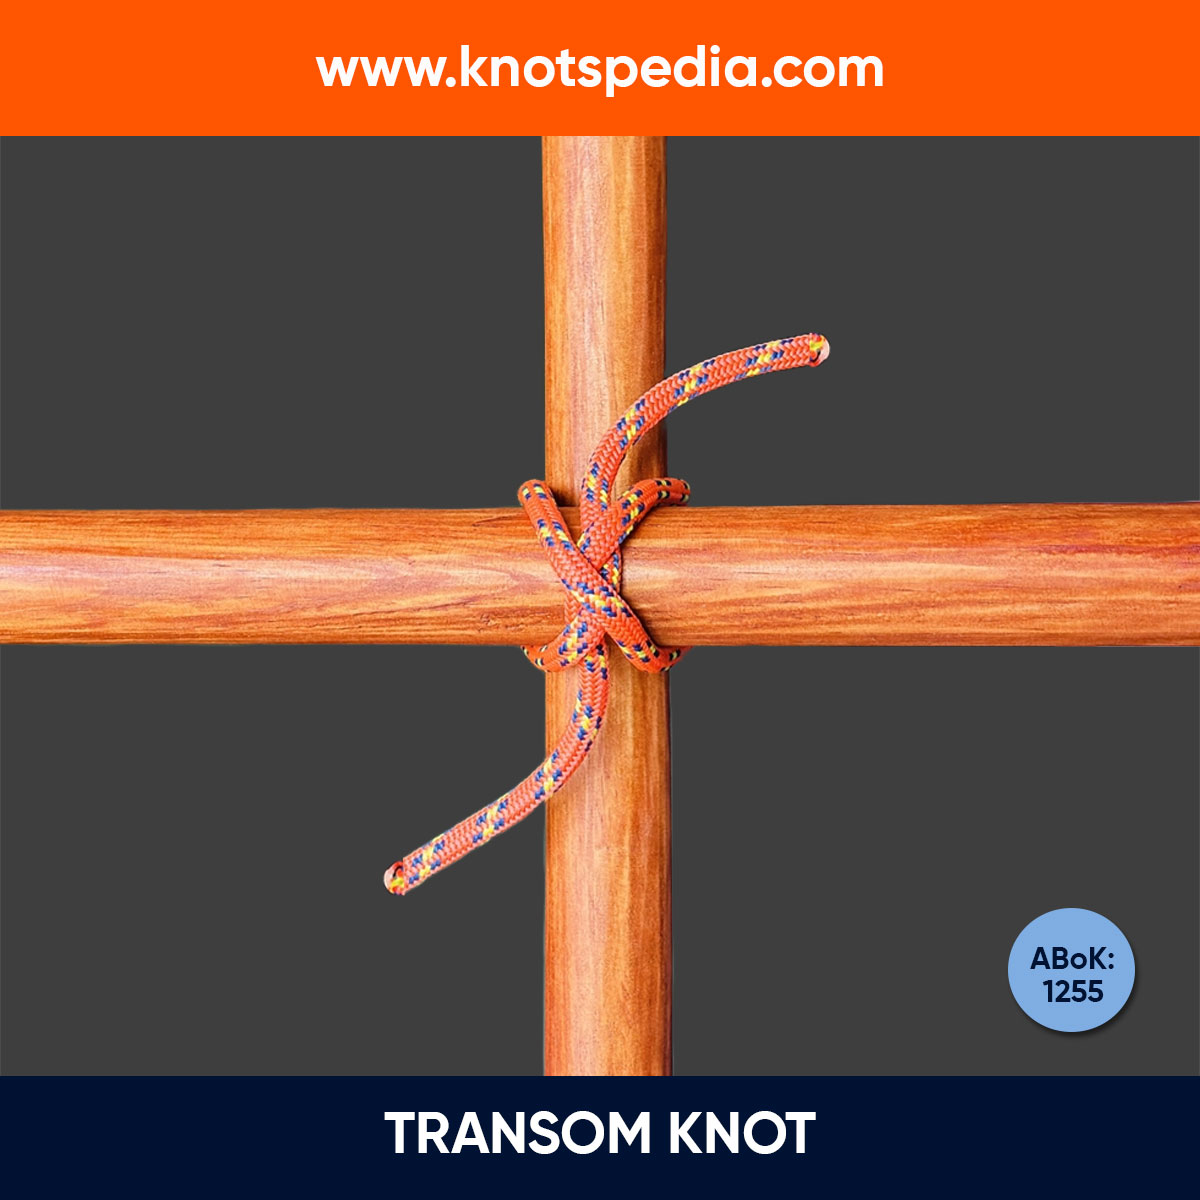
Transom Knot
The Transom Knot is a lashing knot used to secure two spars at right angle. It's great for camping, gardening, and DIY projects but not ideal for heavy loads.
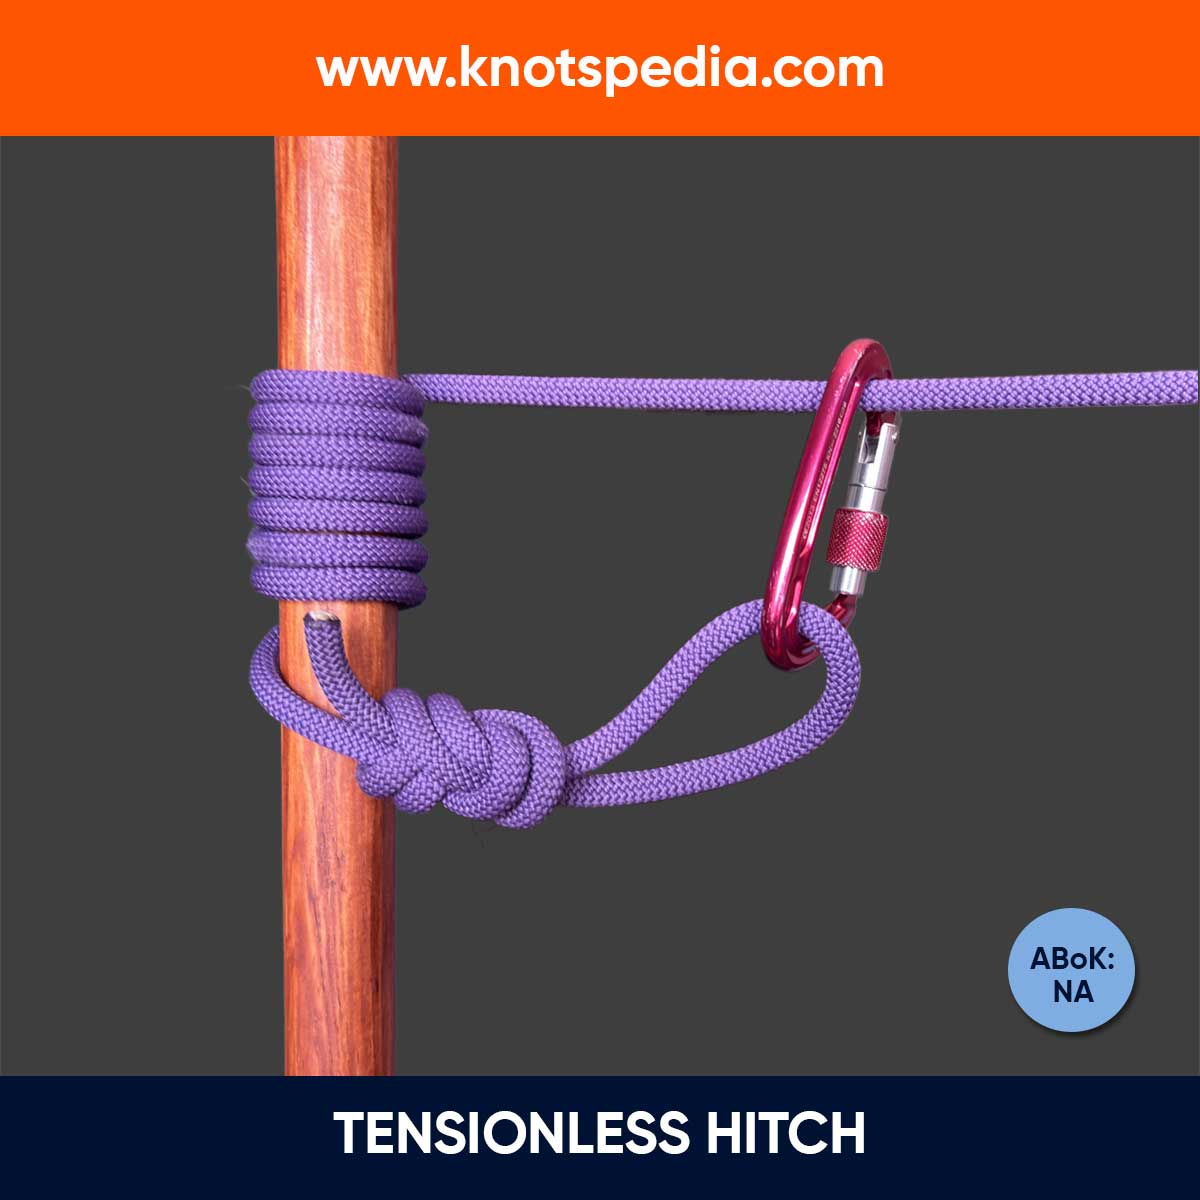
Tensionless Hitch
The Tensionless Hitch is a strong anchor knot that secures a rope using friction wraps, retaining its full strength. Ideal for rescue, climbing, and rigging.
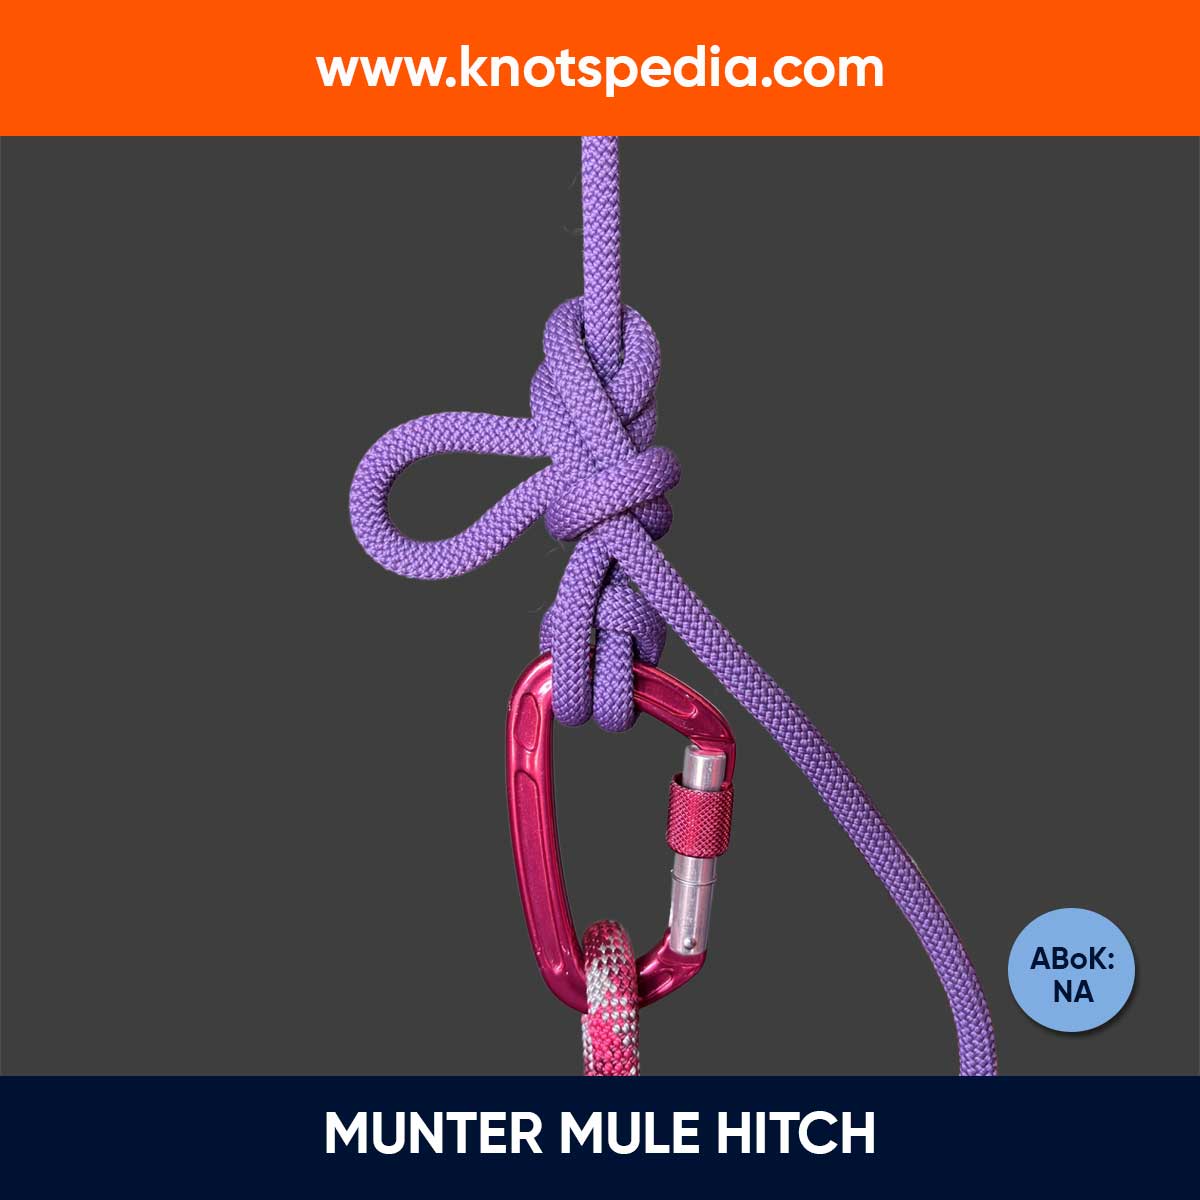
Munter Mule Hitch
The Munter Mule Hitch is a secure, releasable tie-off combining a Munter Hitch and Mule Knot, ideal for belay escapes, knot passing, and rescue load transfers.
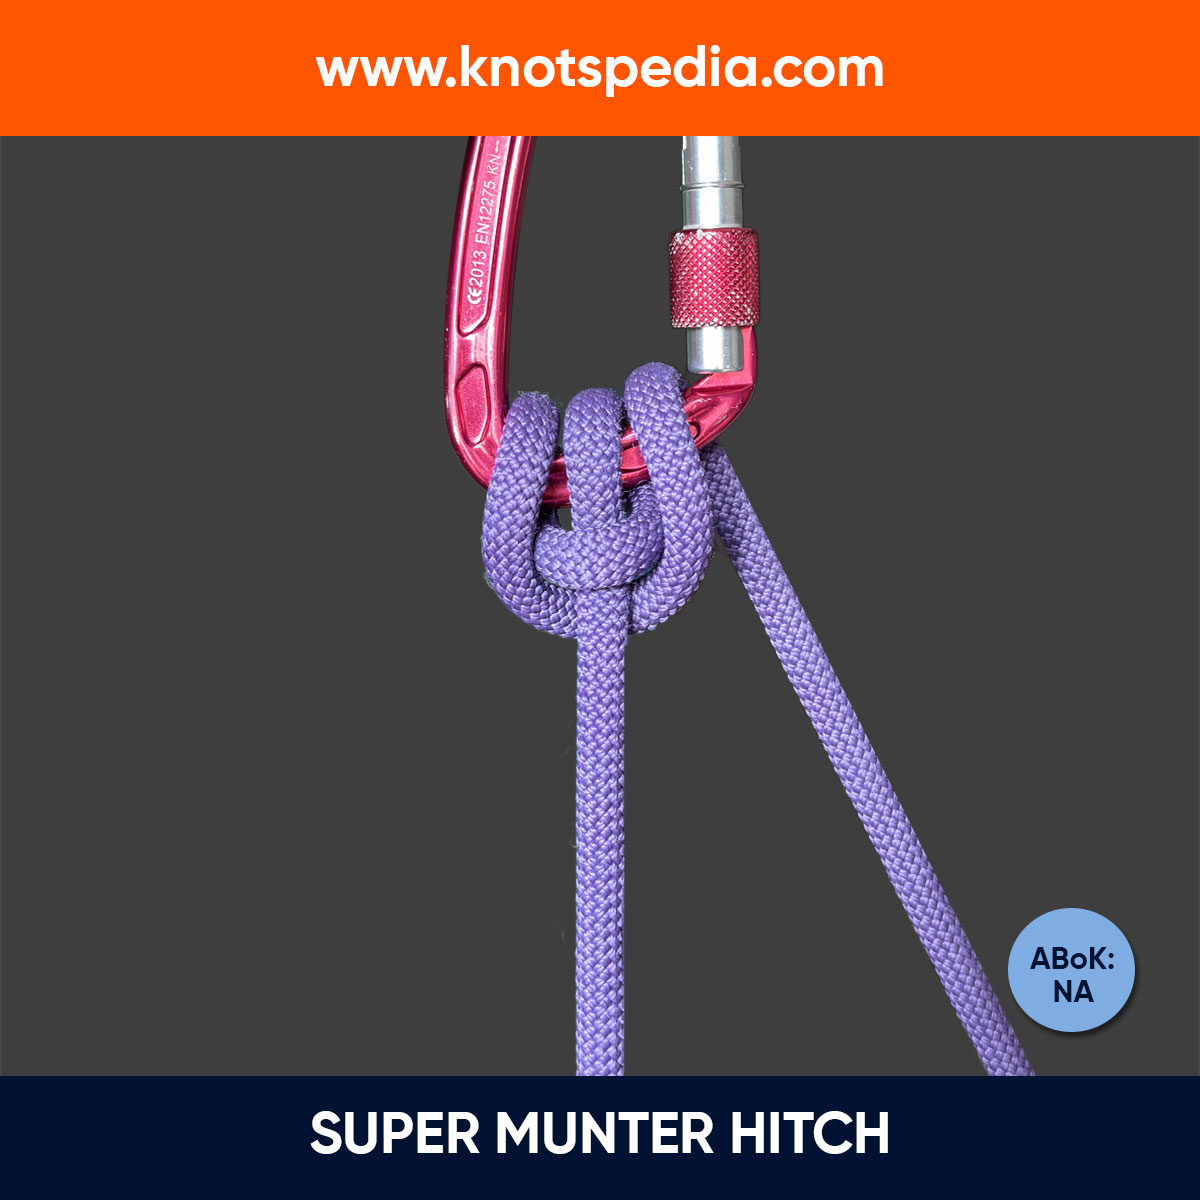
Super Munter Hitch
The Super Munter Hitch adds extra friction to the Munter Hitch, allowing smooth and controlled descent of heavy loads. Ideal for rescue and rappelling.
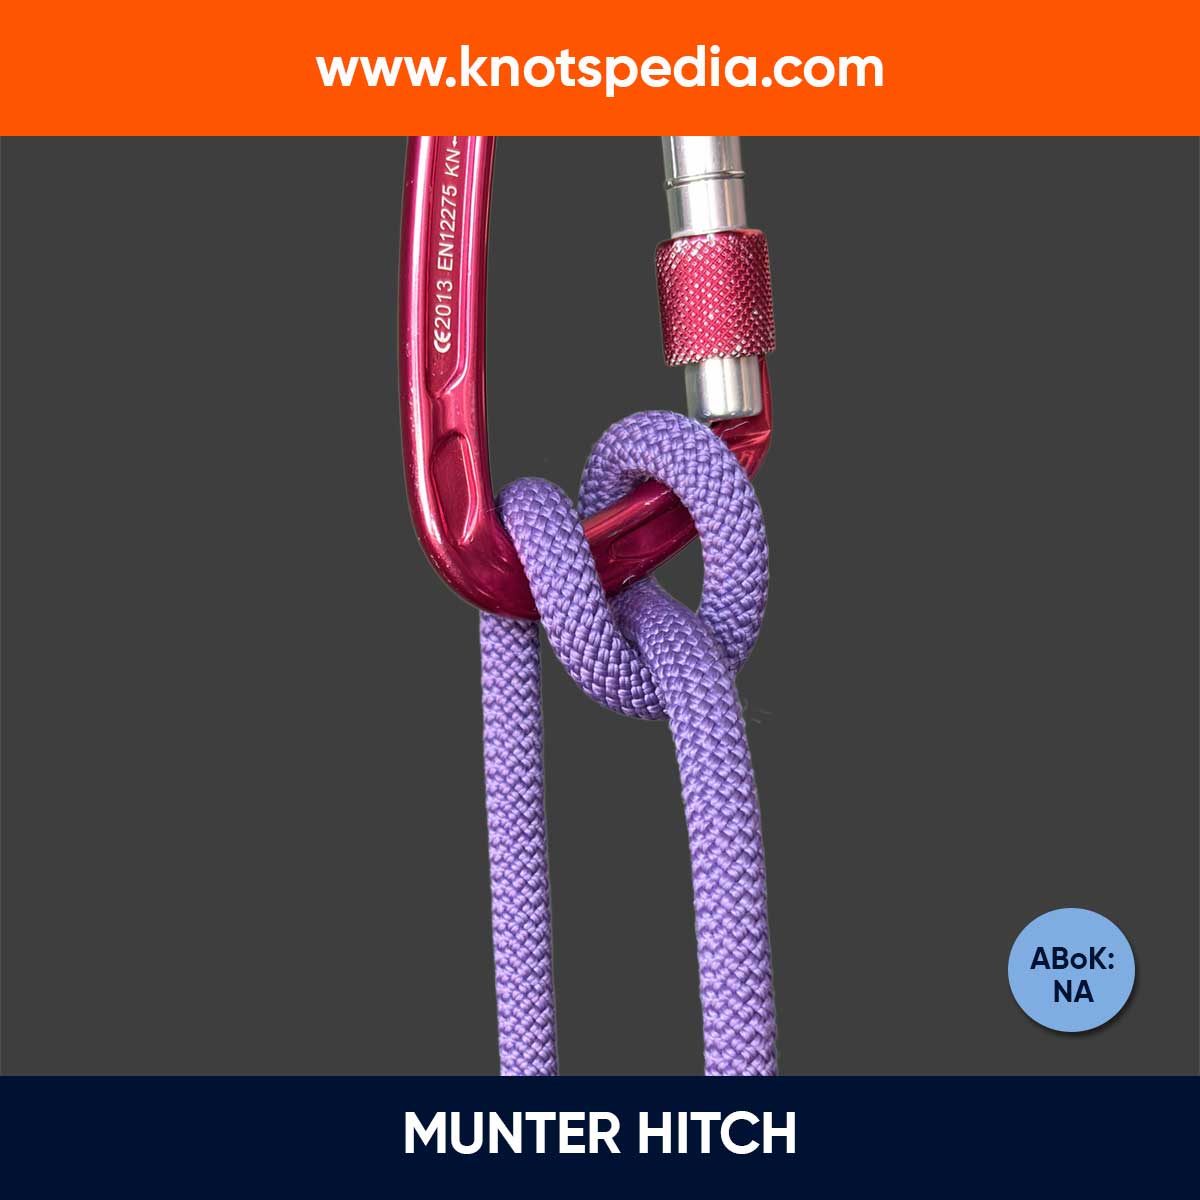
Munter Hitch
The Munter Hitch is a versatile knot for belaying, rappelling, and emergency descents without a belay device. It works both ways, but twists ropes.
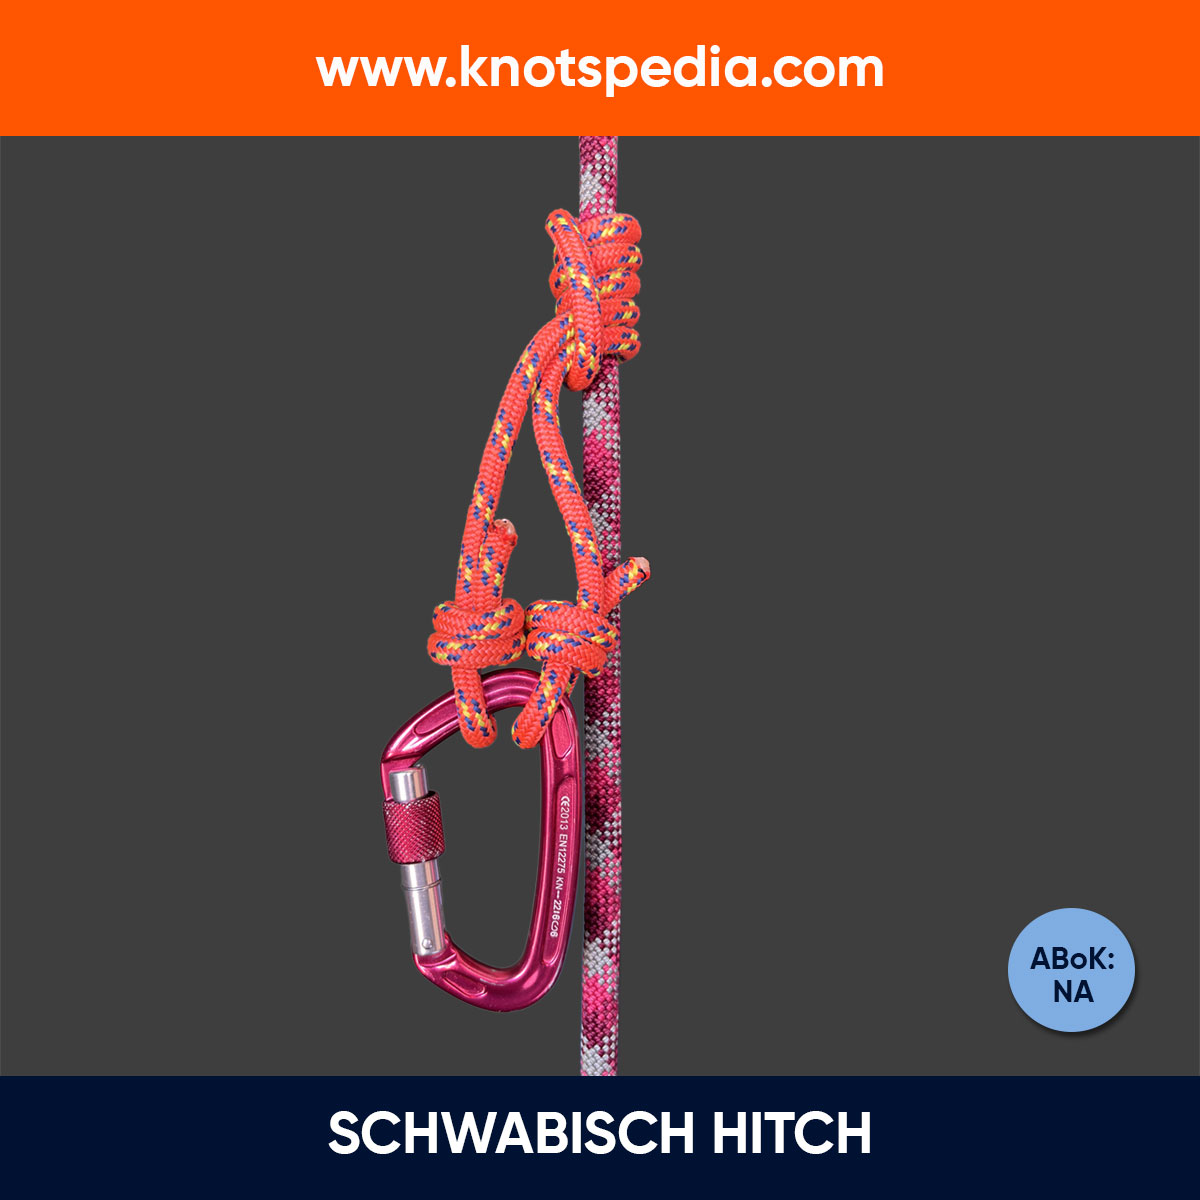
Schwabisch Hitch
The Schwabisch Hitch is a directional friction hitch used in climbing and arborist work. It grips the rope under load and releases smoothly when unloaded.
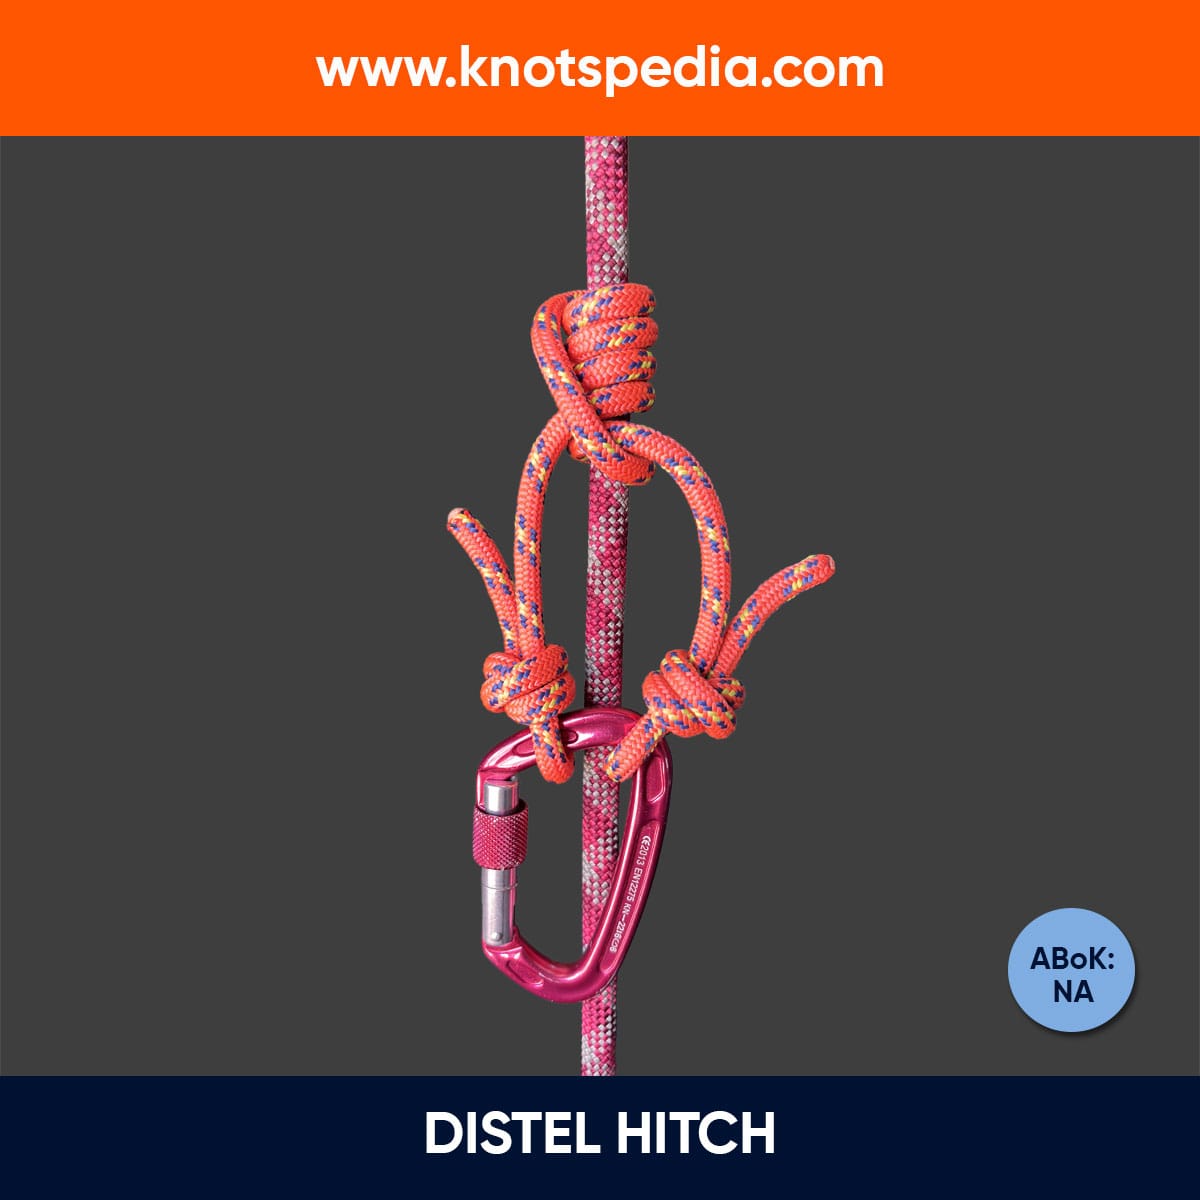
Distel Hitch
The Distel Hitch is a slide-and-grip knot used by arborist to ascend or descend the climbing rope. It's quick, provides strong grip, and smooth adjustment.
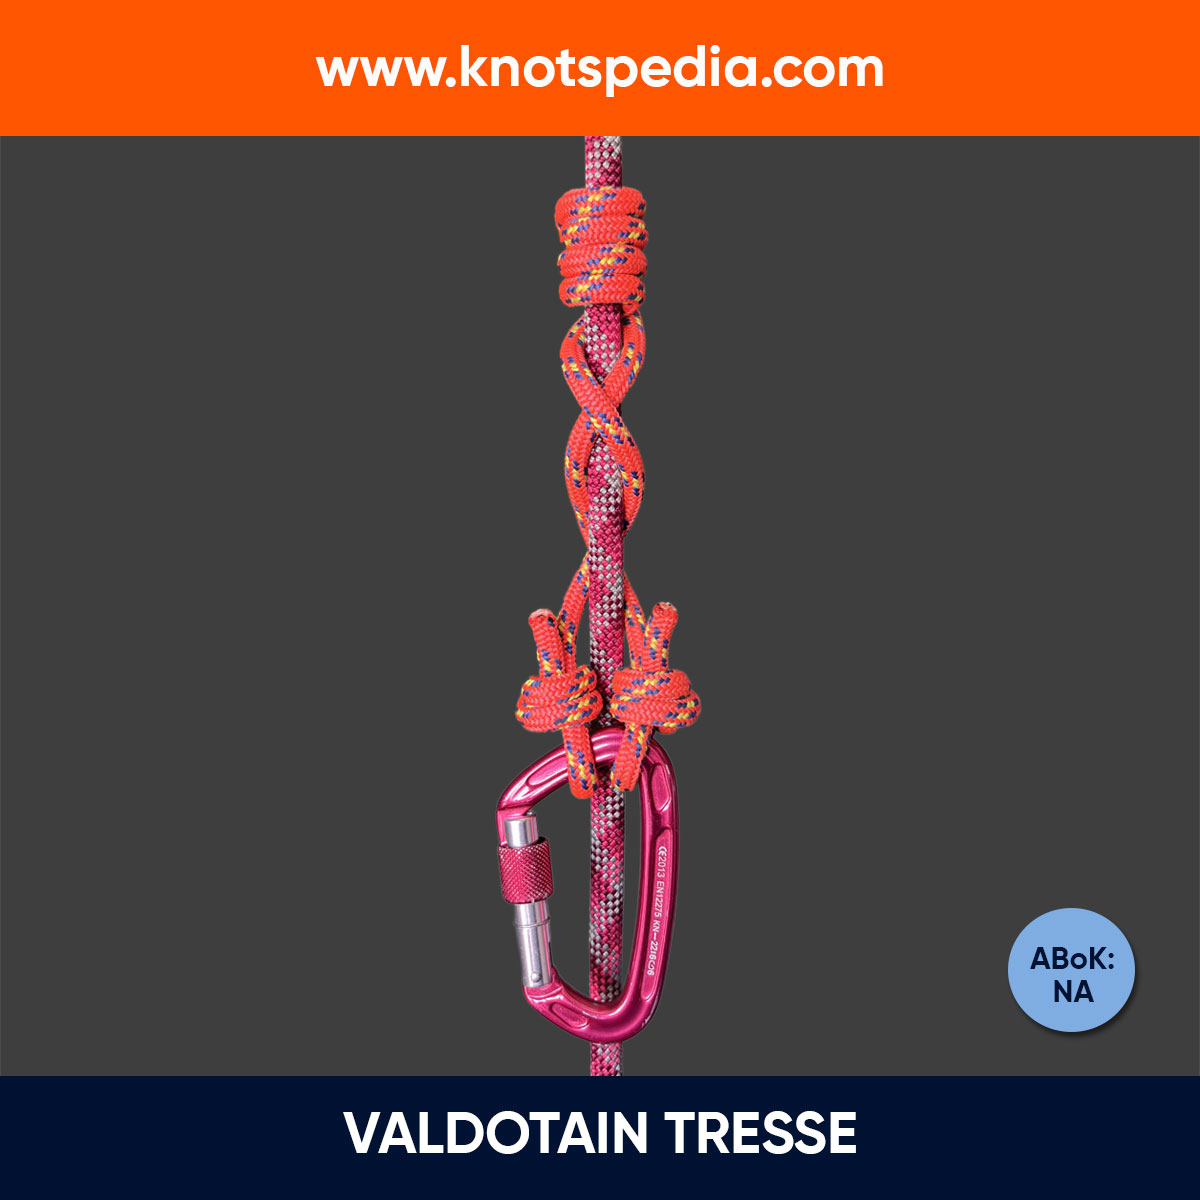
Valdotain Tresse
The Valdotain Tresse (VT) is a friction hitch used in climbing and arborist work. It grips well with minimal sit-back and is often paired with a micro pulley.
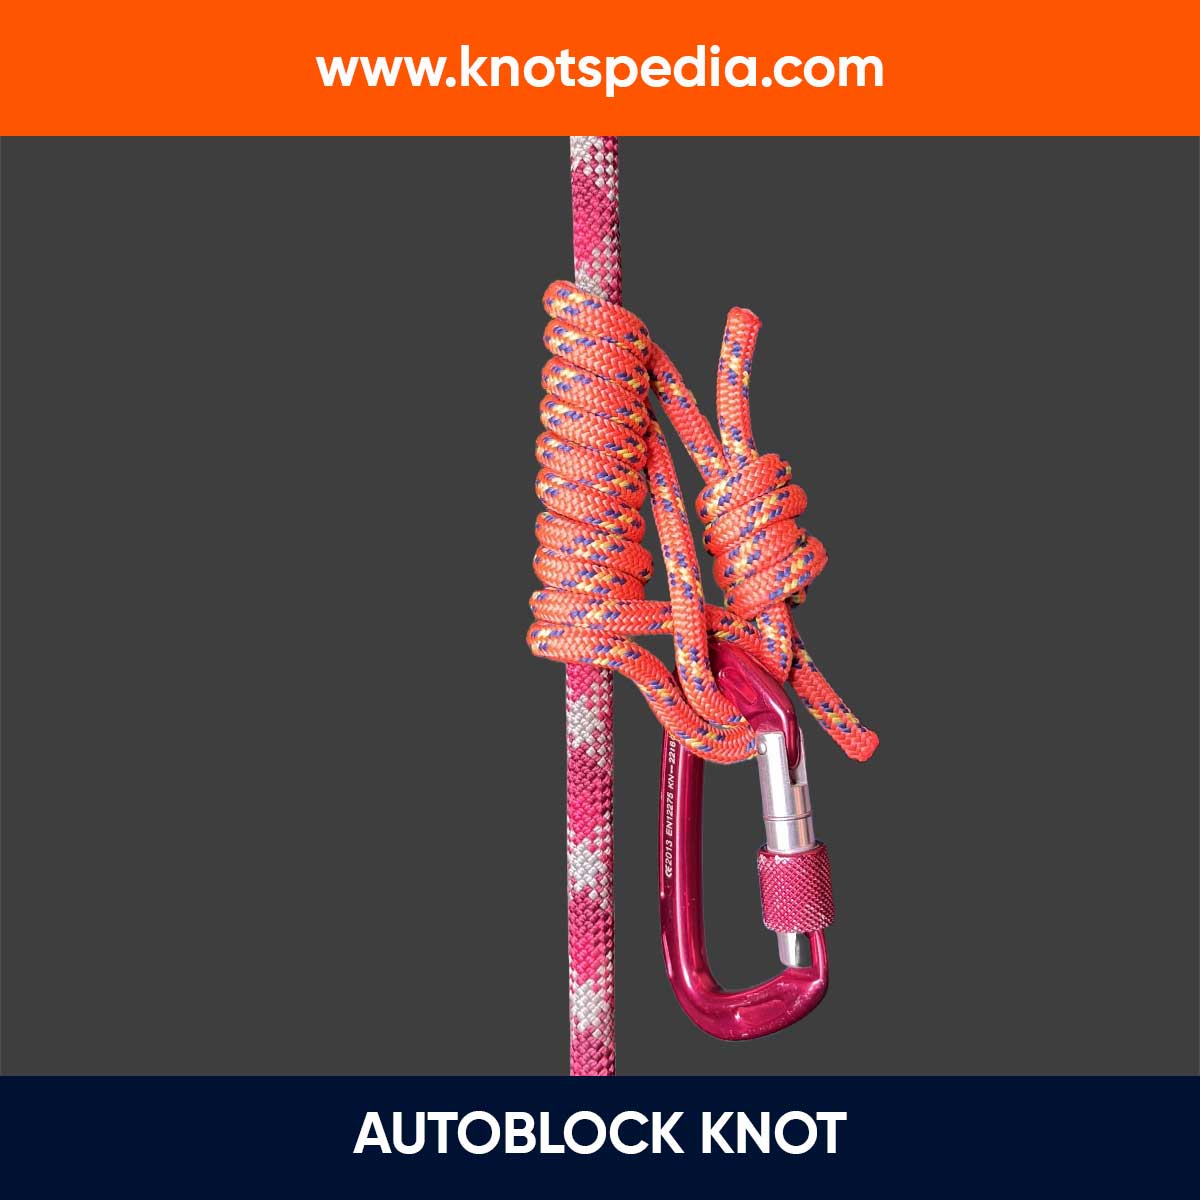
Autoblock Knot
The Autoblock knot, also called French Prusik knot, is a friction hitch used as a backup when rappelling. It grips under load and releases even when loaded.
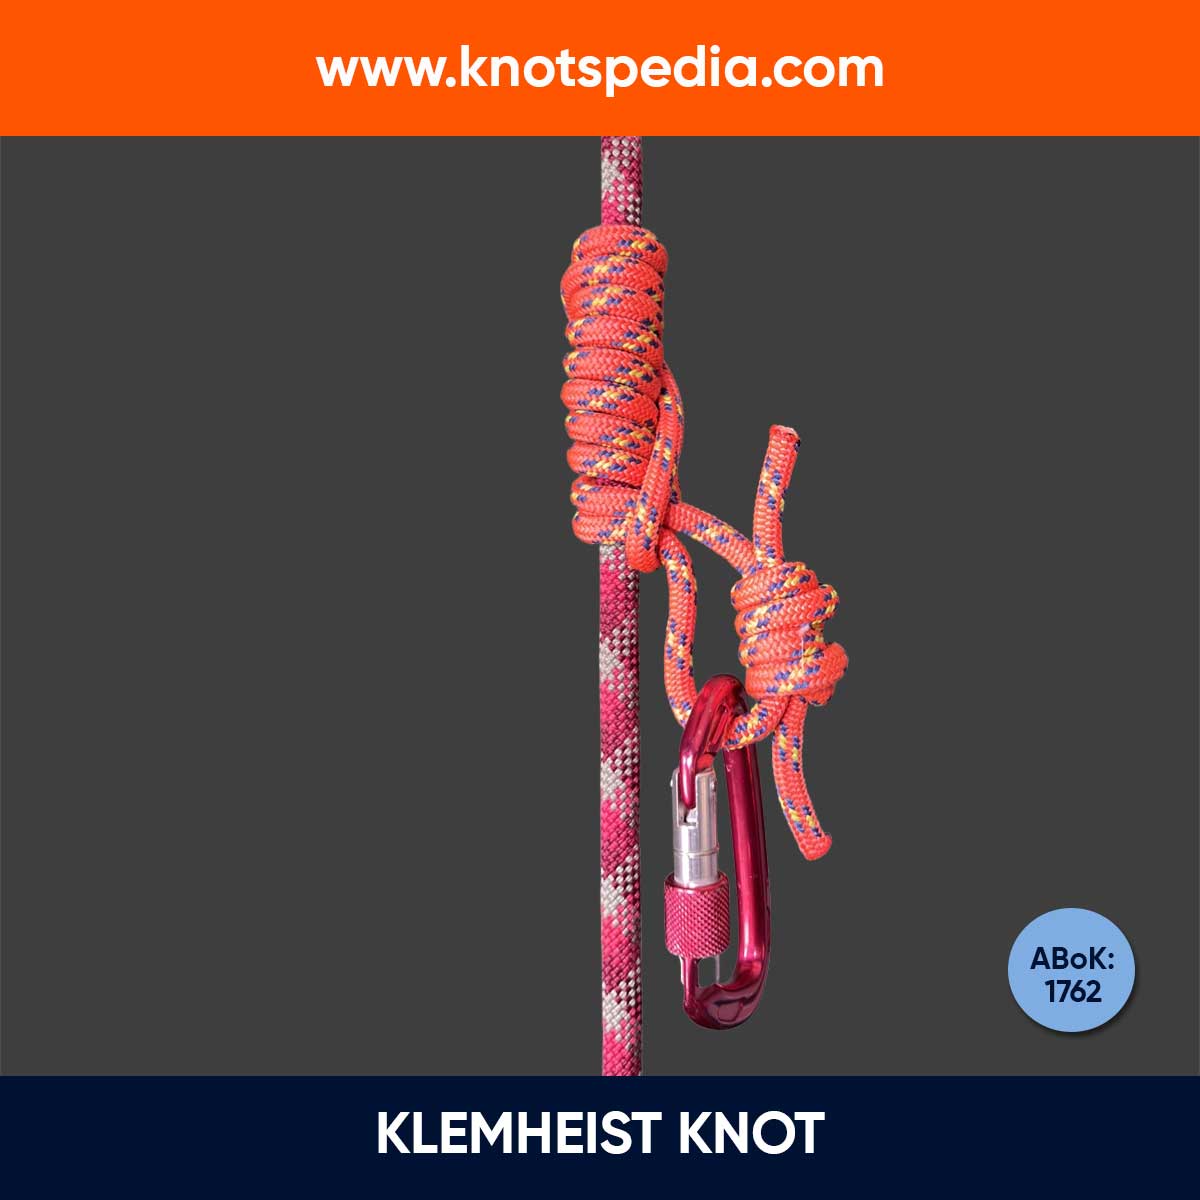
Klemheist Knot
The Klemheist Knot is a slide-and-grip knot used for climbing and rappelling. It grips in one direction and is easy to release, ideal for emergencies.
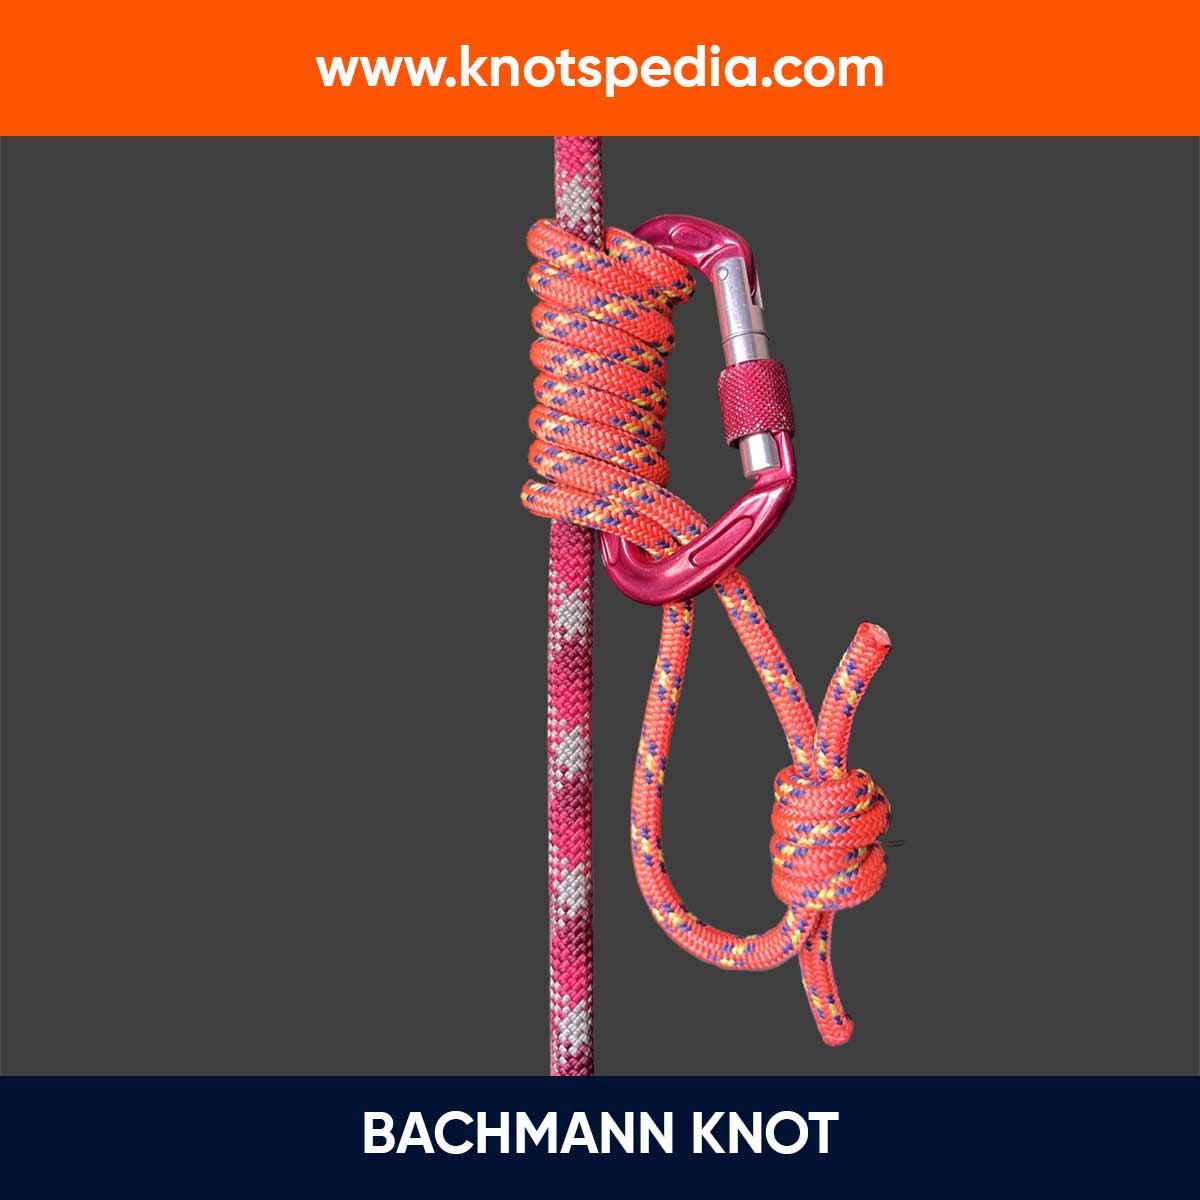
Bachmann Knot
The Bachmann Knot is a slide-and-grip friction knot using a carabiner, ideal for climbing and rescue, allowing quick adjustment up and down a rope.

Prusik Knot
The Prusik Knot (ABoK #1763) is a friction hitch used for climbing and rappelling. It slides when unweighted but locks under load, making it a reliable knot.
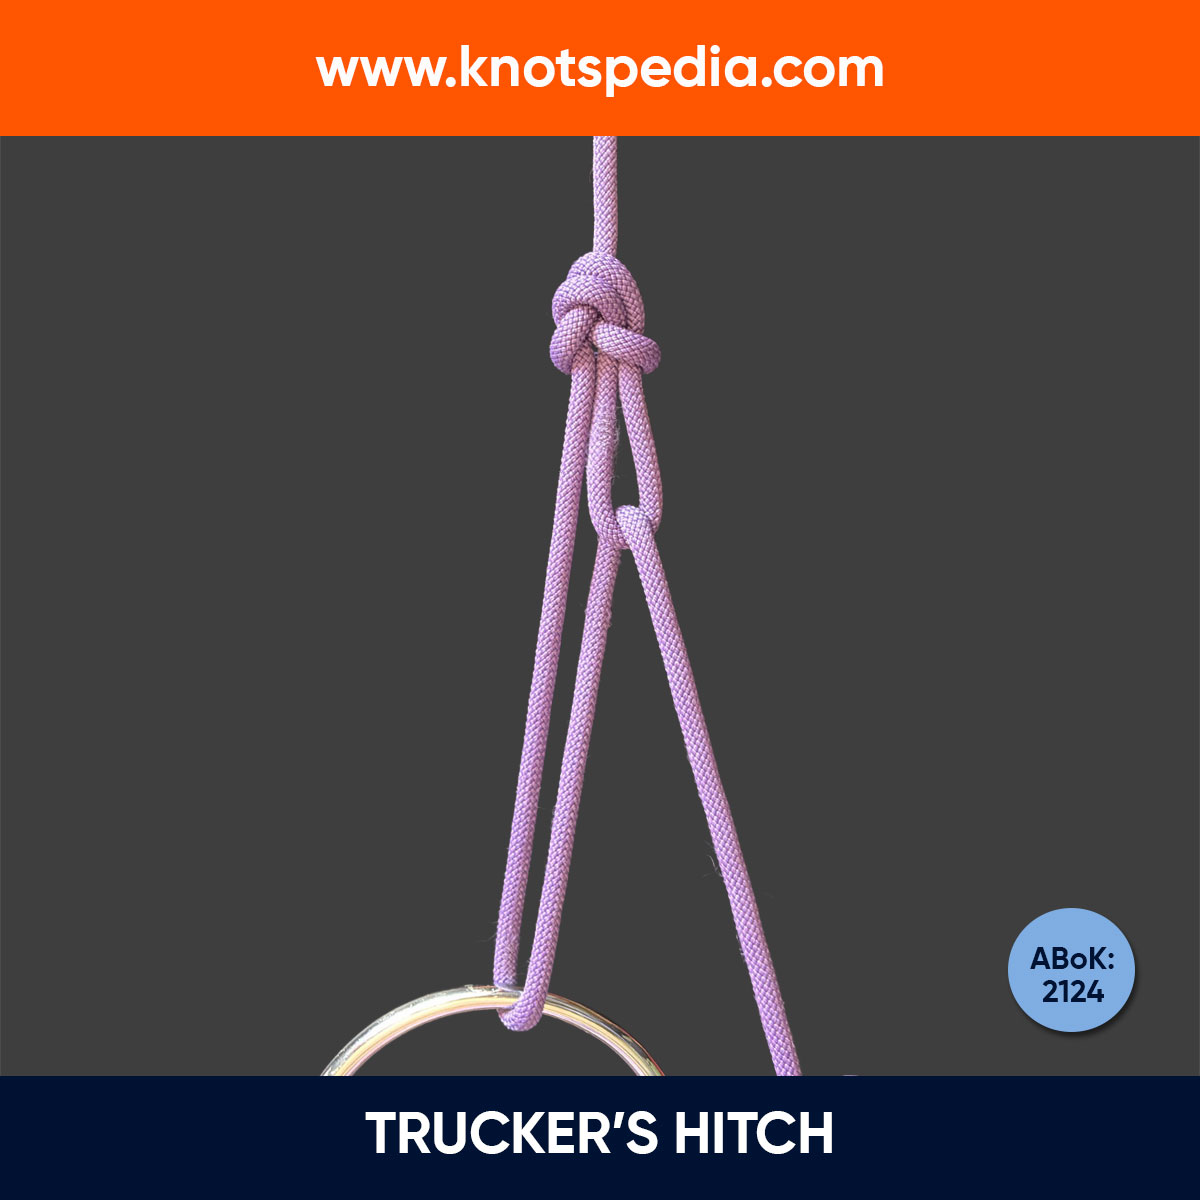
Trucker’s Hitch
The Trucker’s Hitch Knot (ABoK #2124) is used to secure loads. It provides 3:1 mechanical advantage, making it easy to tighten and secure gear, tarps, and more!
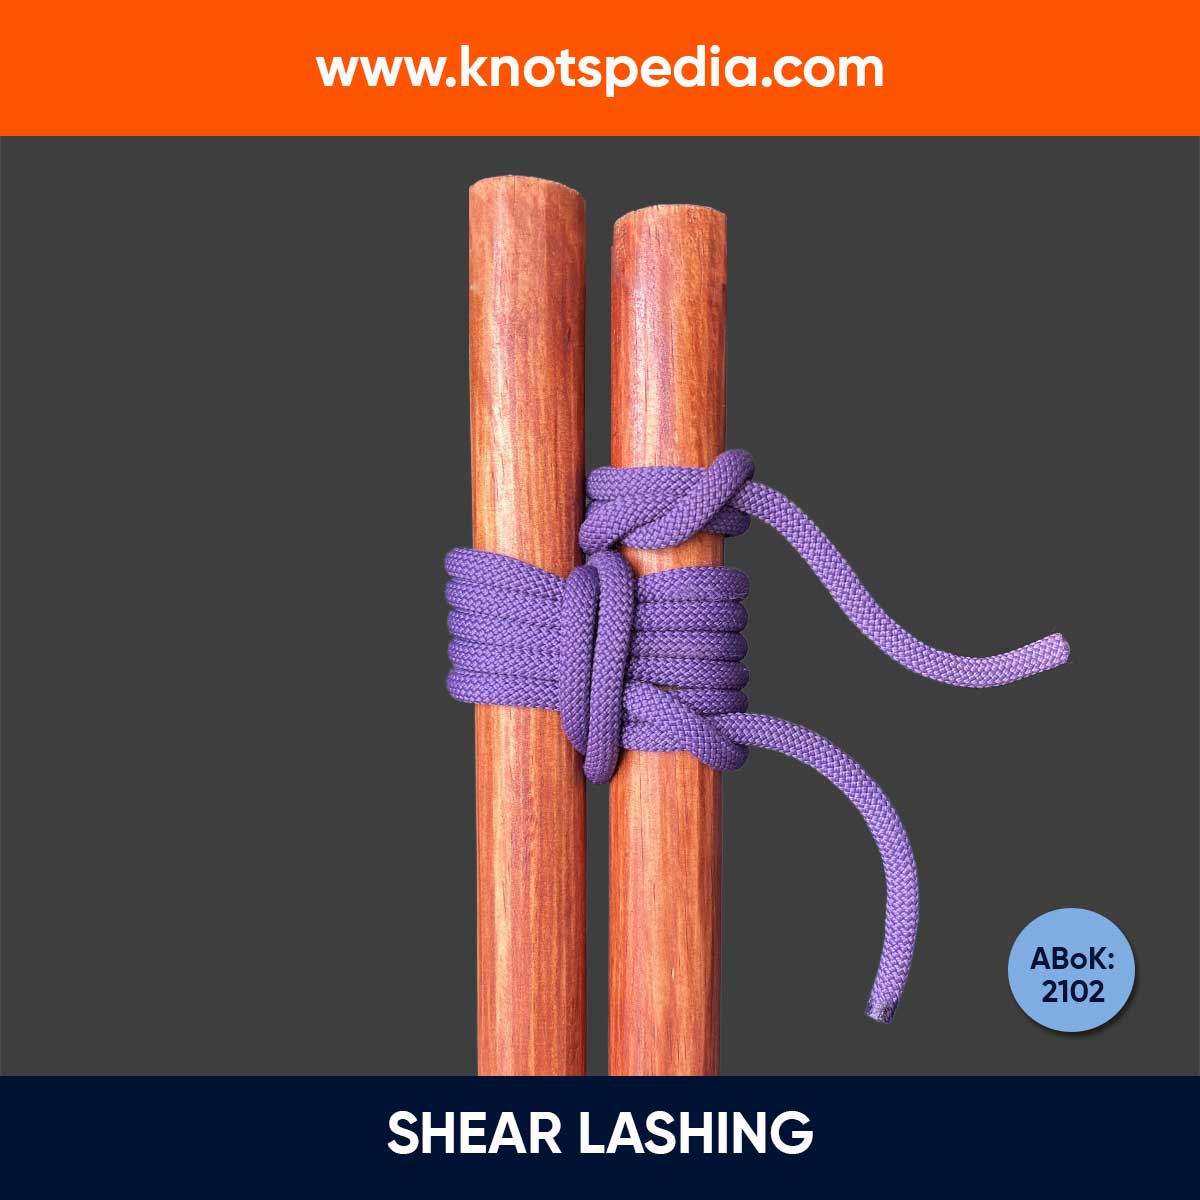
Shear Lashing
The Shear Lashing ties two poles together to form A-frame legs, ideal for lifting, supporting weight, or reinforcing weak poles in outdoor projects.
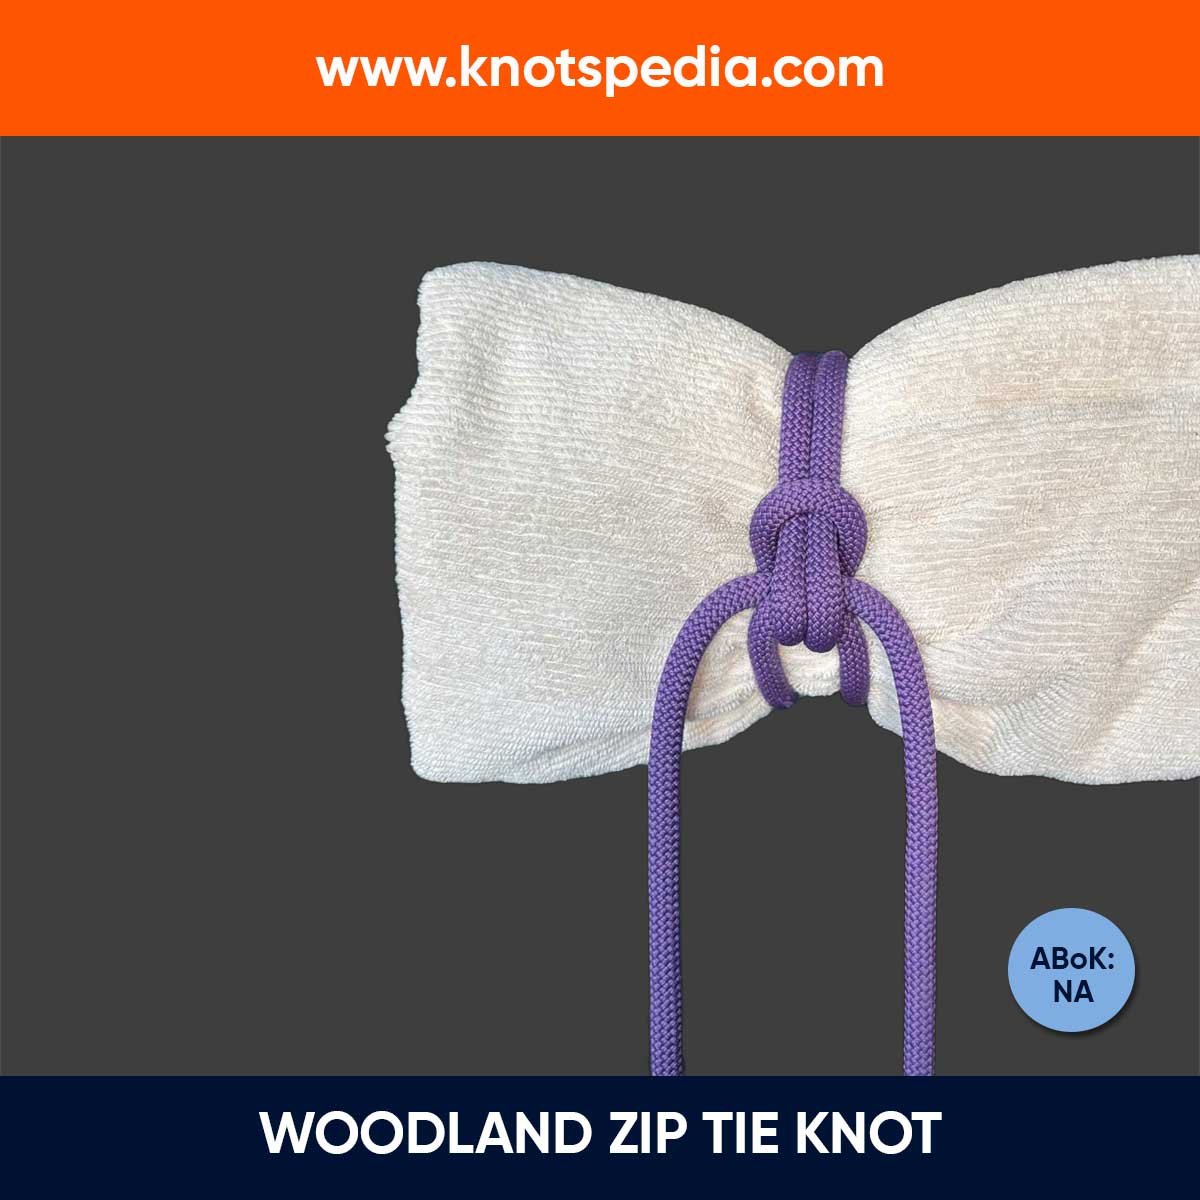
Woodland Zip Tie Knot
The Woodland Zip Tie Knot is a binding knot used to bundle gear like sleeping bags or tarps, offering a quick-release and secure cinching function.
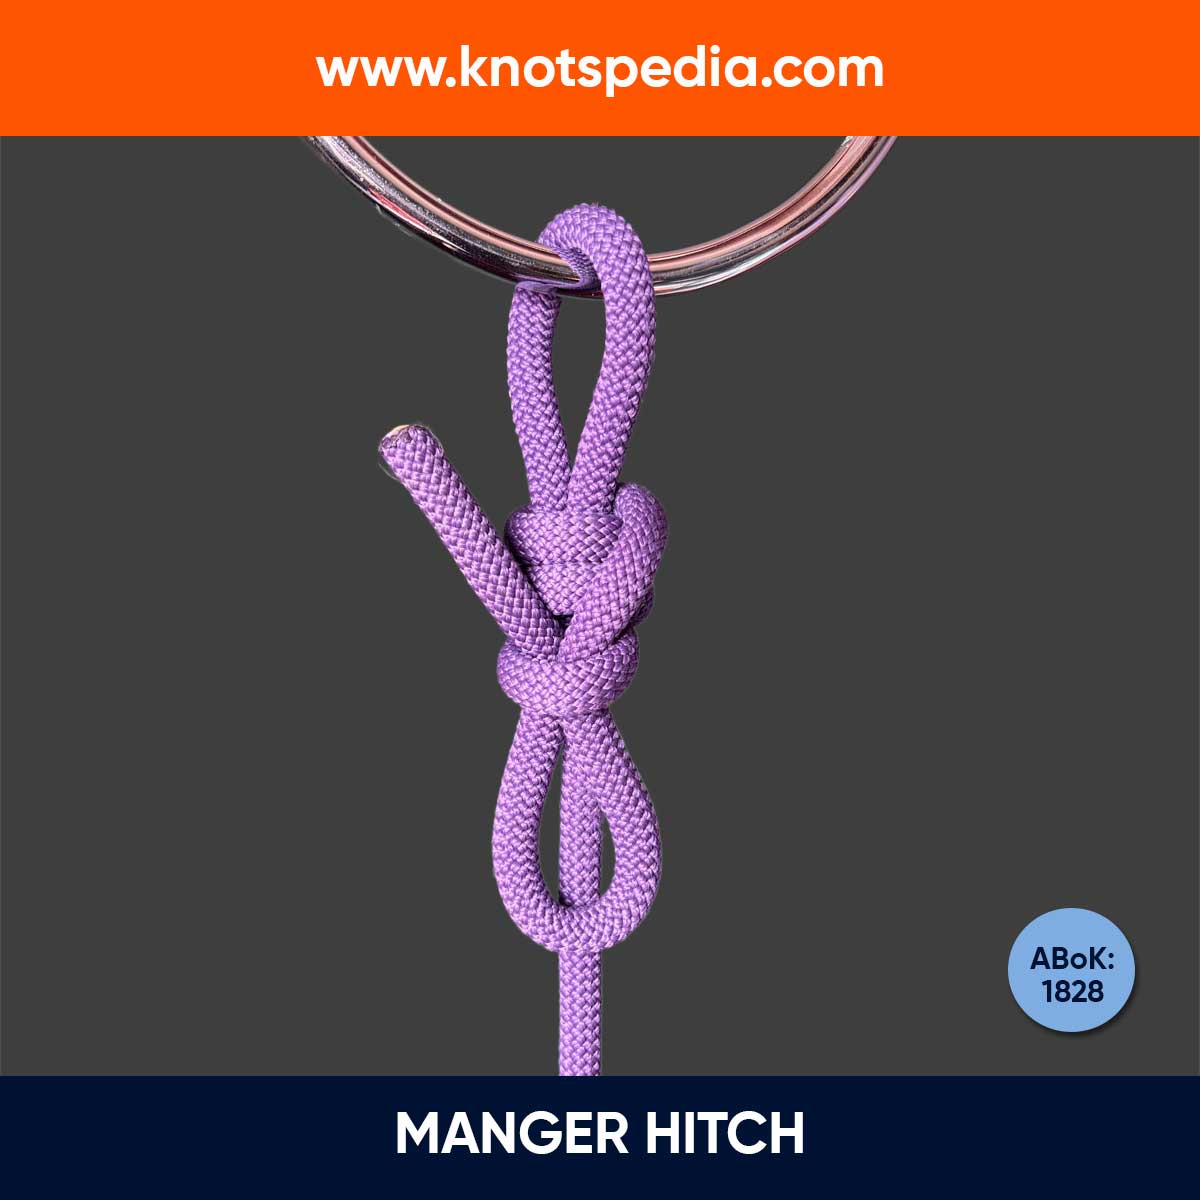
Manger Hitch
The Manger Hitch (ABoK #1828) is a quick release knot used to tie animals securely. It strong, doesn't jam when wet, and is perfect for farms or outdoor tasks.

Tarbuck Knot
The Tarbuck Knot is a slide and grip knot that holds under load, ideal for tarps and ridgelines, but not recommended for climbing with modern kernmantle ropes.
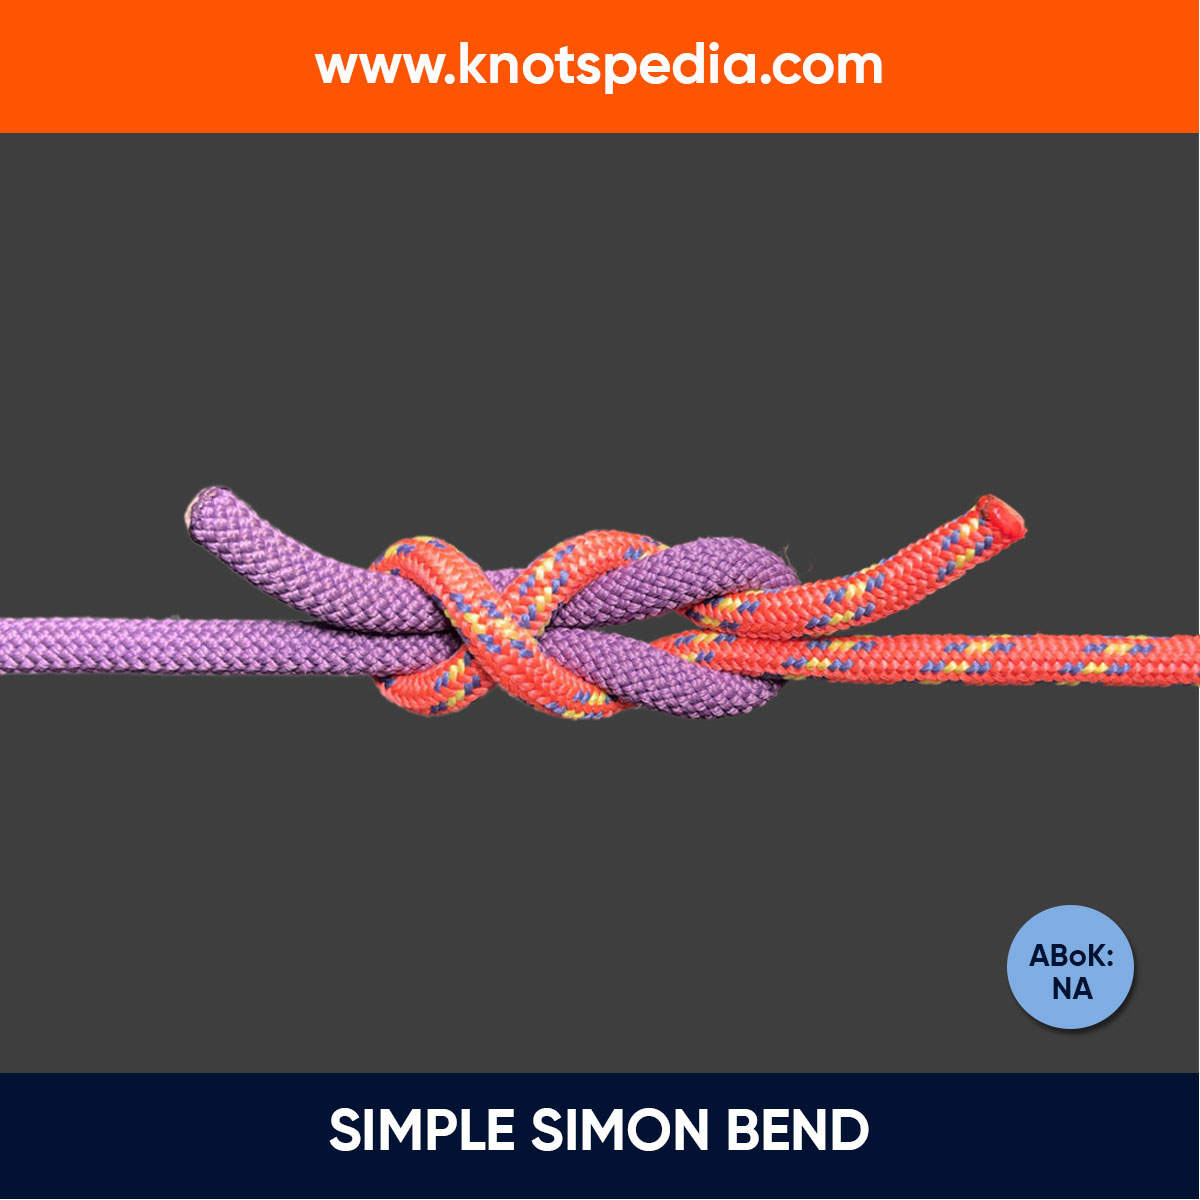
Simple Simon Bend
The Simple Simon Bend is a secure knot for joining slippery ropes, including those of different sizes. Learn how to tie its three variations.
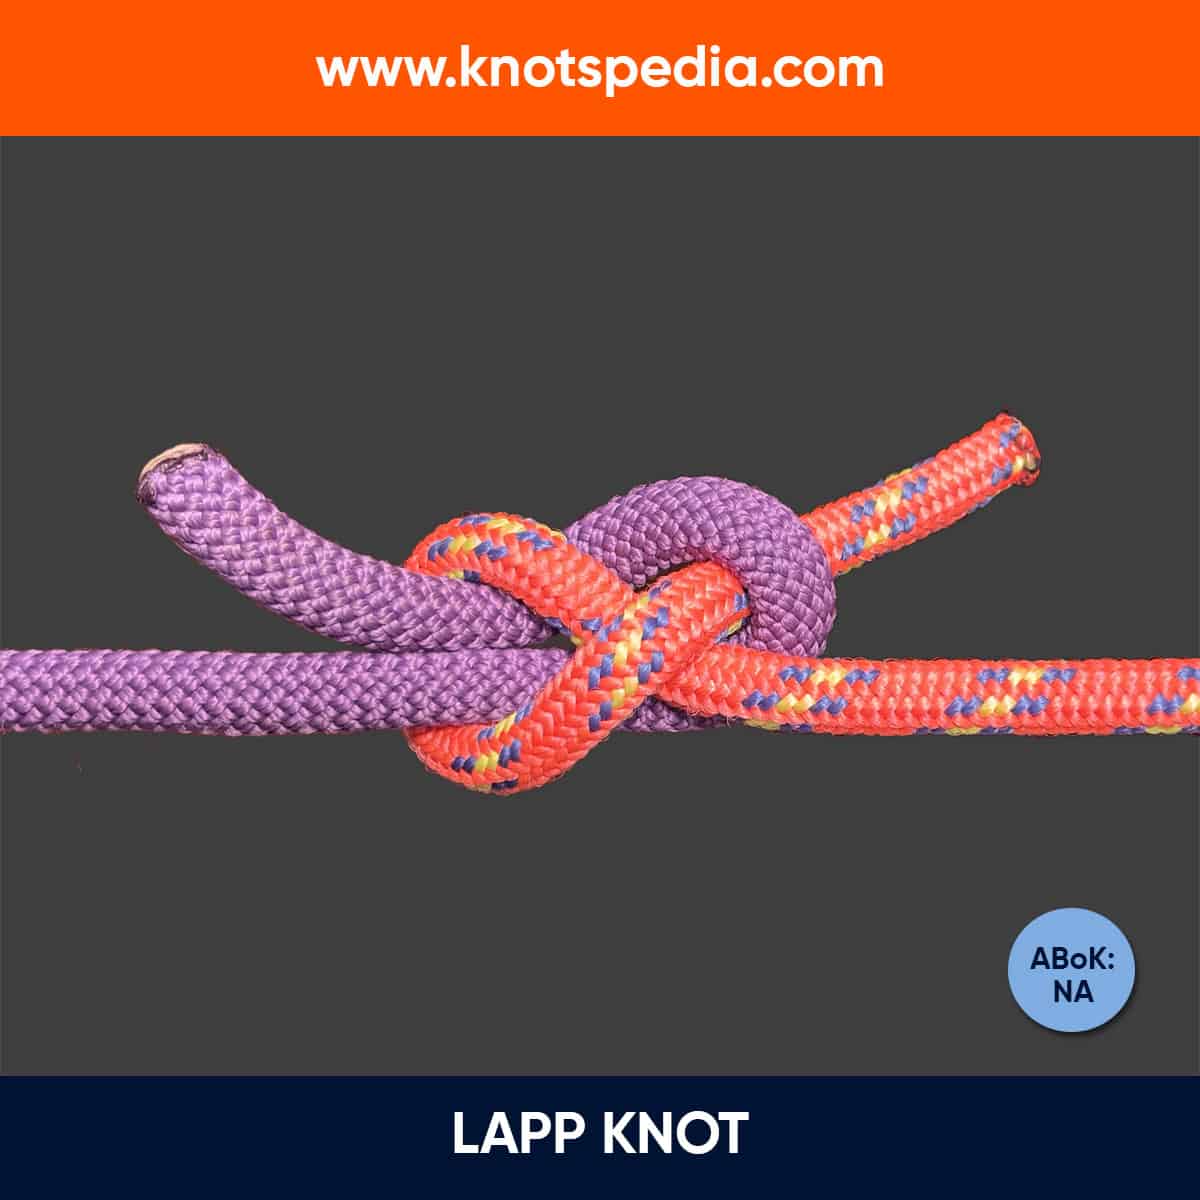
Lapp Knot
The Lapp Knot is a versatile knot used for joining ropes. Similar to the Sheet Bend but distinct, it can also serve as a loop or binding knot.
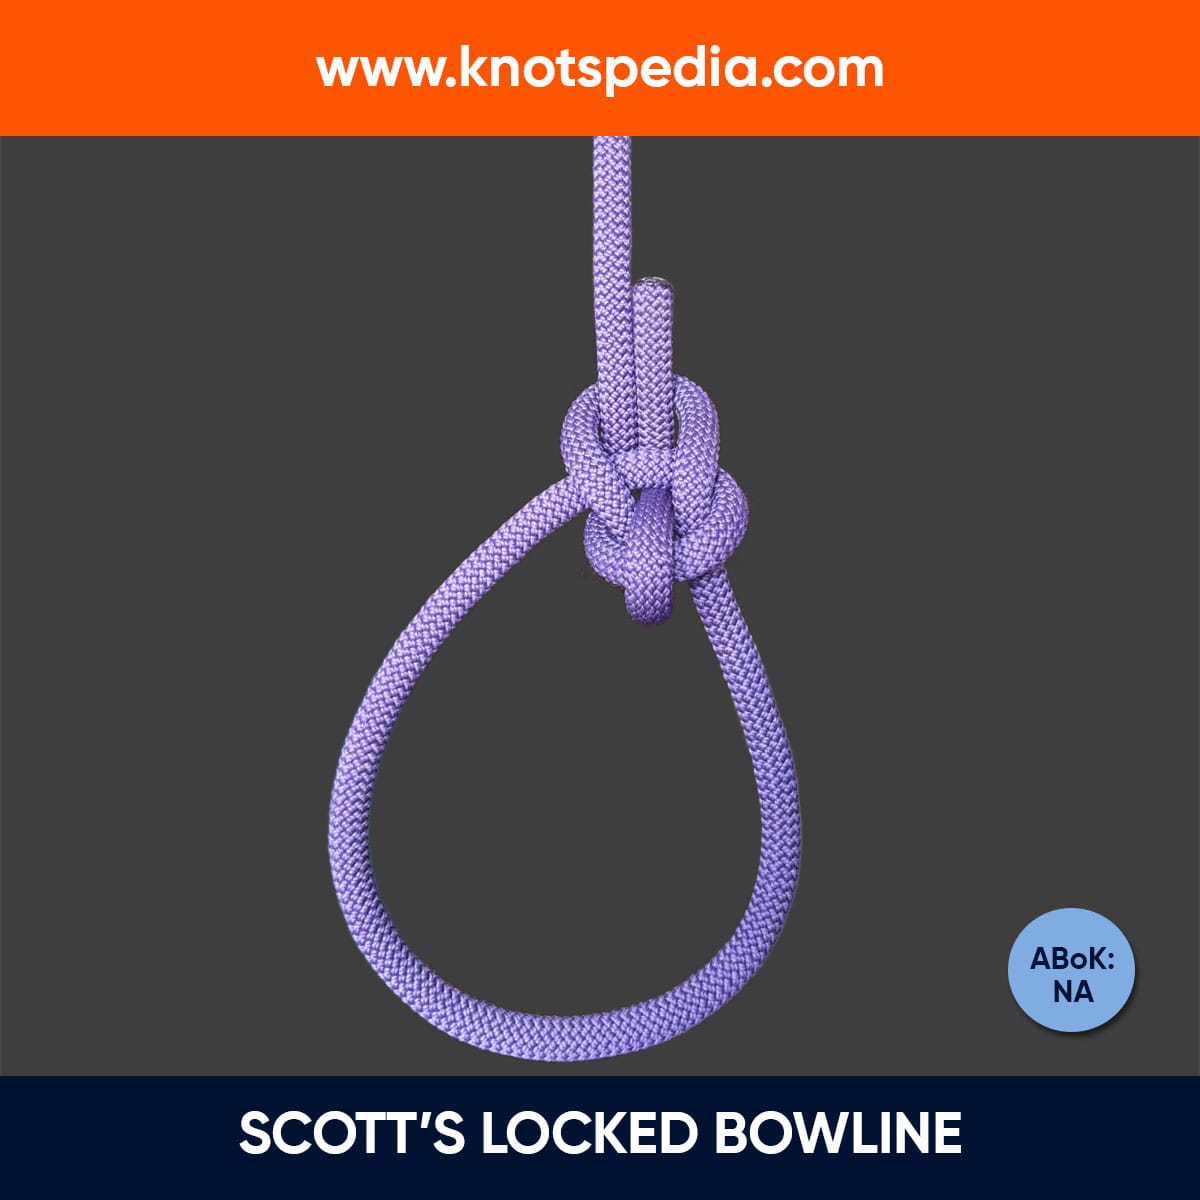
Scott’s Locked Bowline
The Scott’s Locked Bowline is a secure variation of the Bowline. Its locked tag end resists slipping, making it great for climbing, caving or securing loads.
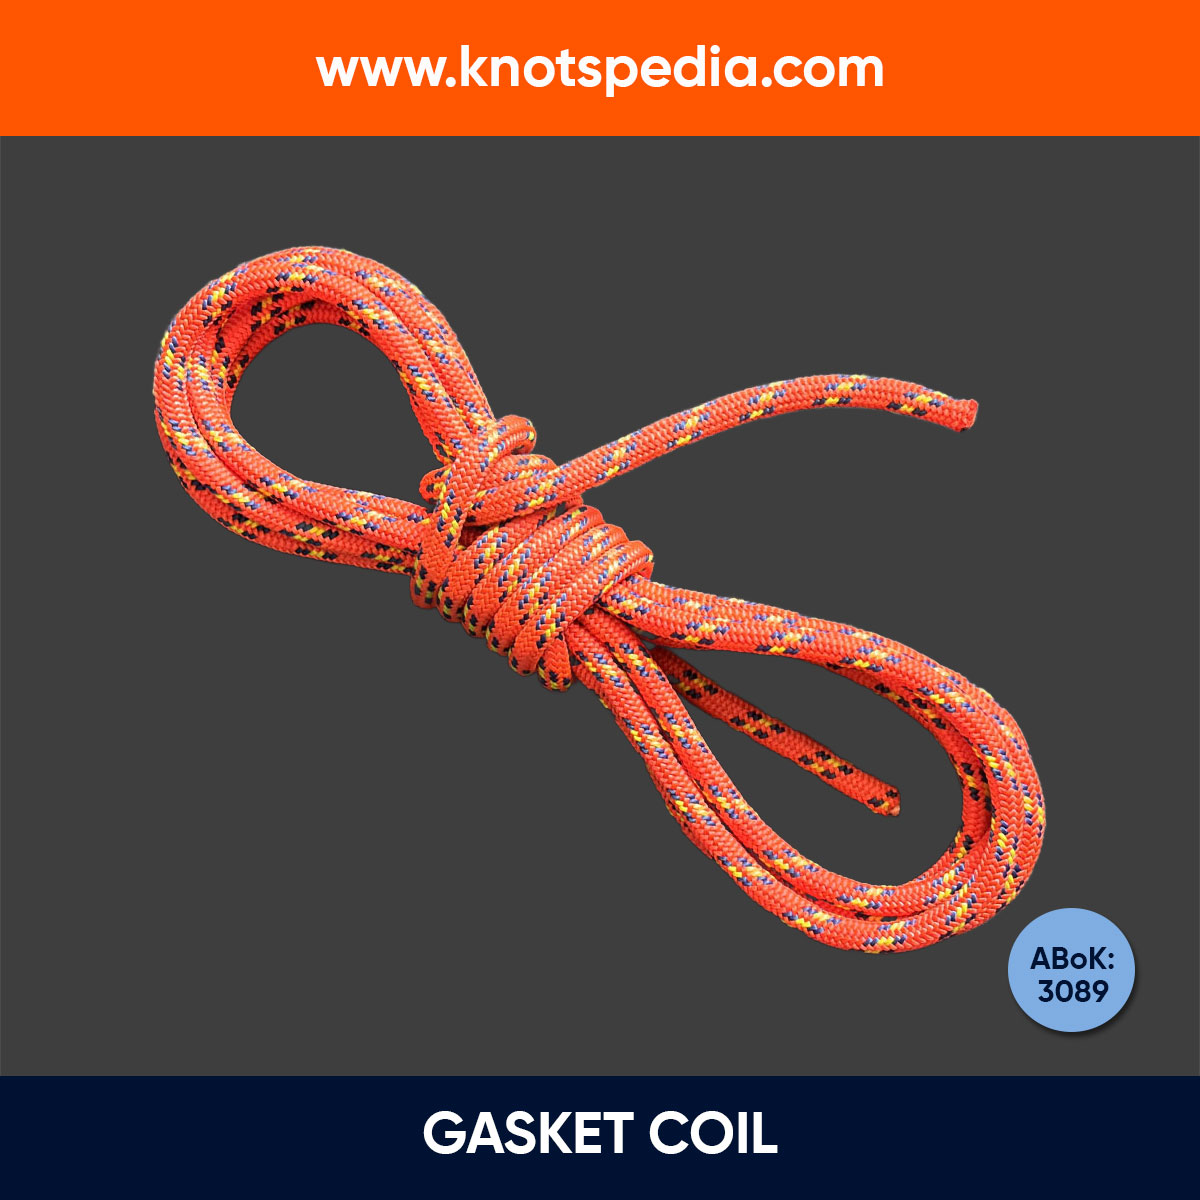
Gasket Coil
The Gasket Coil (ABoK #3089) is a secure, tangle-free way to store long ropes or extension cords. It’s easy to tie and ensures quick deployment without twists.
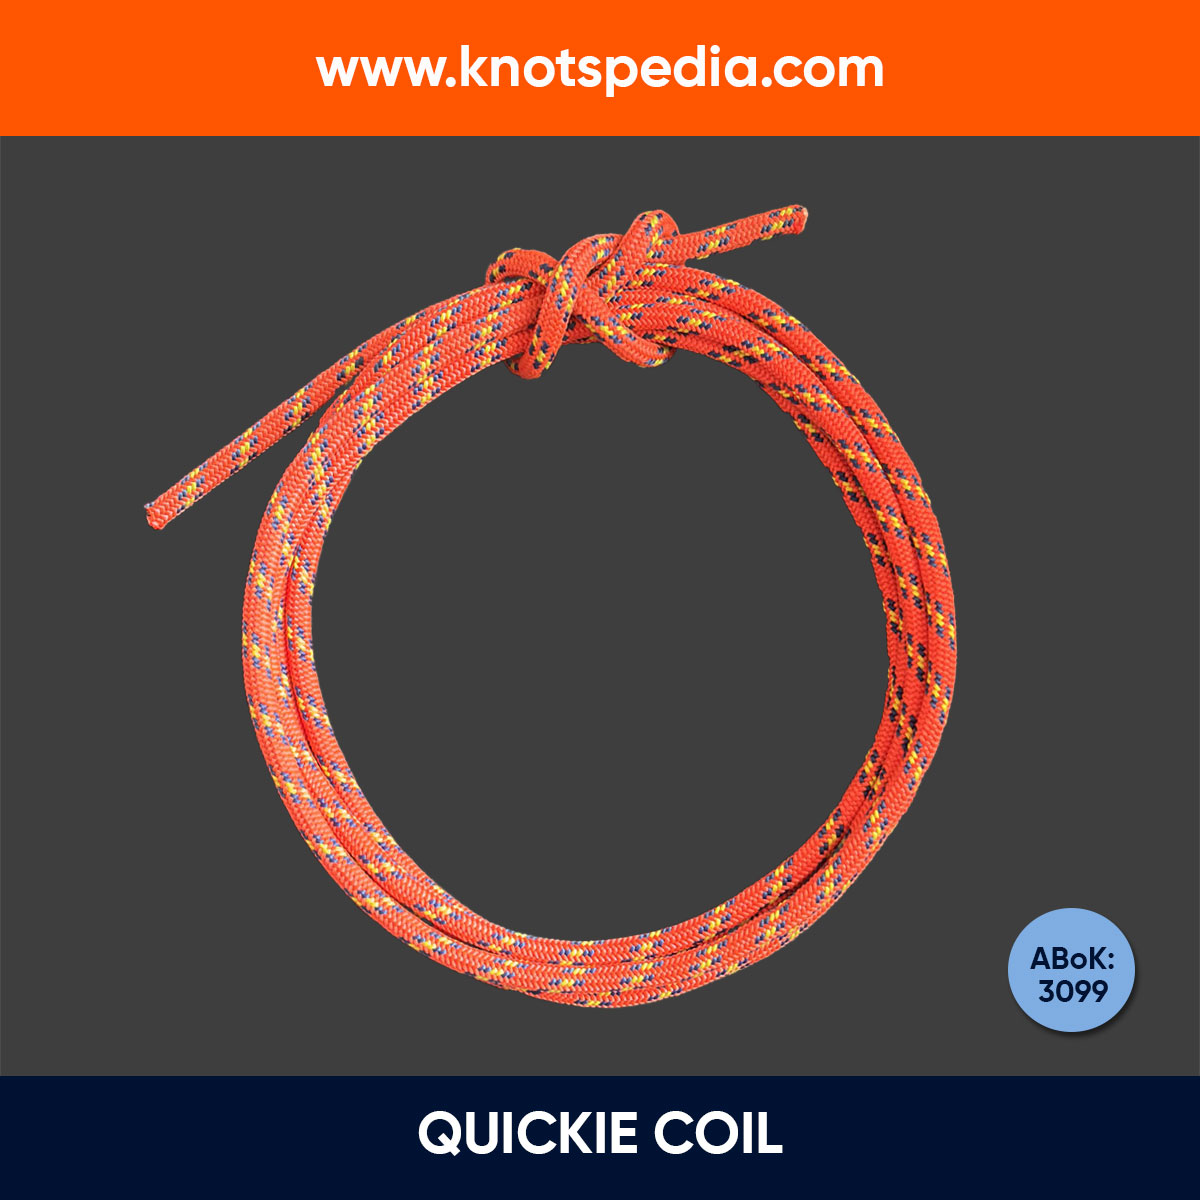
Quickie Coil
The Quickie Coil (ABoK #3099) is a fast and efficient method for coiling and securing ropes, making it ideal for quick storage or transport.
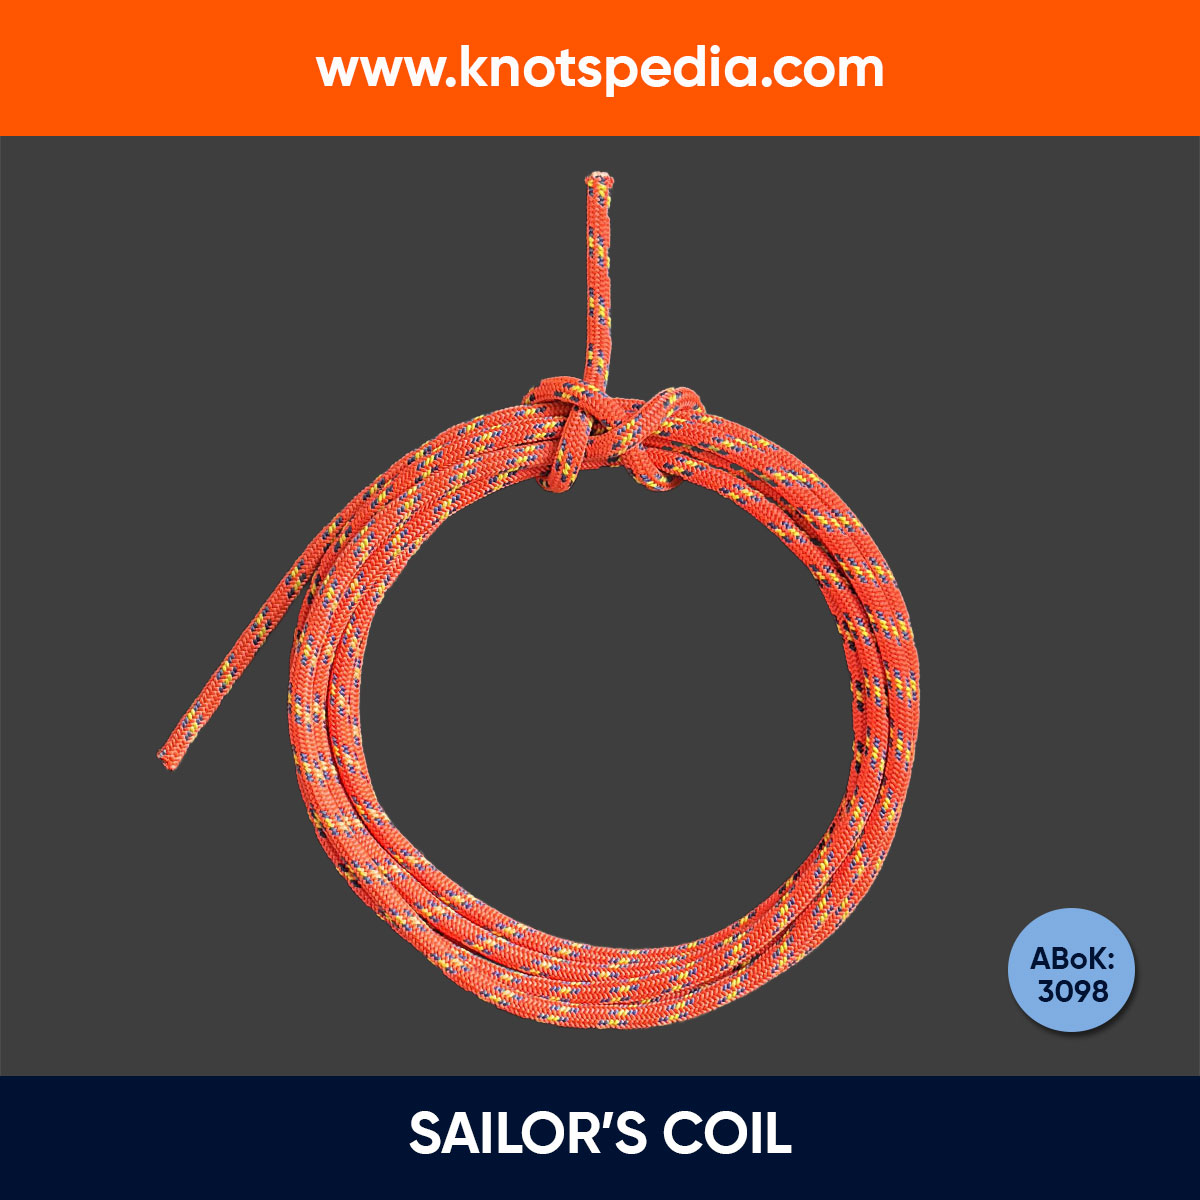
Sailor’s Coil
The Sailor’s Coil (ABoK #3098) stores ropes at sea, preventing tangles and kinks. Easy to tie, it keeps ropes secure and ready for use. Perfect for sailors!
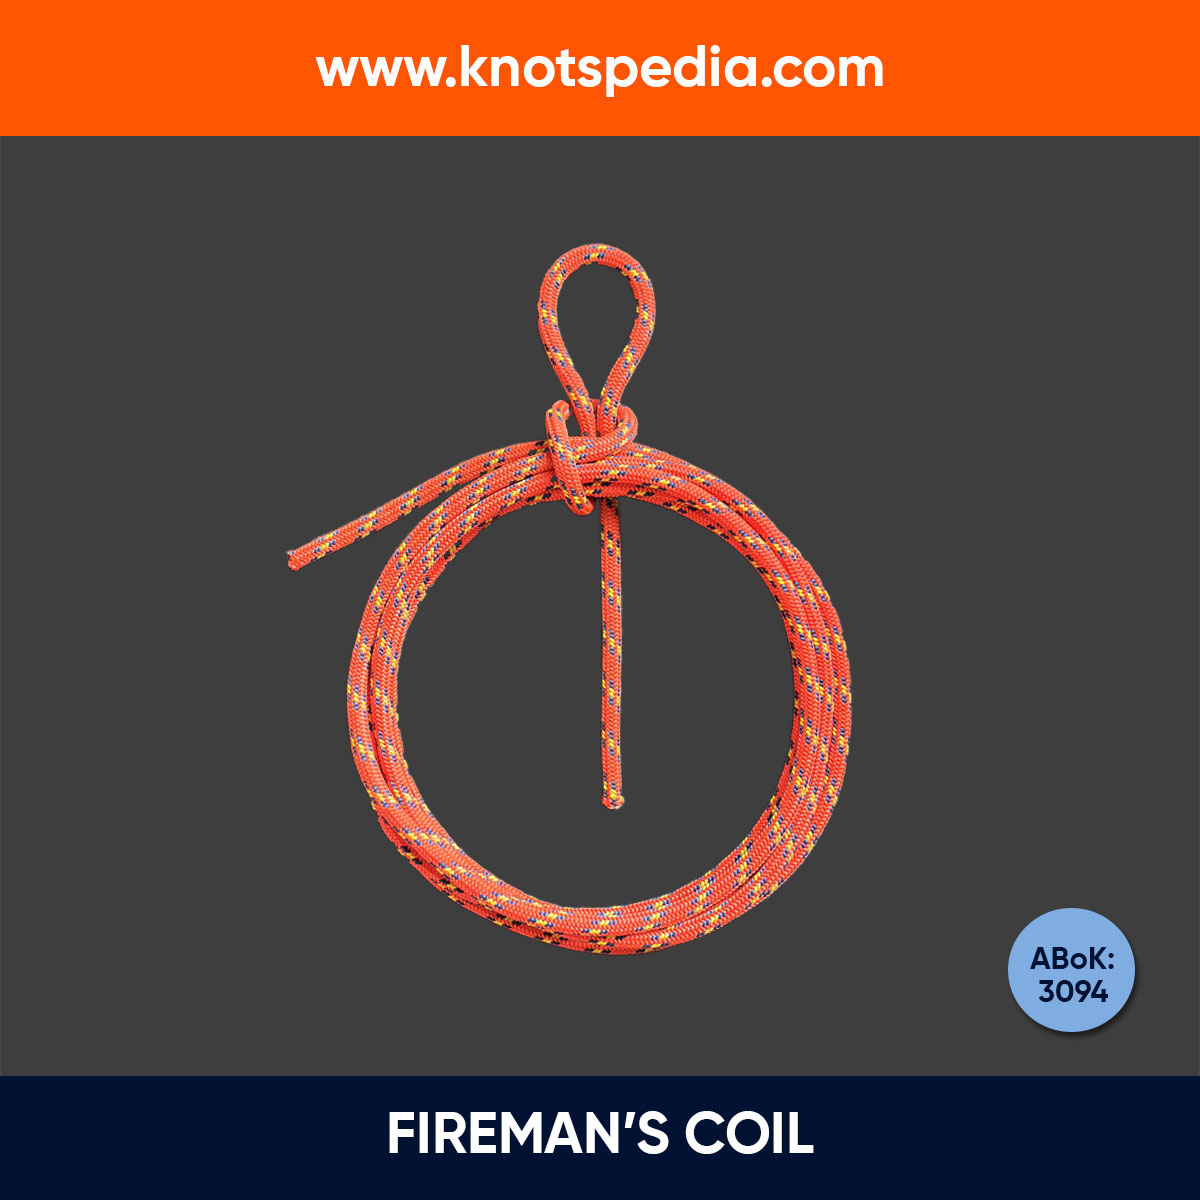
Fireman’s Coil
The Fireman’s Coil (ABoK #3094) is a quick, neat way to store ropes keeping them tangle-free. A single pull releases the rope instantly when needed!
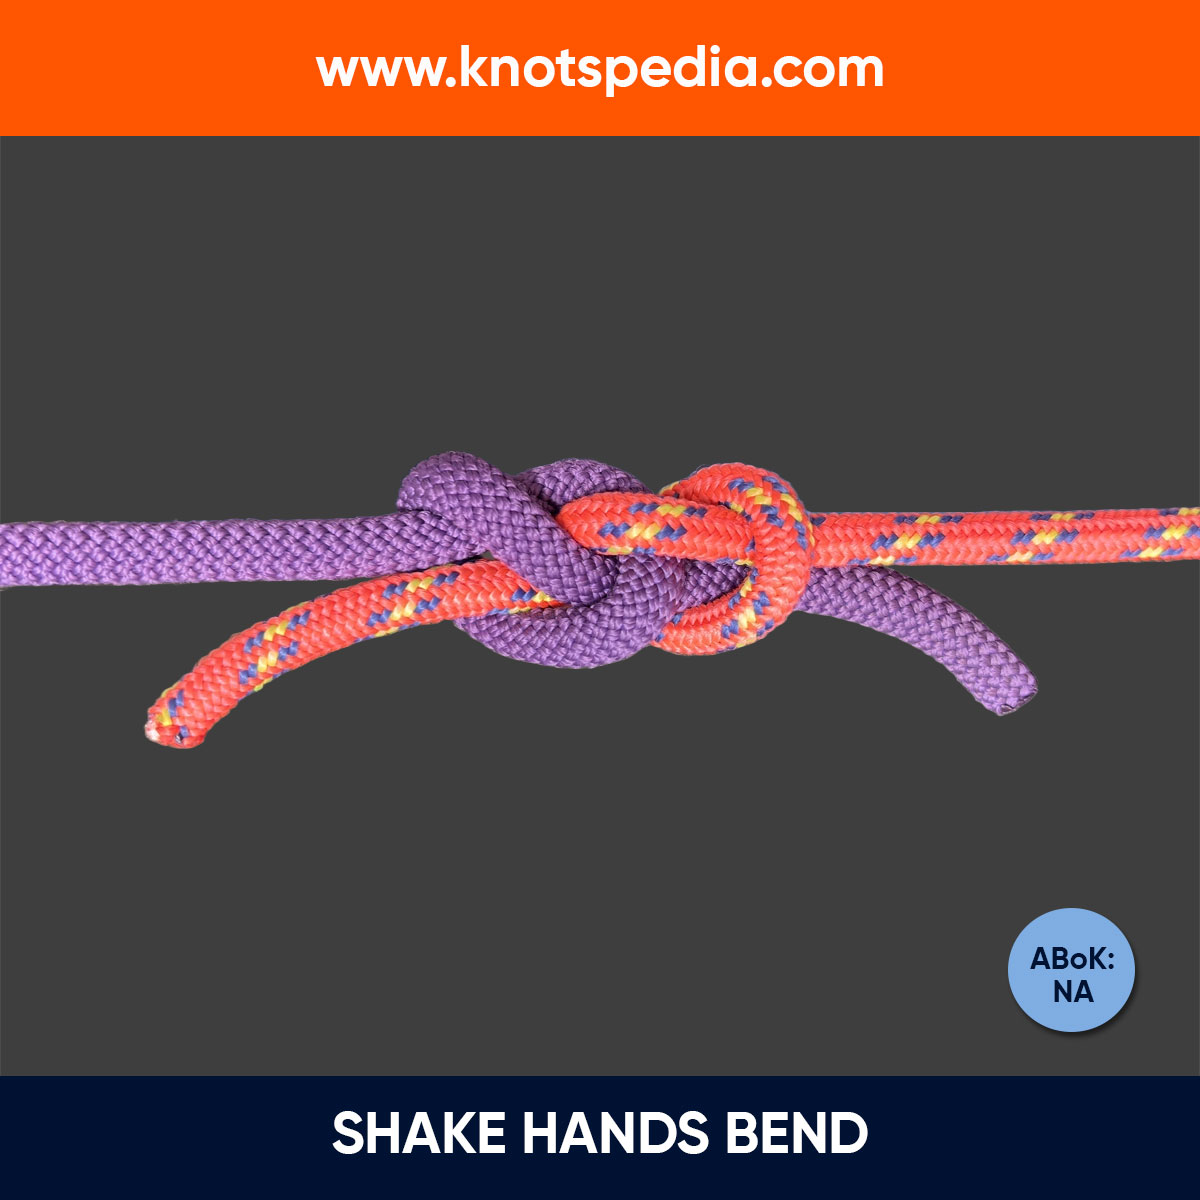
Shake Hands Bend
The Shake Hands Bend is a reliable knot for joining two ropes. It’s strong, neat, and works well with slippery ropes, making it perfect for tight spaces!
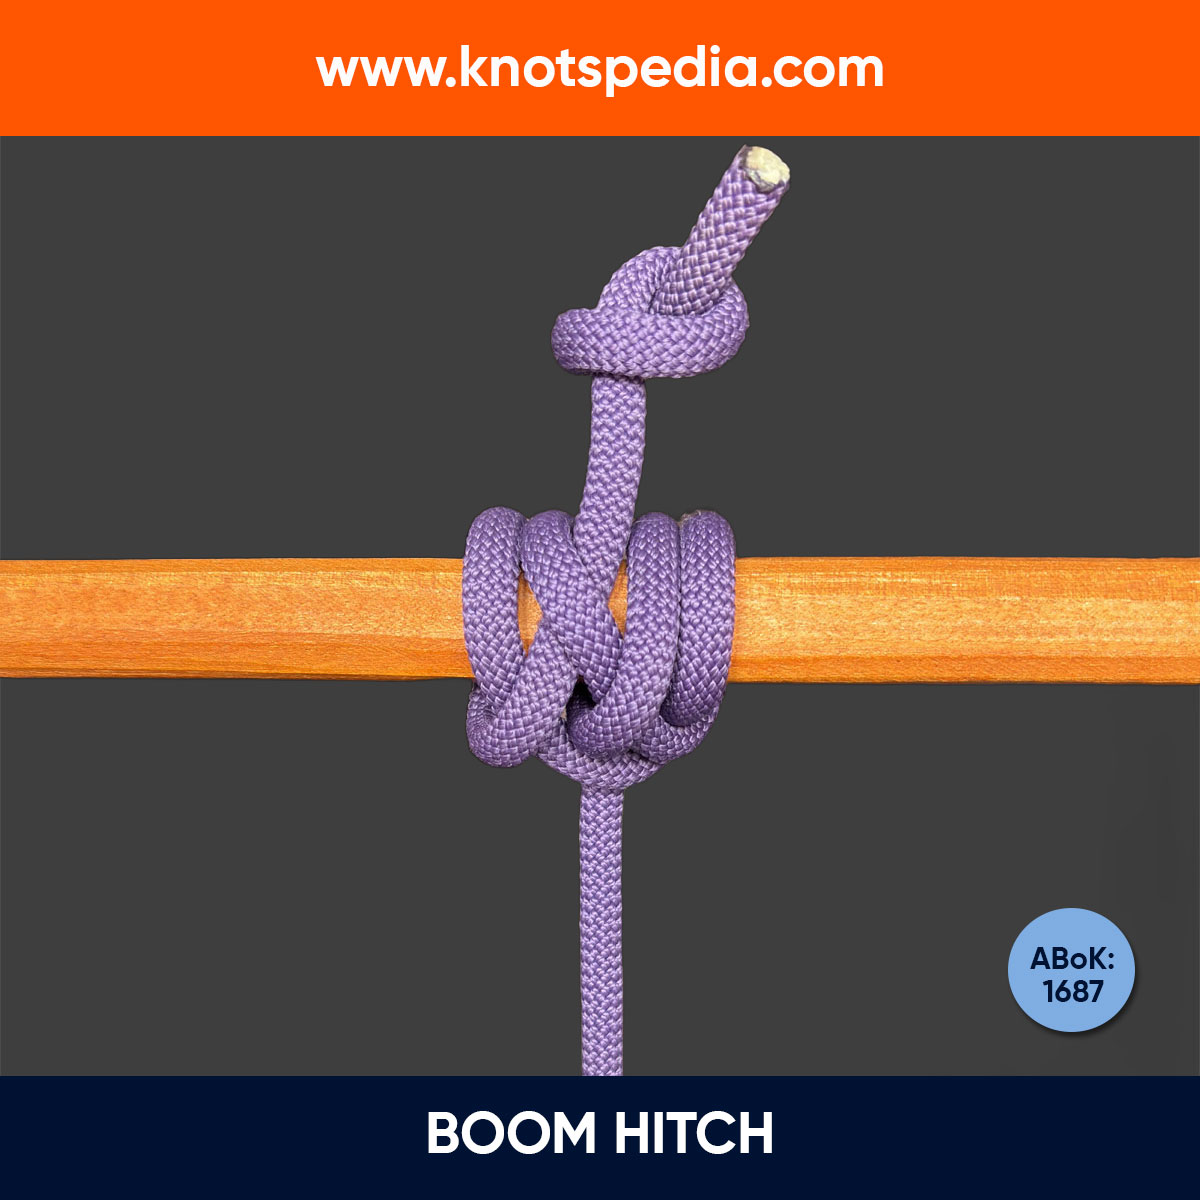
Boom Hitch
The Boom Hitch (ABoK #1687) secures ropes to sail boom or fixed objects. Perfect for heavy loads and works even on slippery surfaces like steel.
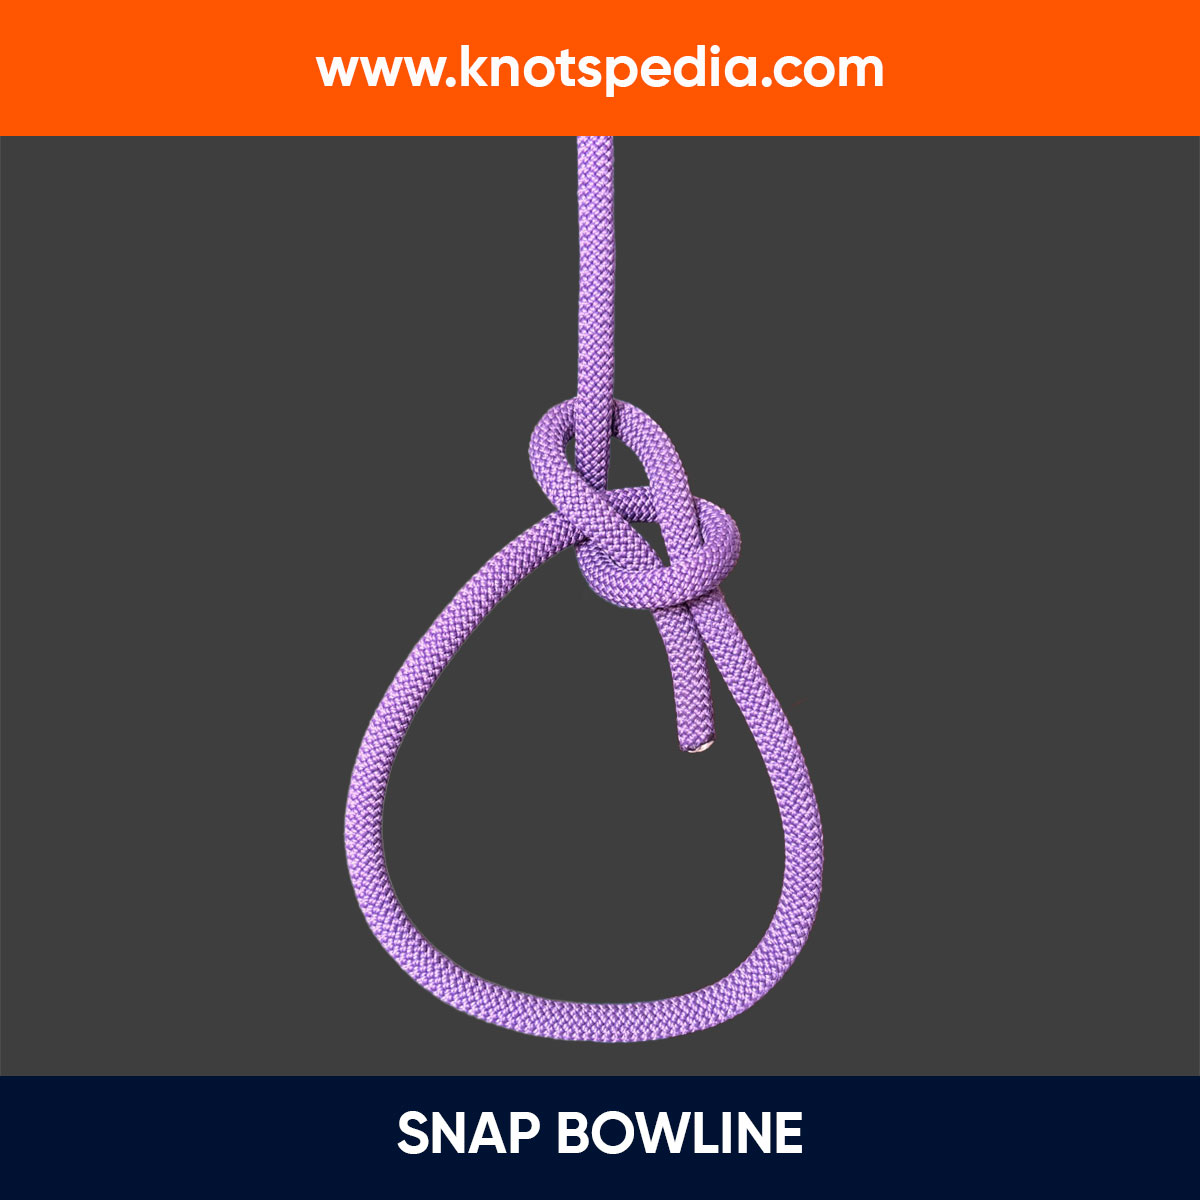
Snap Bowline
The Snap Bowline is a quick and reliable way to tie a Bowline Knot. Ideal for emergencies, it’s simple and nearly foolproof!
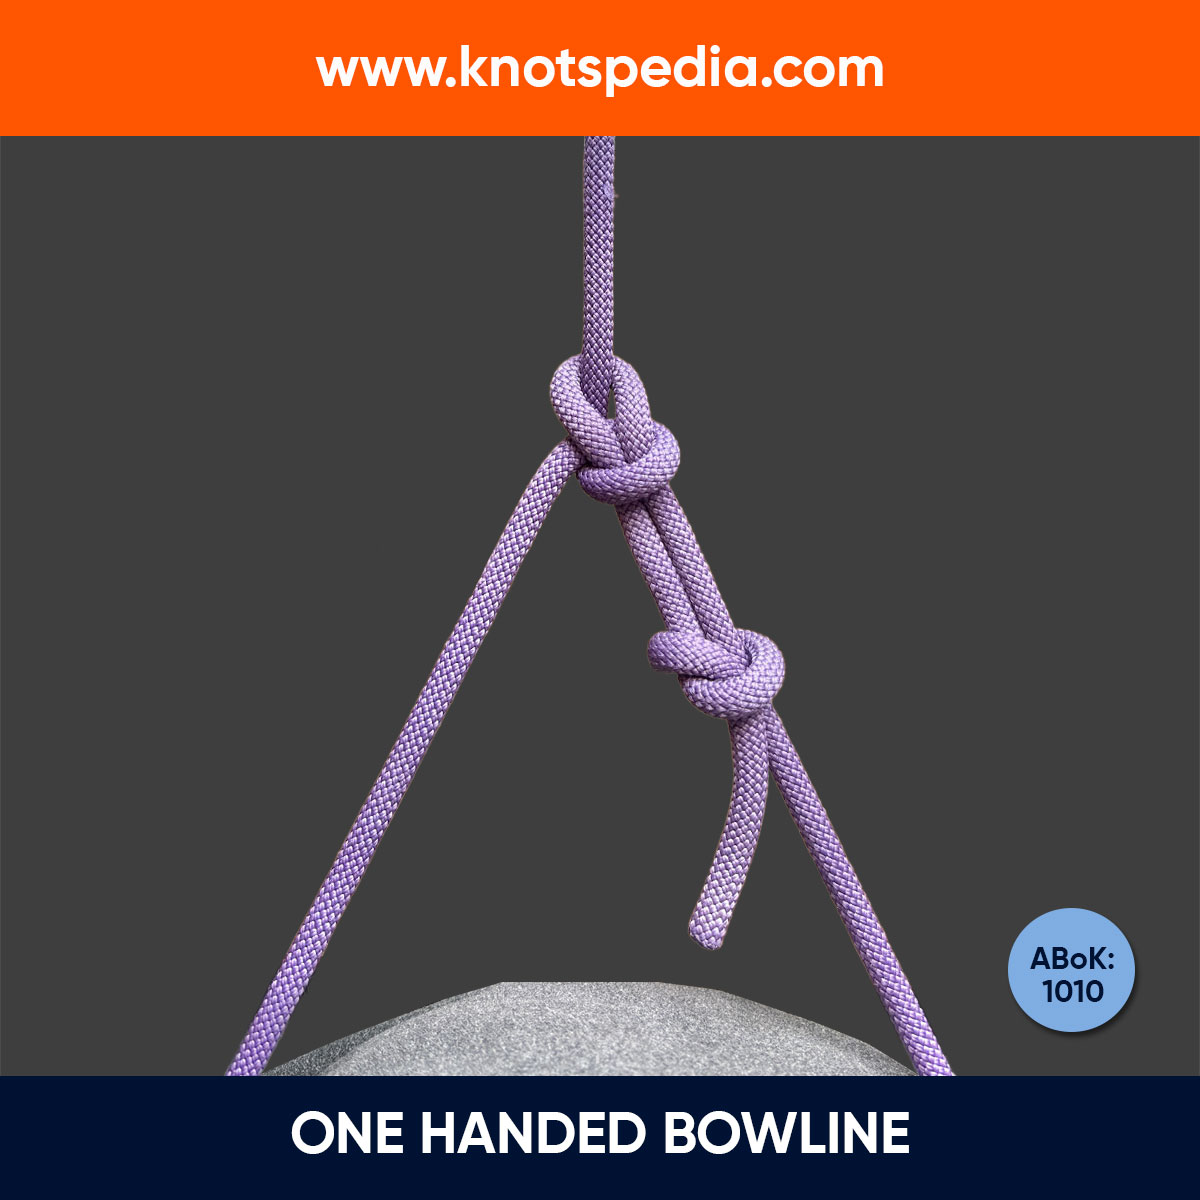
One Handed Bowline
The One Handed Bowline is a quick, one-handed knot for creating a secure loop, perfect for emergencies or rescue scenarios when one hand is unavailable.
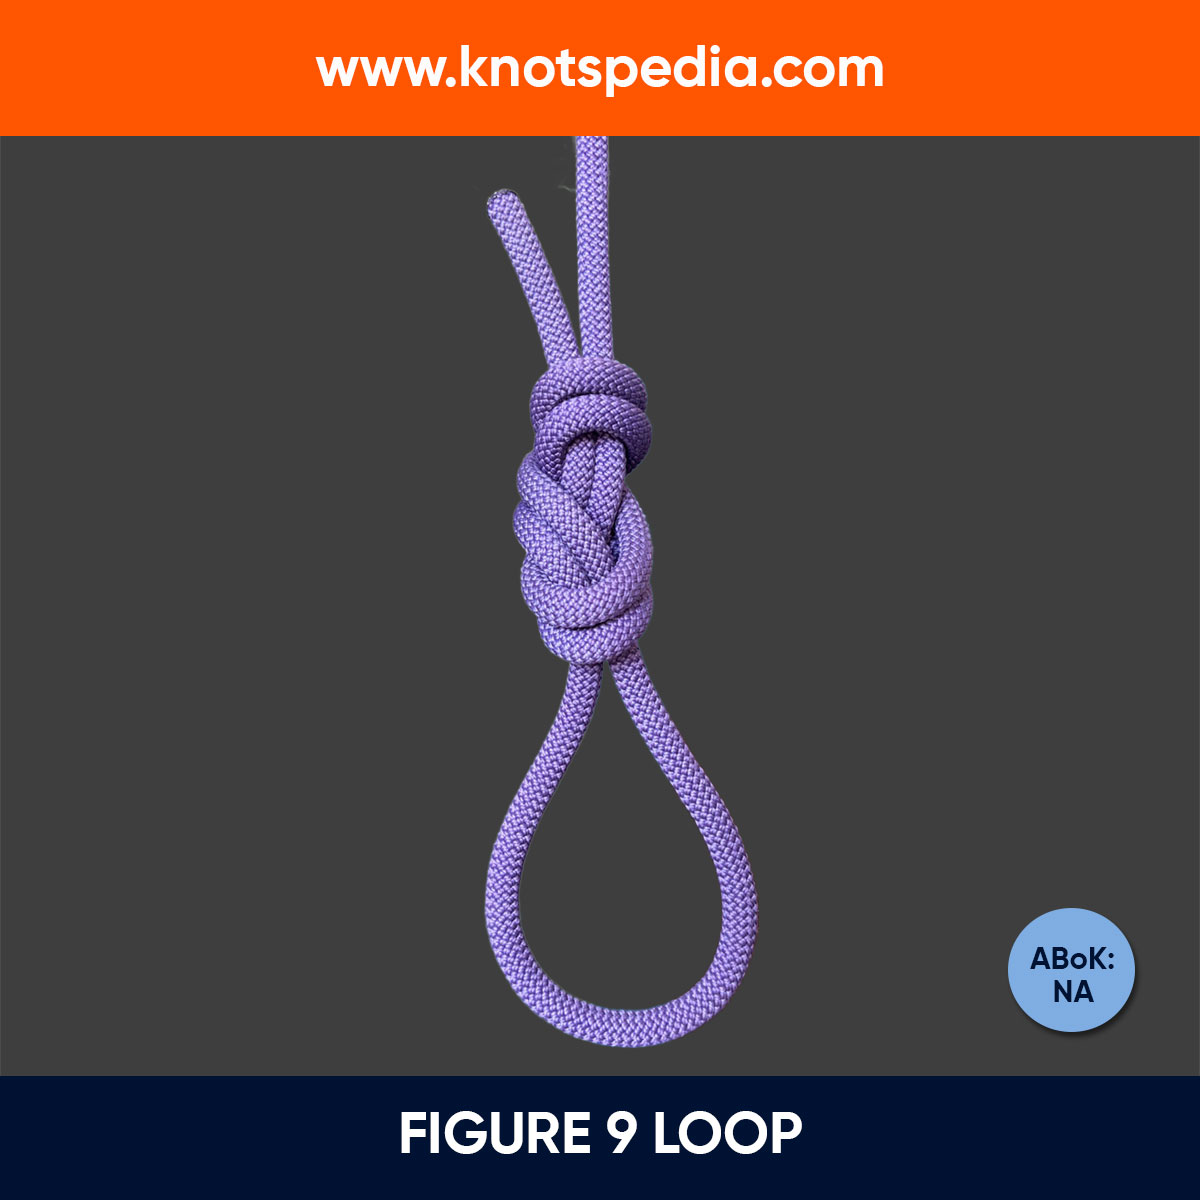
Figure 9 Loop
The Figure 9 Loop Knot creates a strong, fixed loop at the rope's end. It's bulkier and stronger than the Figure 8 Loop, ideal for caving and rappelling.
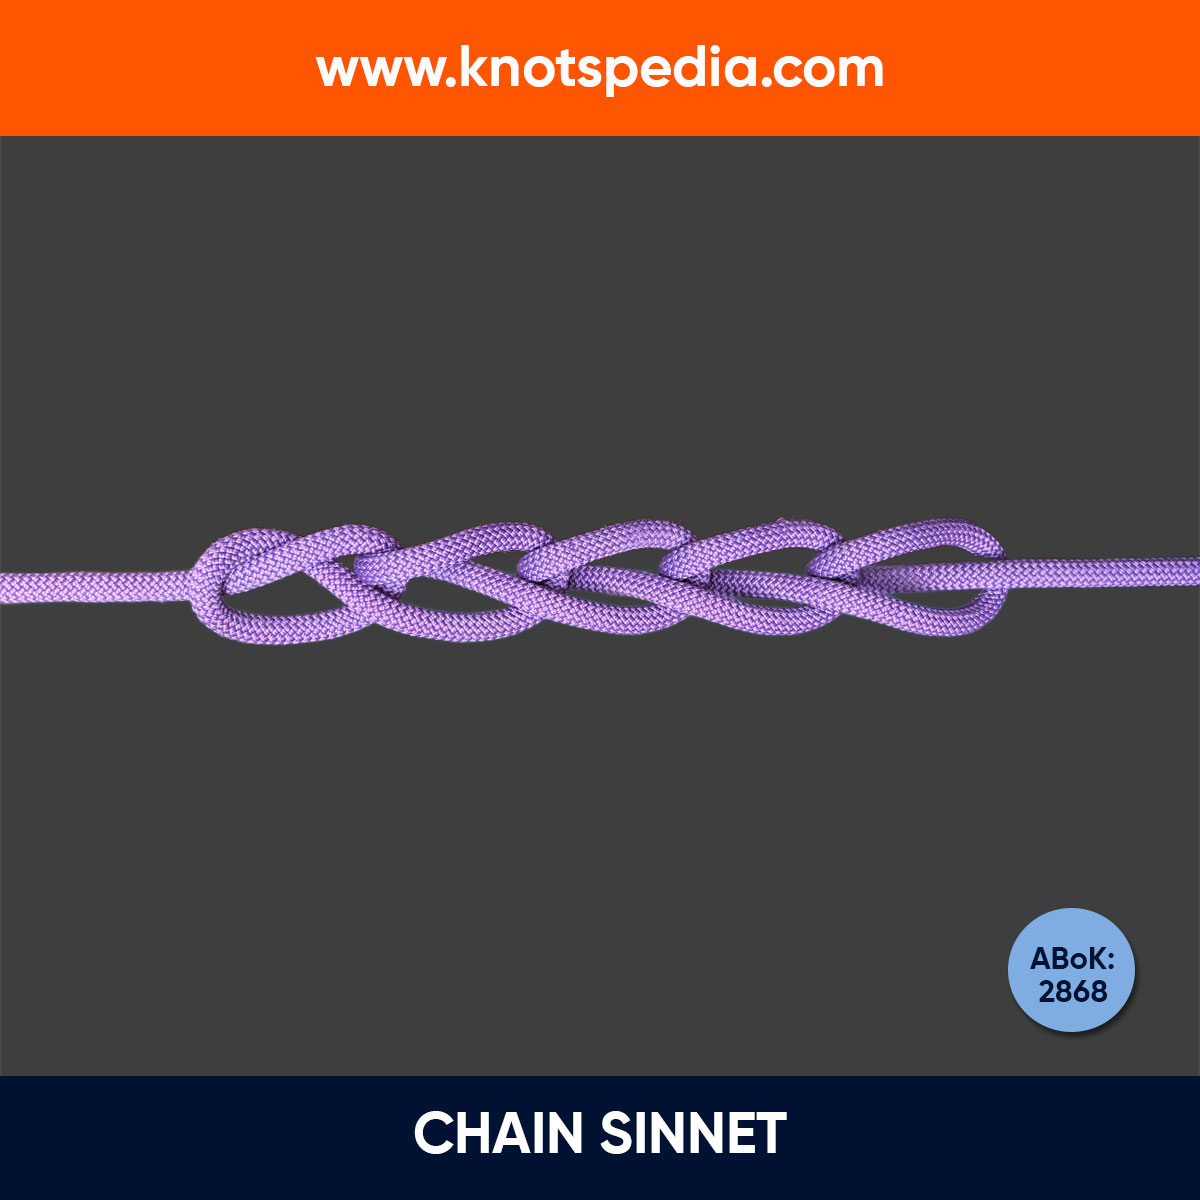
Chain Sinnet
The Chain Sinnet is a quick-release knot used to shorten ropes. Easy to tie, untie, and tangle-free, it's perfect for crafts, climbing, and cable management!
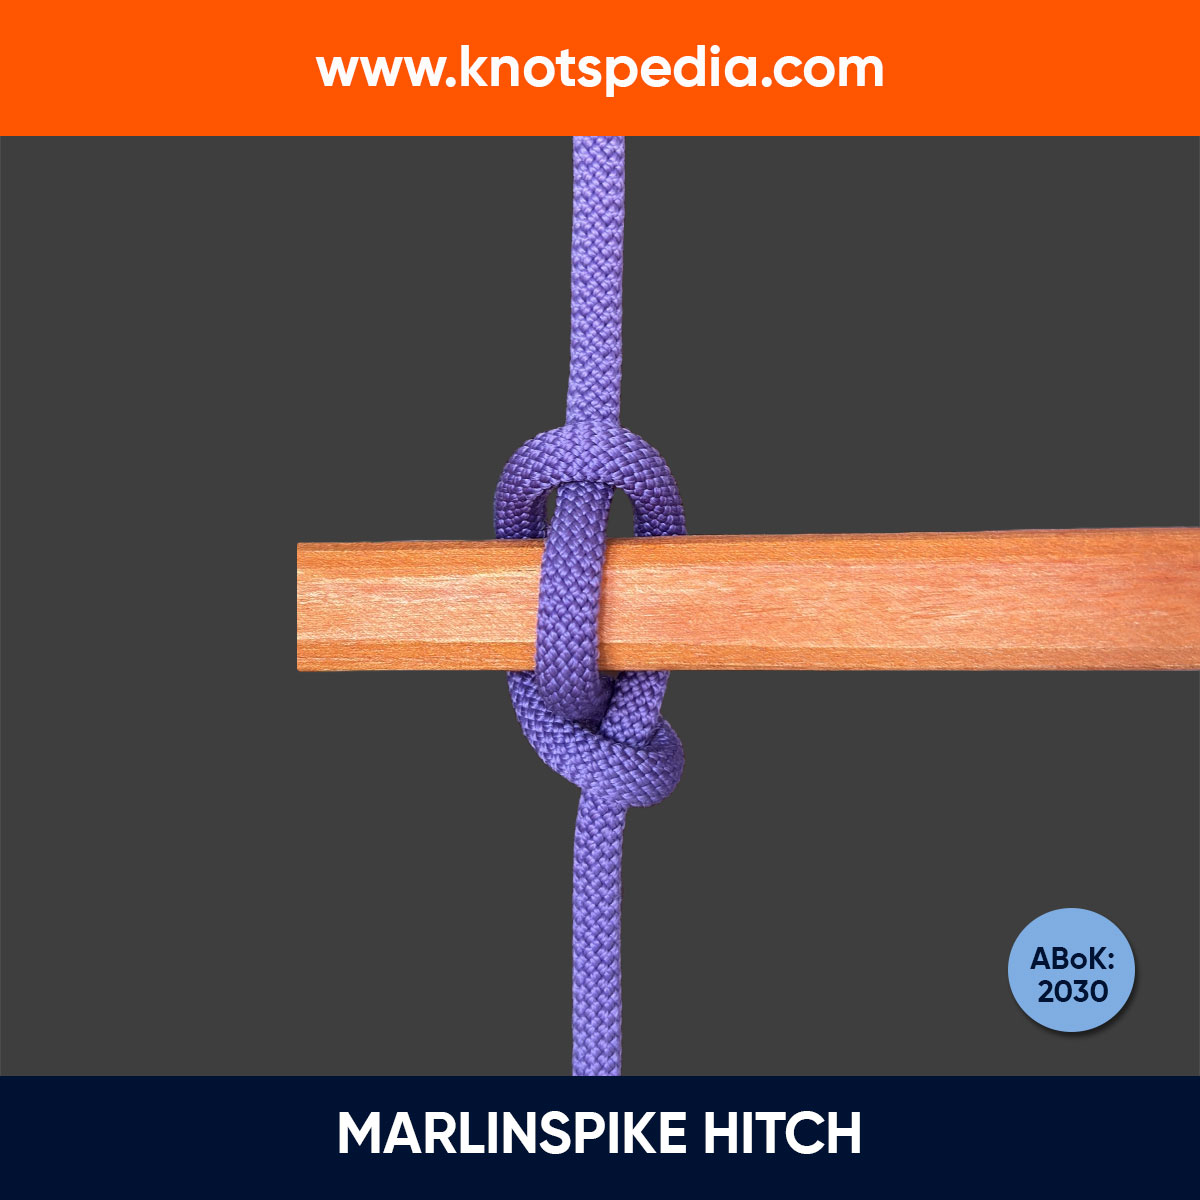
Marlinspike Hitch
The Marlinspike Hitch (ABoK #2030) is a quick knot to creates a handle using a rod or stick. Ideal for tightening knots, making ladders, or hammock setups!
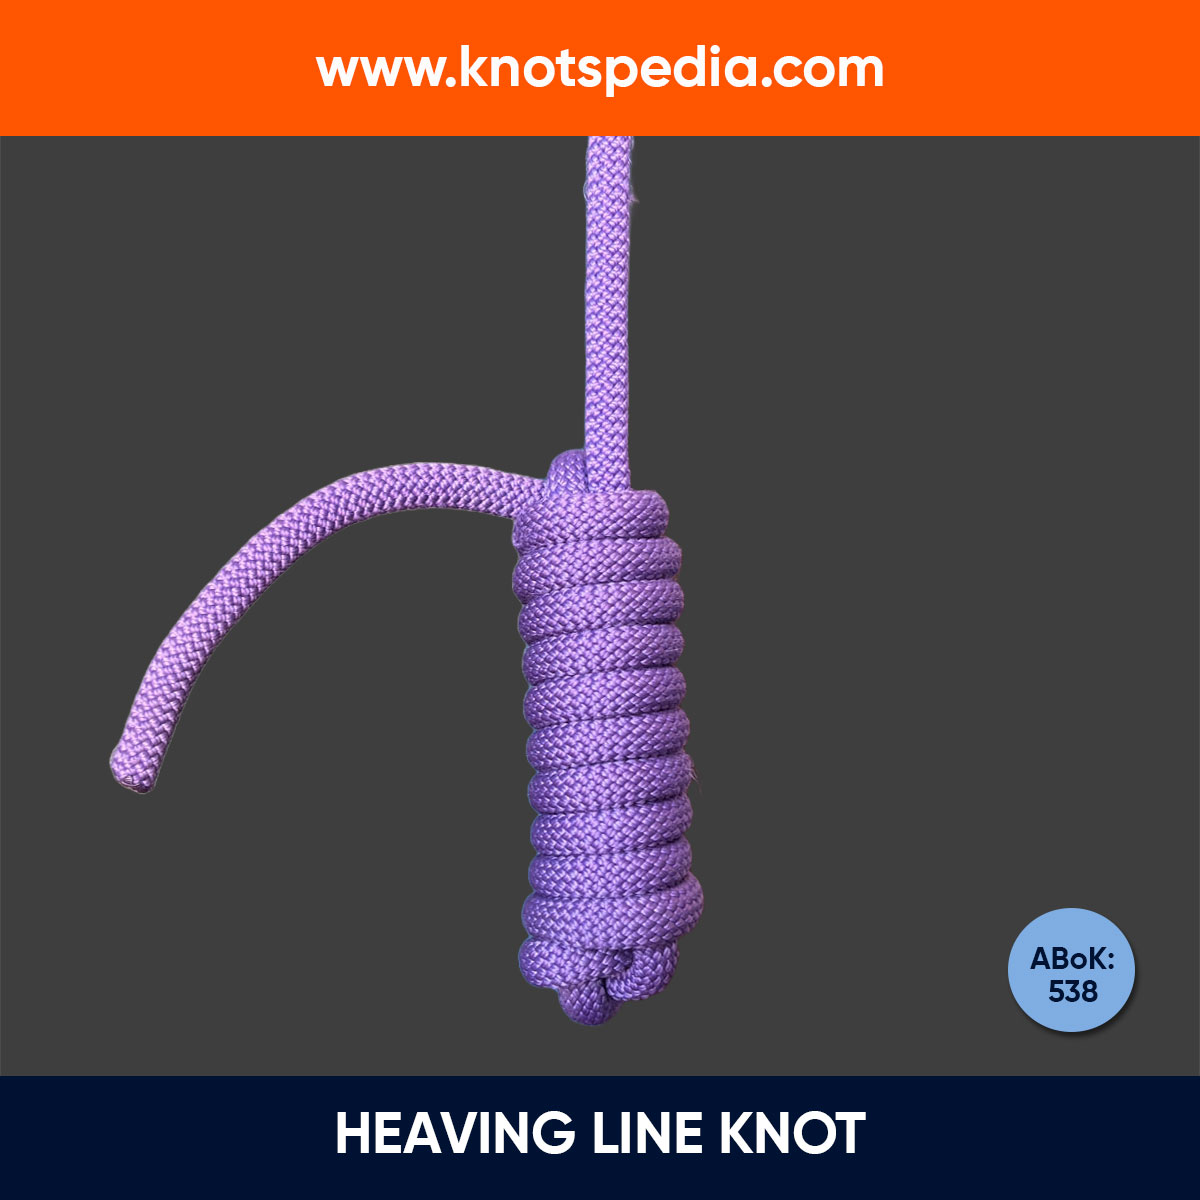
Heaving Line Knot
The Heaving Line Knot adds a moderate weight at the end of the rope so its easy to throw the line further with precision. Easy to tie, untie and customize.
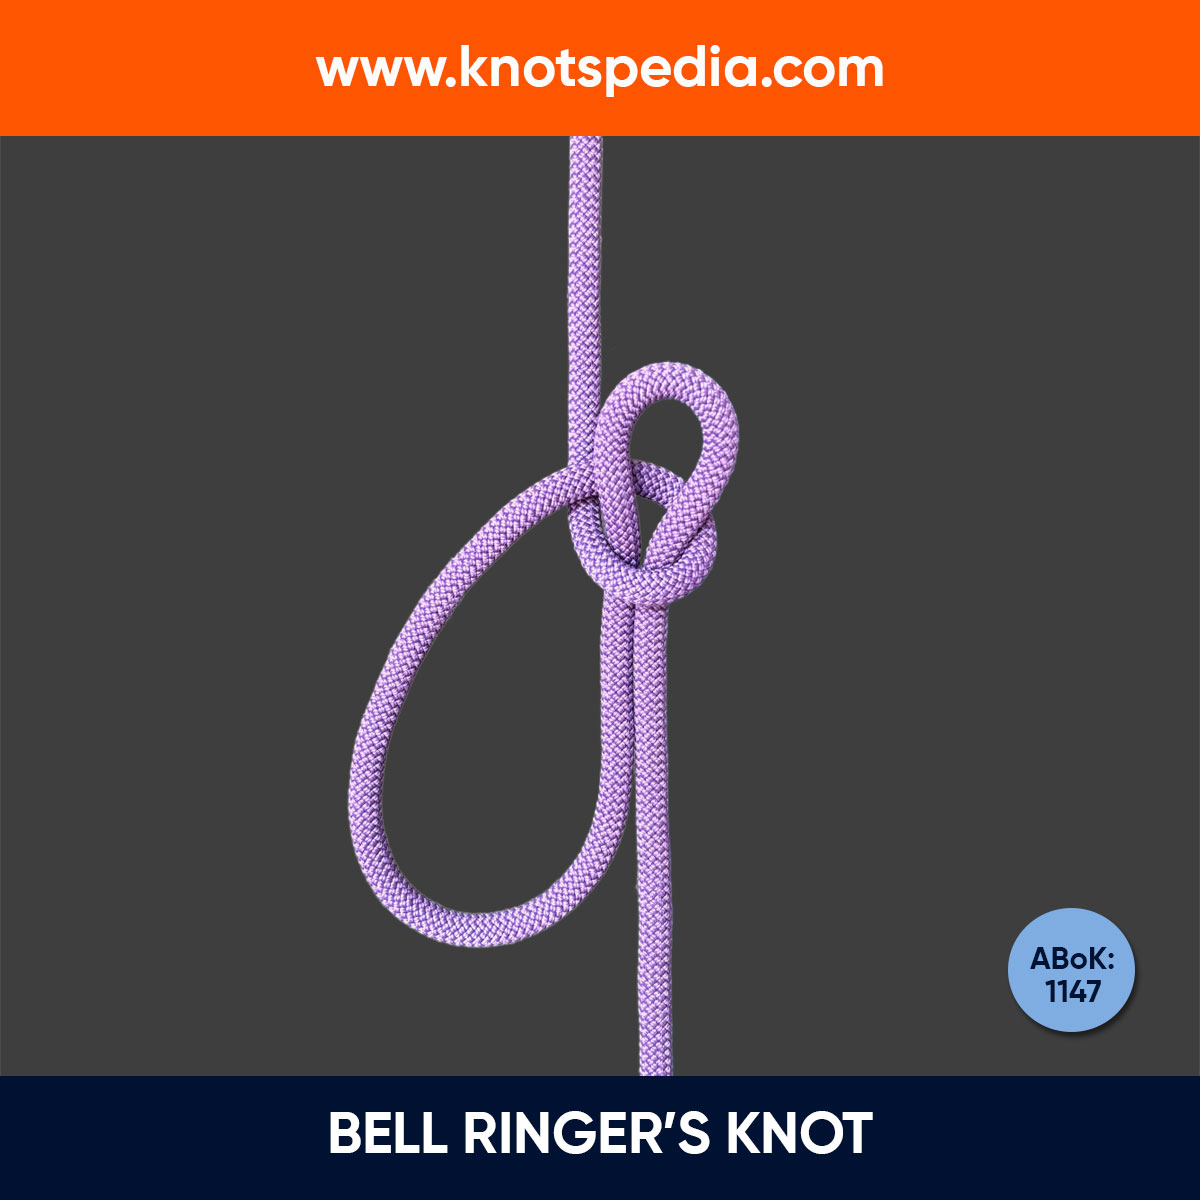
Bell Ringer’s Knot
The Bell Ringer's Knot (ABoK #1147), also known as the Bell Rope Knot, is a simple and easy to tie knot used to shorten ropes.
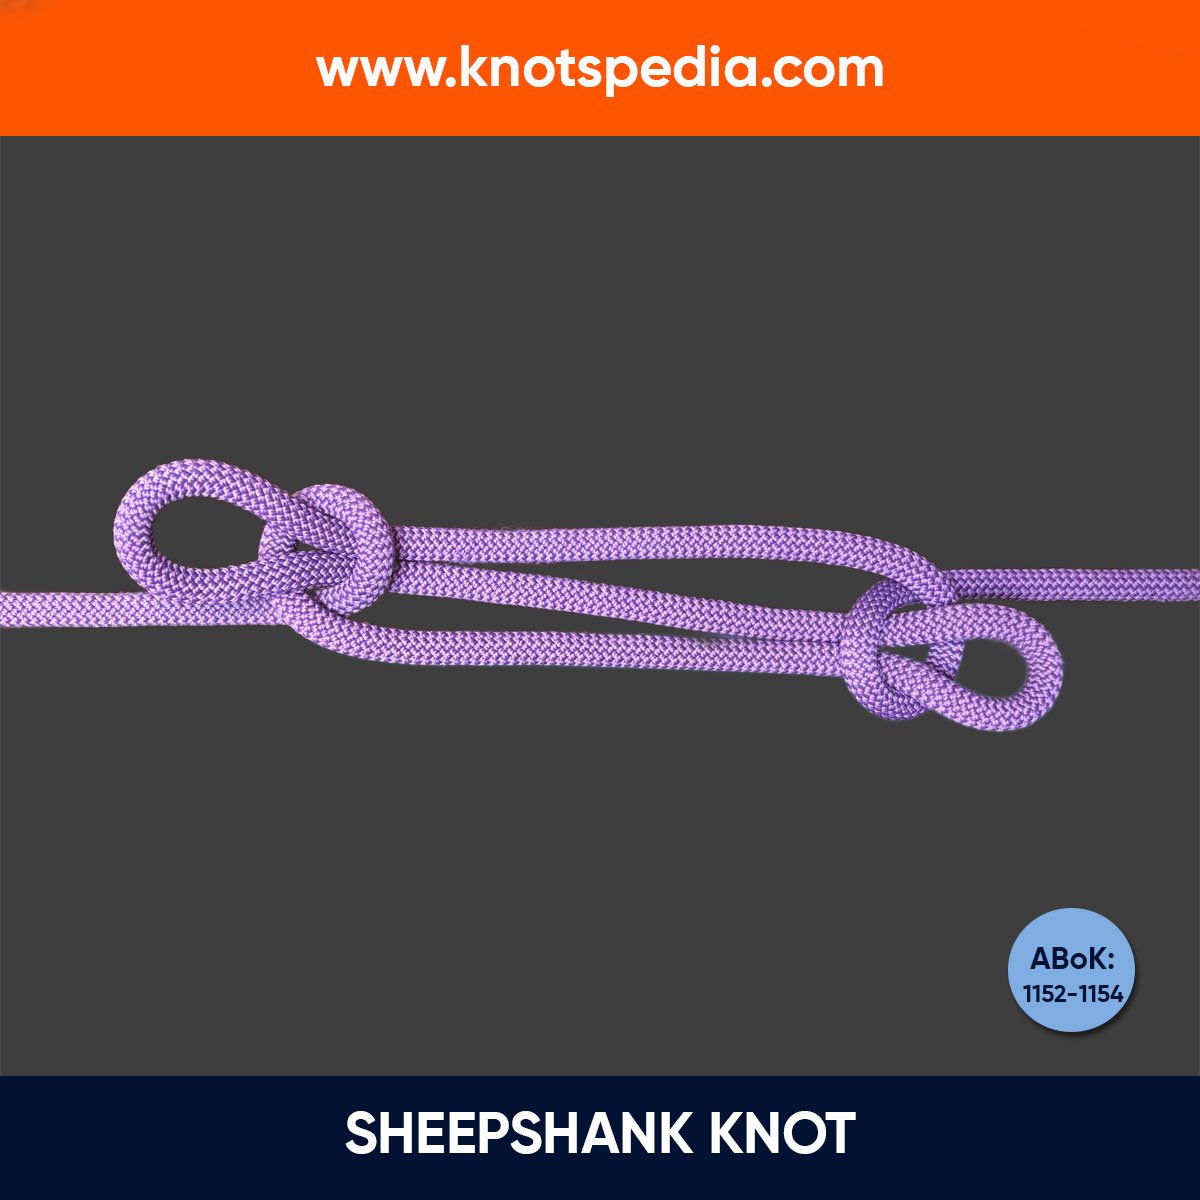
Sheepshank Knot
The Sheepshank knot (ABoK #1152-1154) is used to shorten rope or isolate damaged sections. Easy to tie, but unreliable and unsuitable for critical applications.
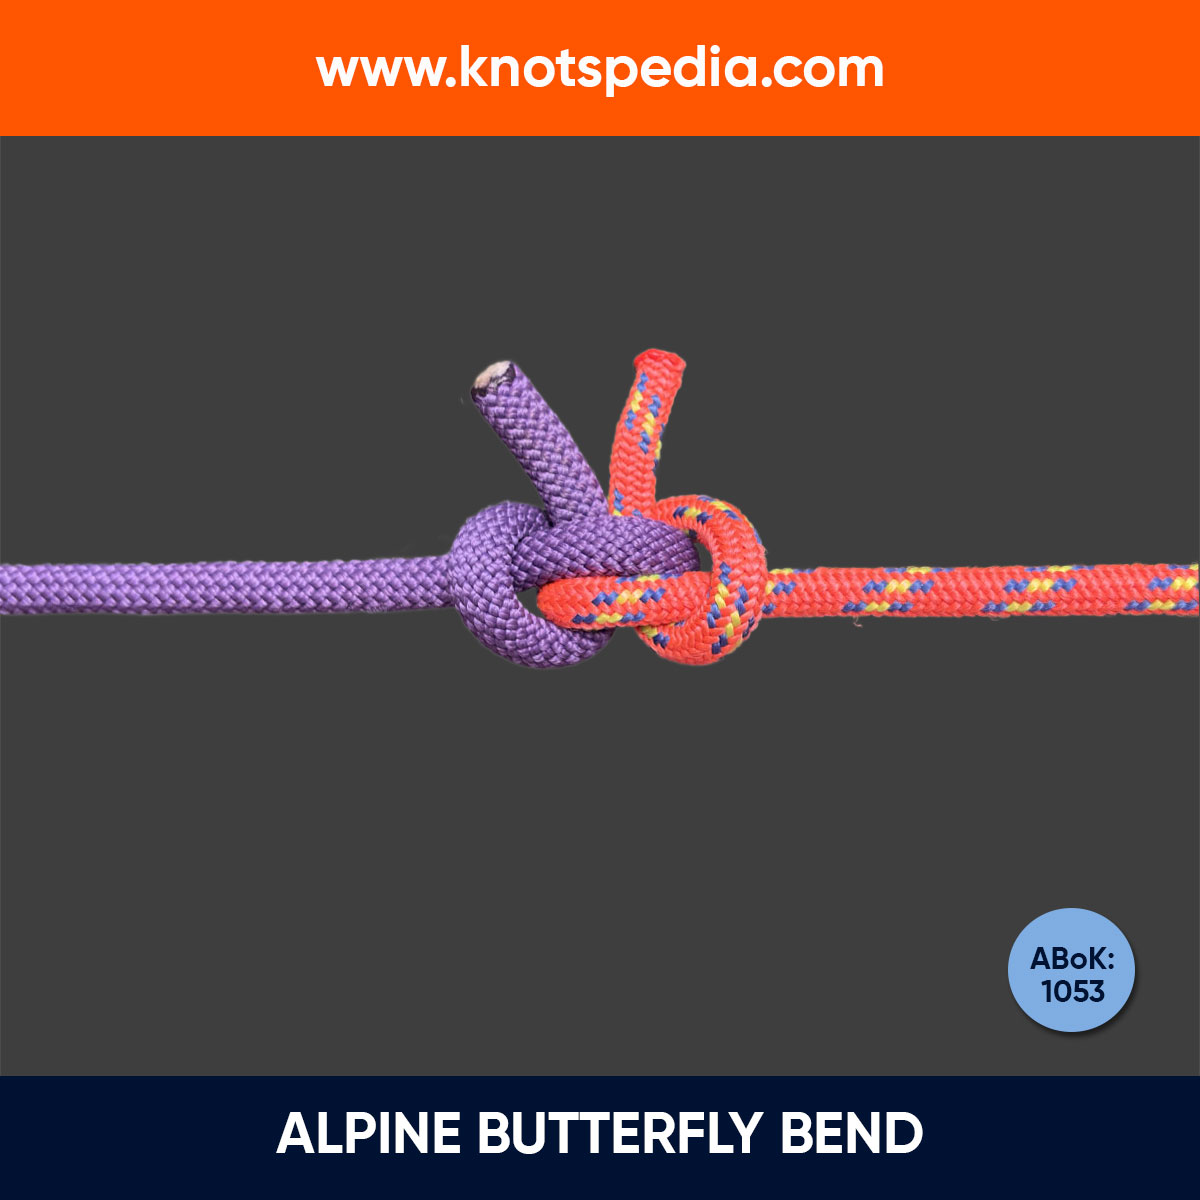
Alpine Butterfly Bend
The Alpine Butterfly Bend joins two ropes, making it ideal for climbing, mountaineering, and rescue work. Easy to tie, untie after heavy loading.
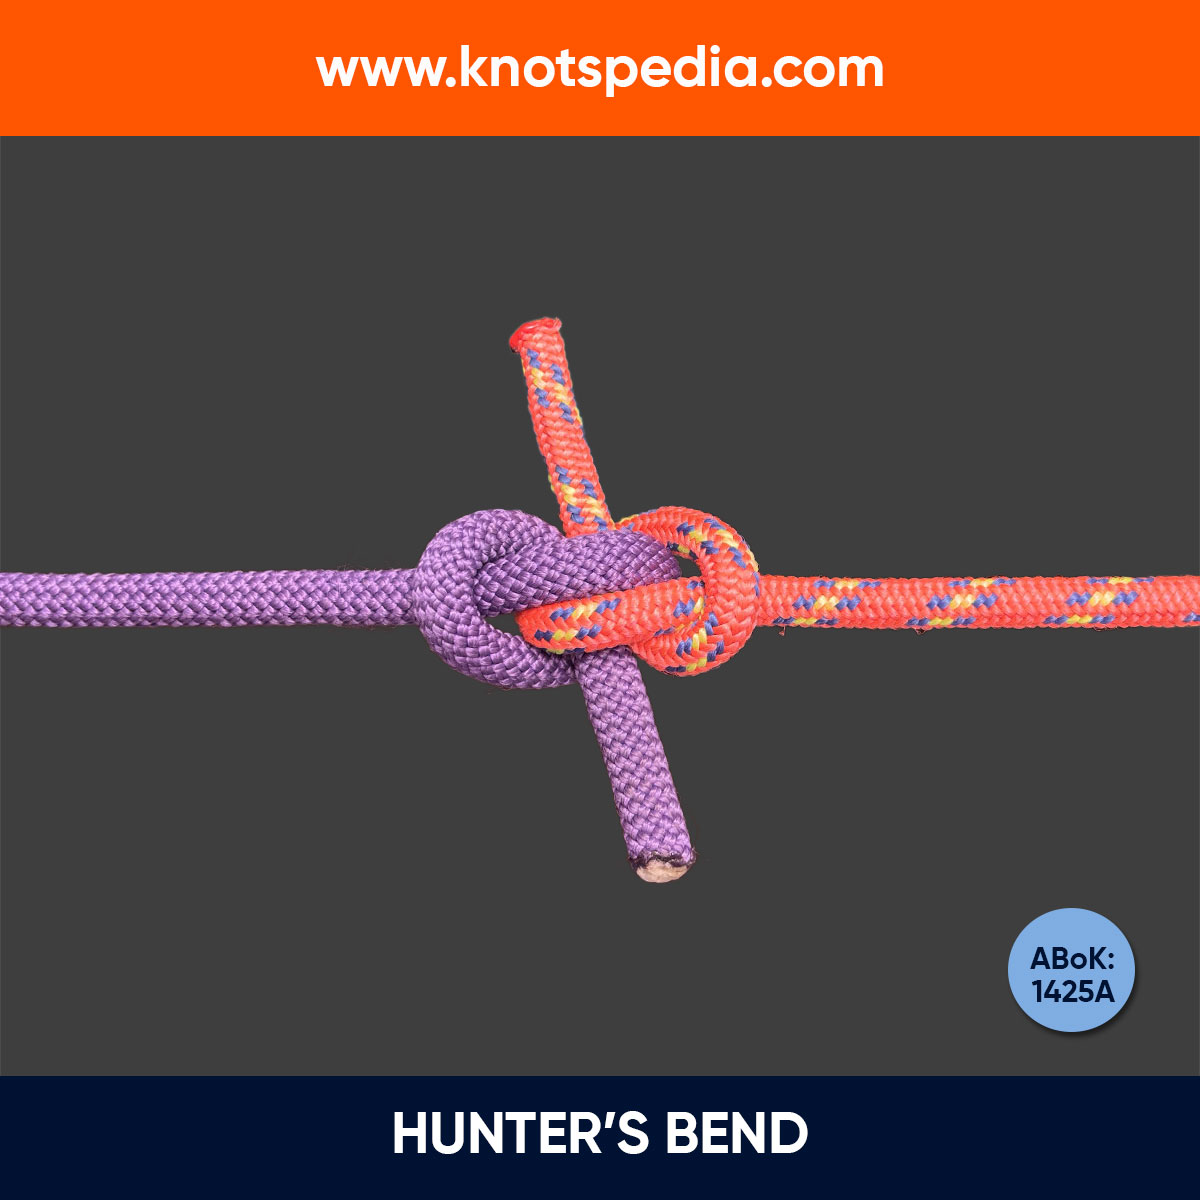
Hunter’s Bend
The Hunter’s Bend (ABoK #1425A), also known as, Rigger's Bend is a strong knot for joining two ropes of similar size, ideal for slippery ropes.
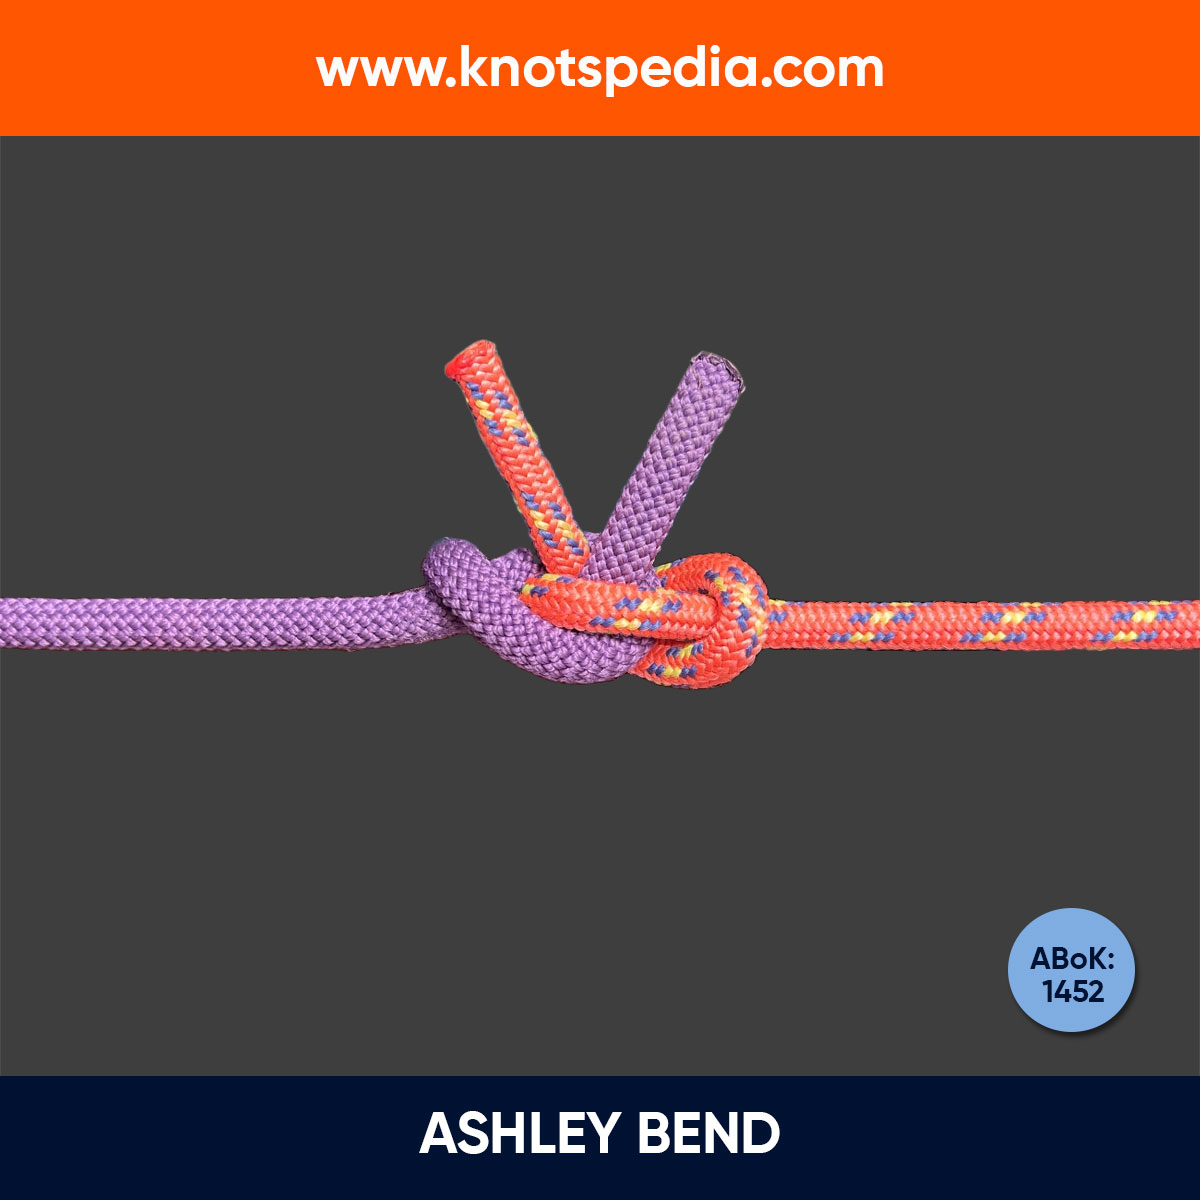
Ashley Bend
The Ashley Bend (ABoK #1452) is a secure, symmetrical knot for joining ropes. It resists slipping, works with slippery materials, but can jam under heavy load.