Binod Gautam
Binod Gautam is the founder of Knotspedia and has over 10 years of experience tying and testing knots for camping, fishing, hiking, and daily use. He launched Knotspedia to share his extensive experience and help others master the art of knot tying. Binod breaks down each knot with step-by-step guides and real-world tips you can actually use. Whether you’re just getting started or want to sharpen your skills, Binod’s guides are made to be useful, accurate, and easy to follow.
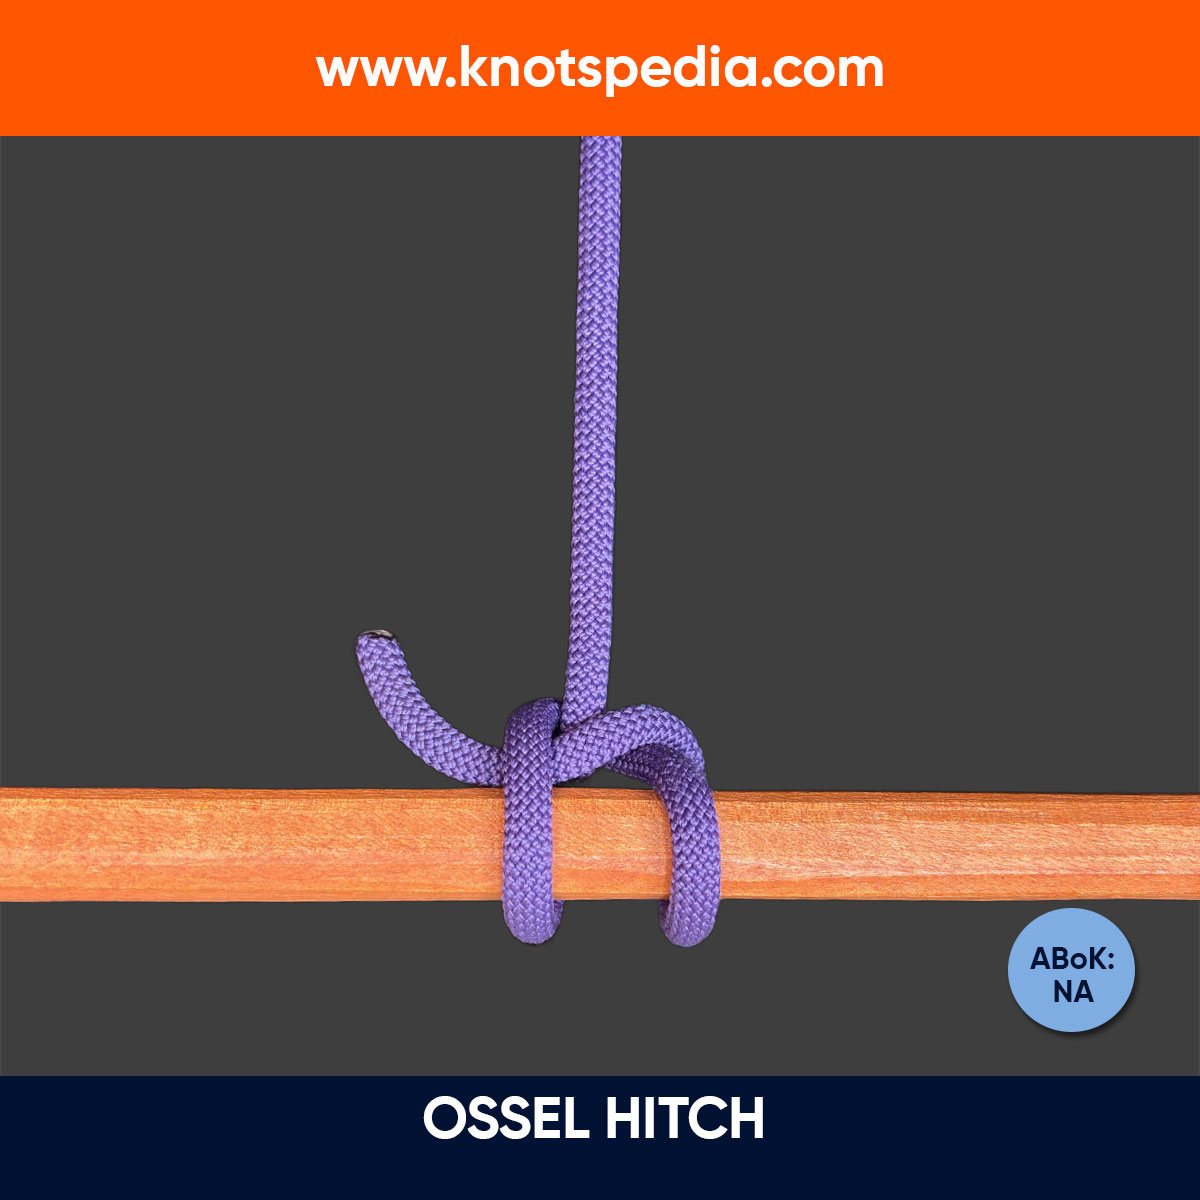
Ossel Hitch
The Ossel Hitch is a strong and simple knot used by fishermen to secure nets to floating ropes. Perfect for underwater stability and easy to untie!
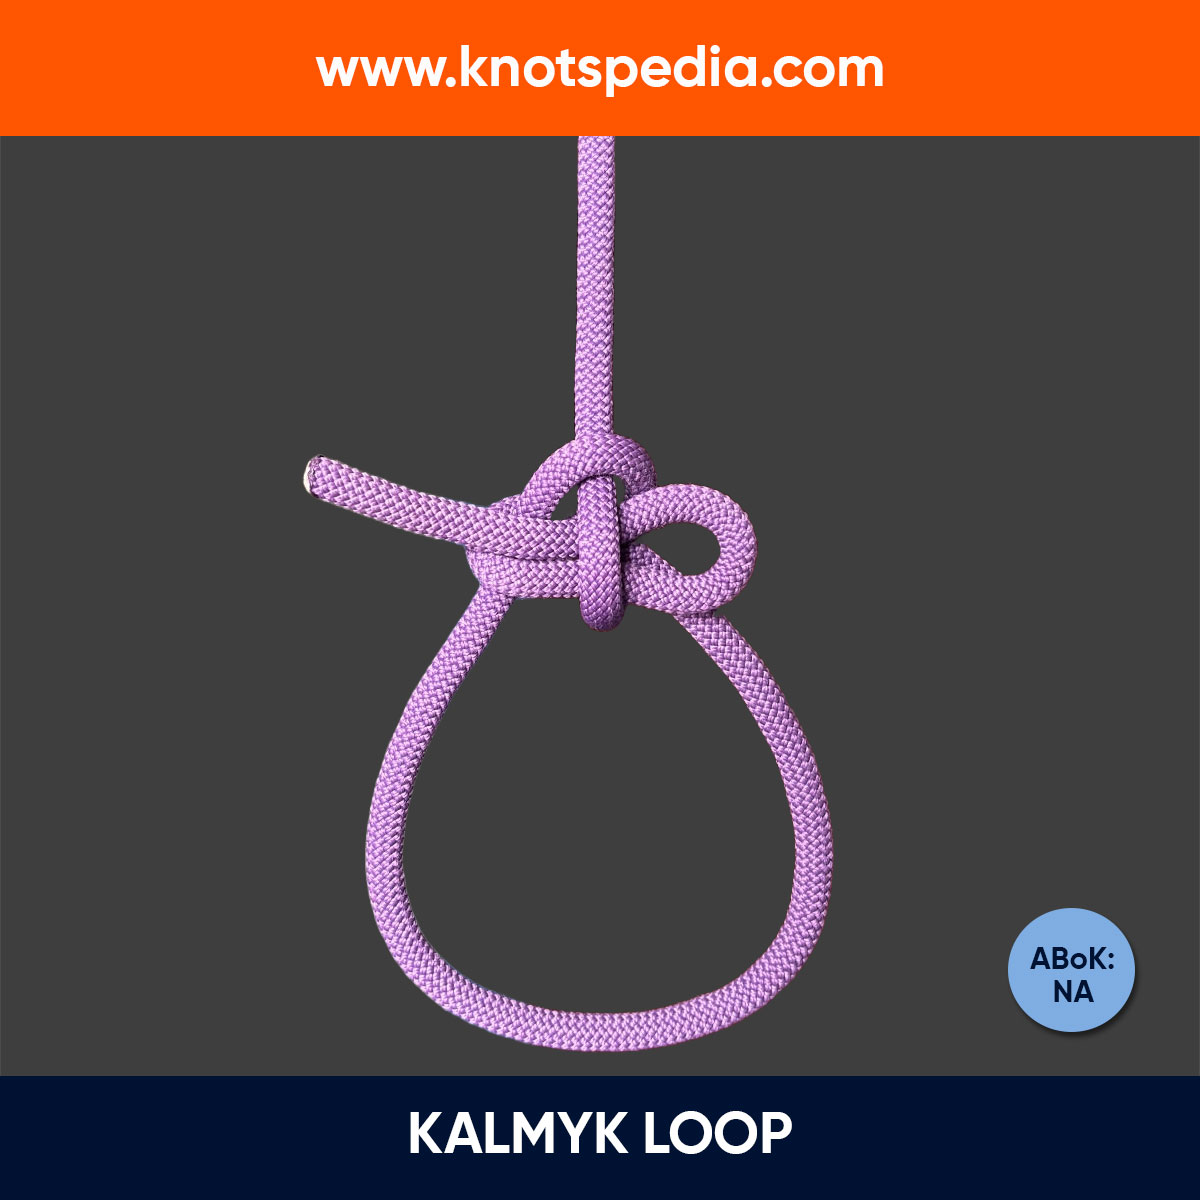
Kalmyk Loop
The Kalmyk Loop is a quick-release knot that creates a fixed loop in the rope. Perfect for camping, bushcraft, and light-duty tasks.
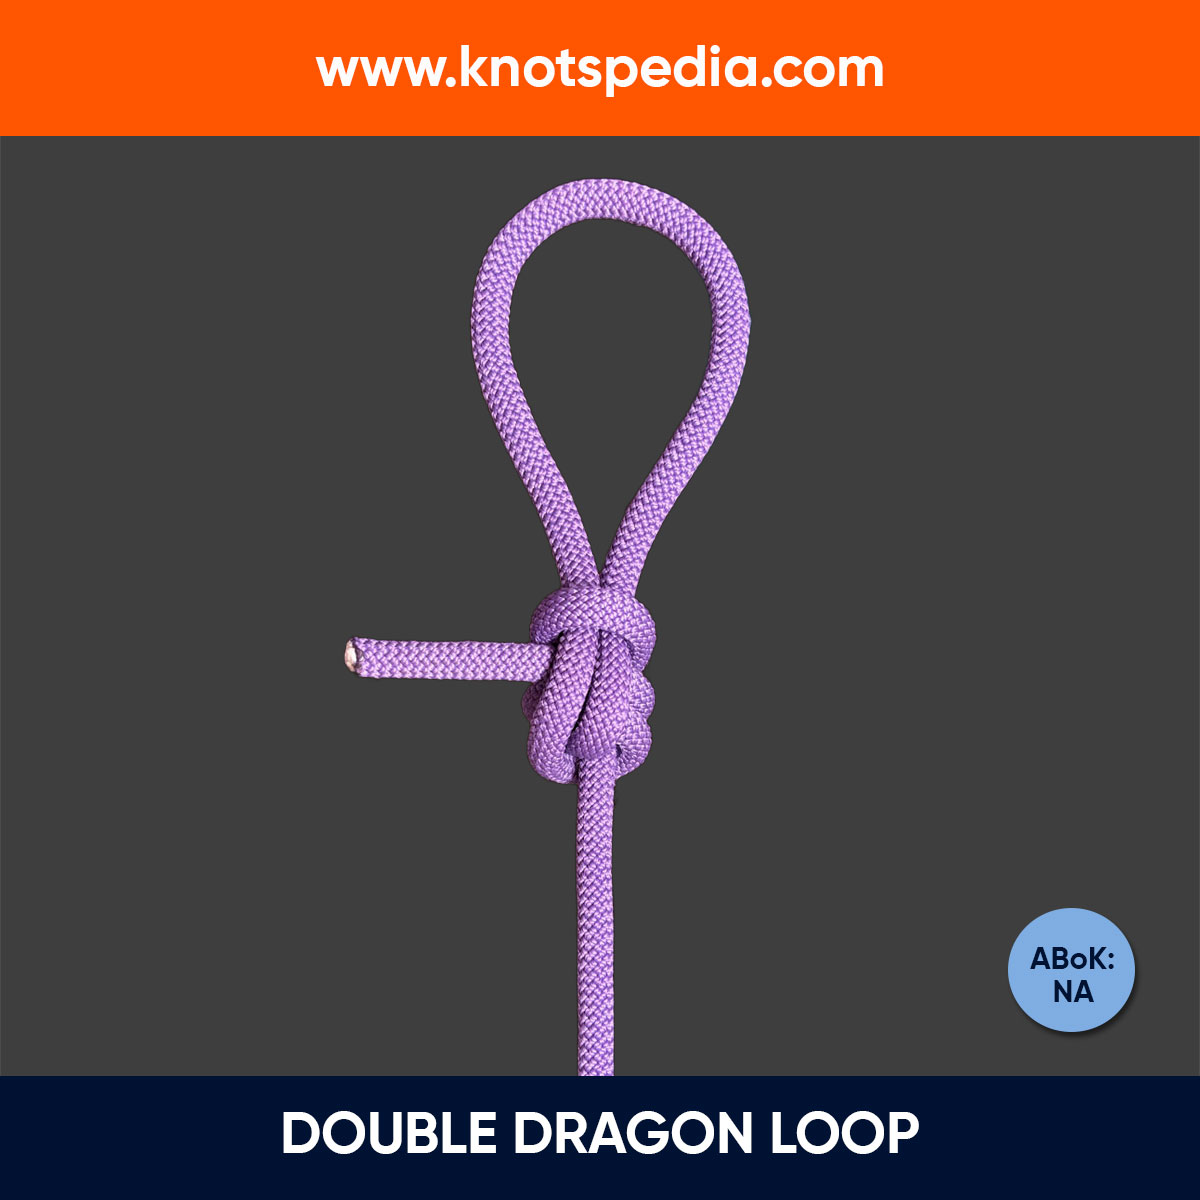
Double Dragon Loop
The Double Dragon Loop Knot forms a secure, jam-free fixed loop at the rope's middle or end. Ideal for camping, transport, and dynamic loads.
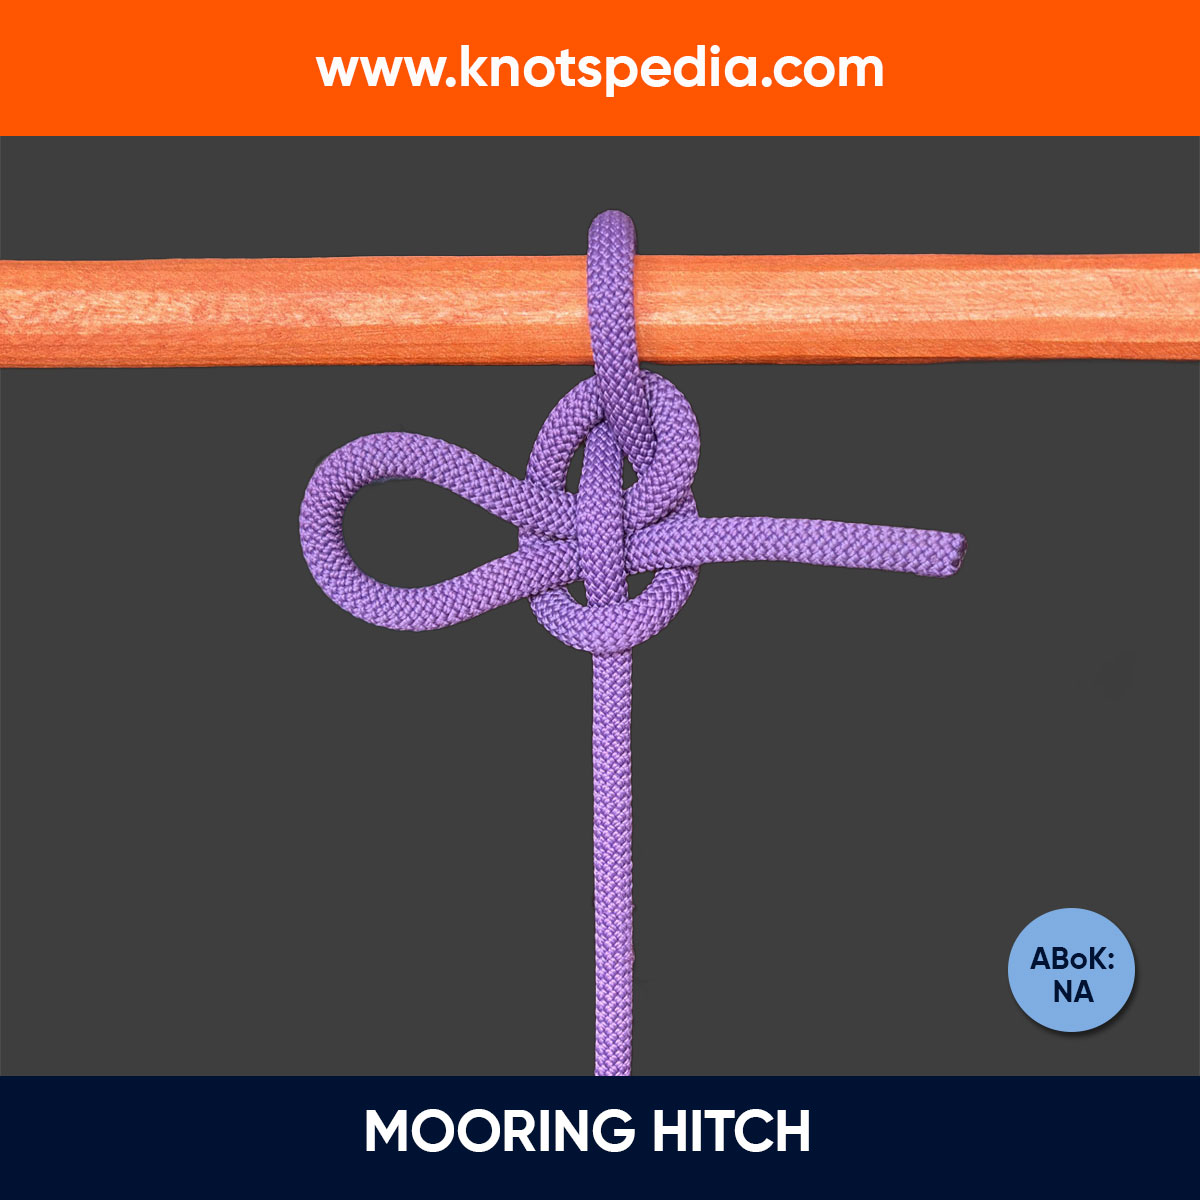
Mooring Hitch
The Mooring Hitch is a quick-release knot ideal for temporary tasks like tying small boats, or tethering animals. Easy to untie, but not life-critical!
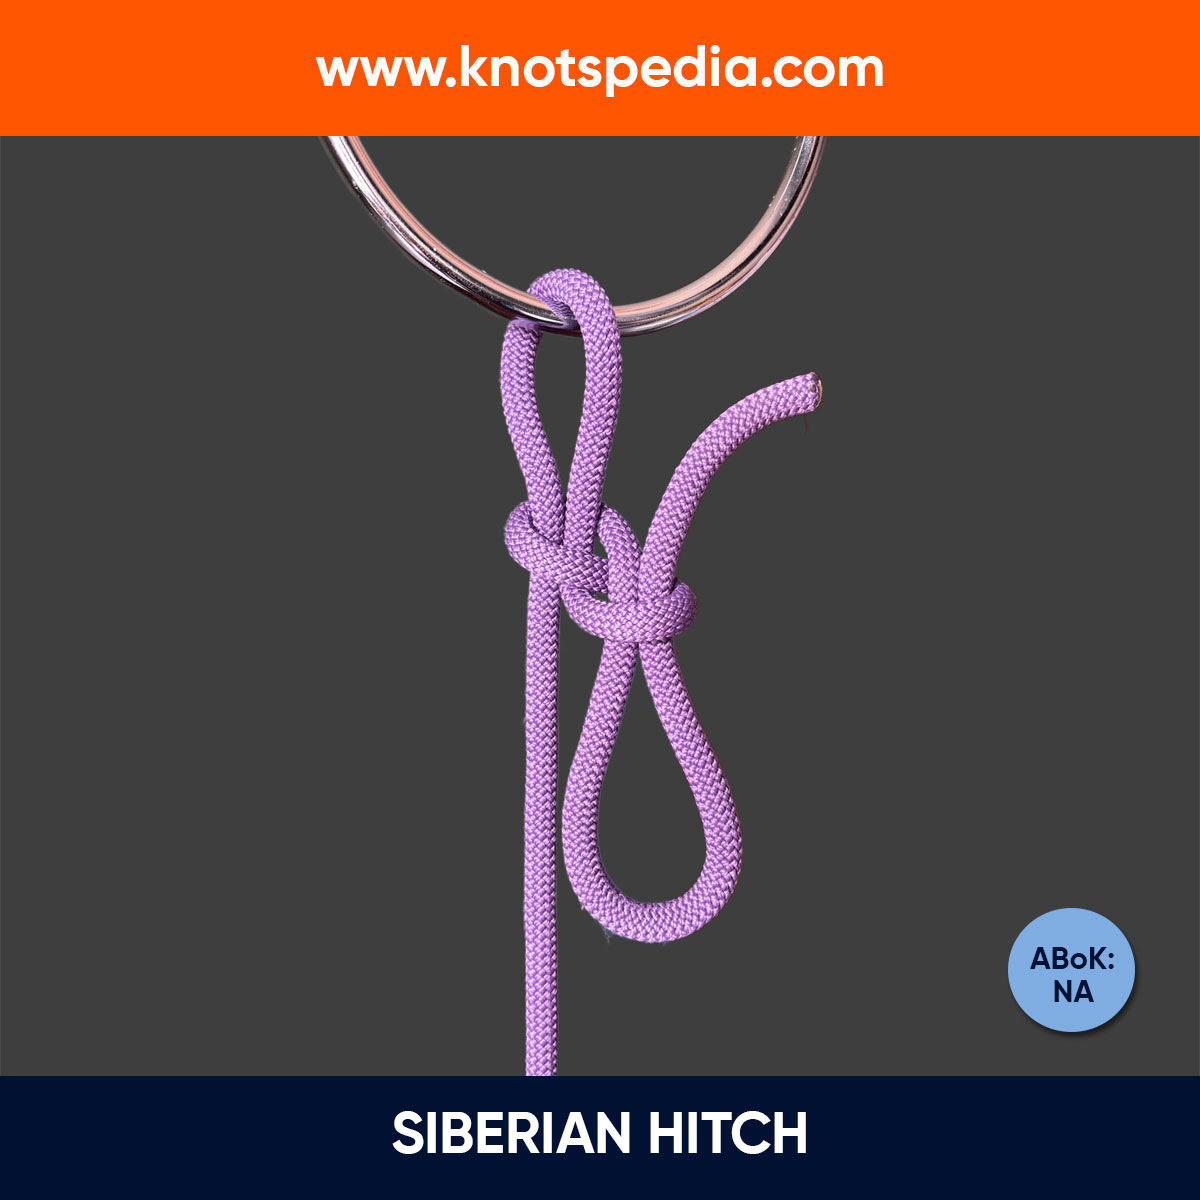
Siberian Hitch
The Siberian hitch, also known as the Evenk knot, is a quick-release hitch ideal for cold climates; it can be tied and untied easily, even with gloves on.
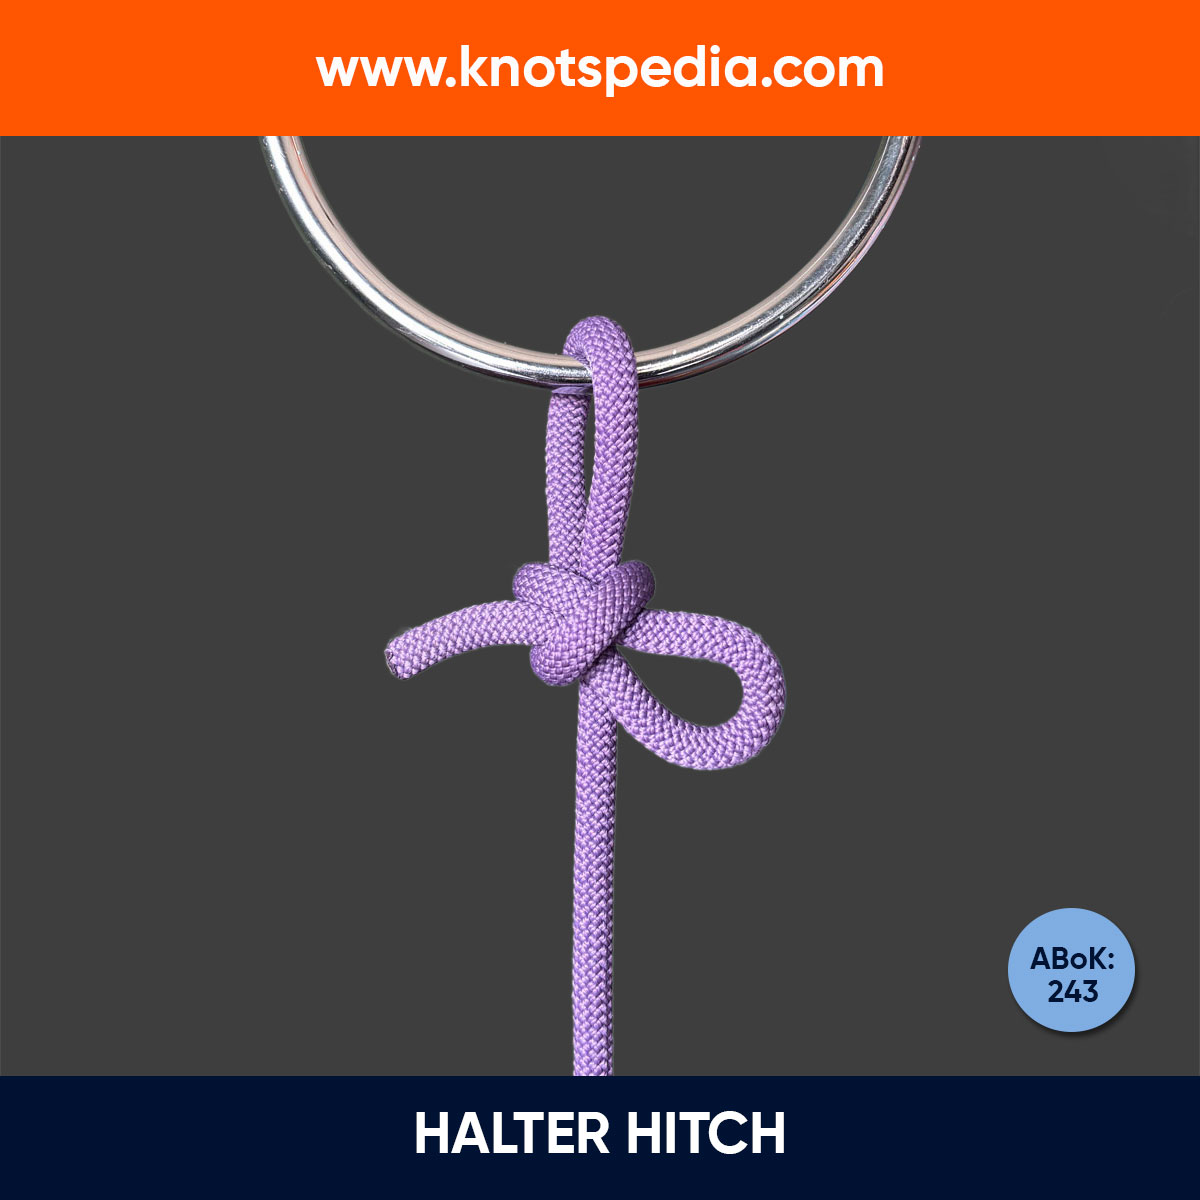
Halter Hitch
The Halter Hitch is a quick-release knot perfect for securing ropes to posts, commonly used for horses. It's easy to tie, untie, and works even under tension!
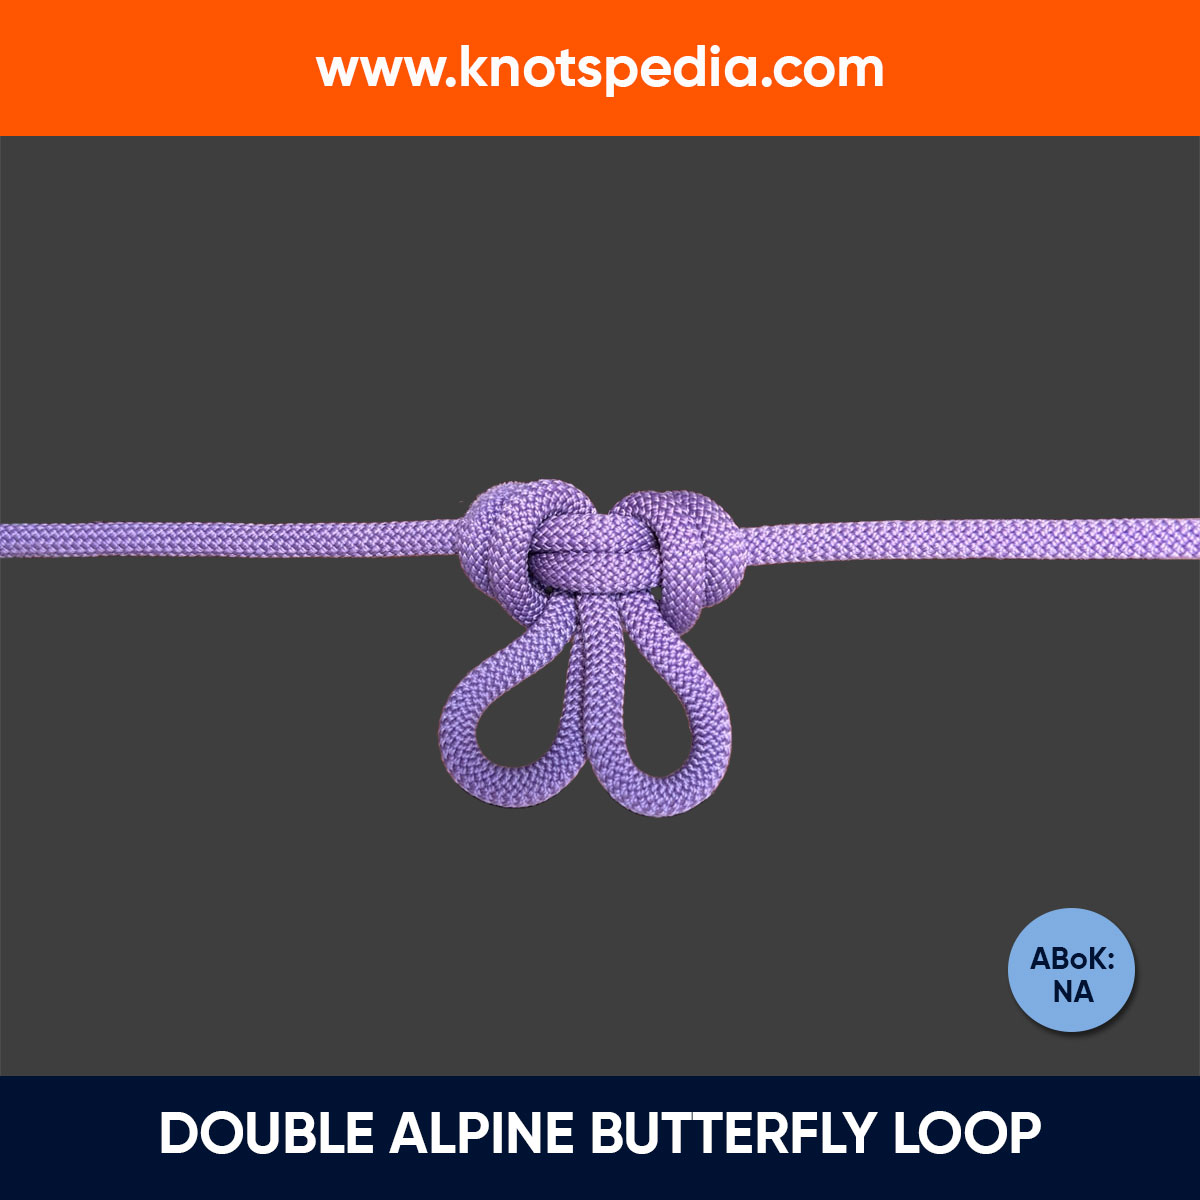
Double Alpine Butterfly Loop
The Double Alpine Butterfly Loop forms two secure loops mid-rope, perfect for climbing, rescue, or pulley setups, handling multidirectional loads.

Eskimo Bowline
The Eskimo Bowline, also known as Cossack Knot or Anti-Bowline, creates a secure loop at the rope's end. It’s widely used in Russia as a Bowline alternative.
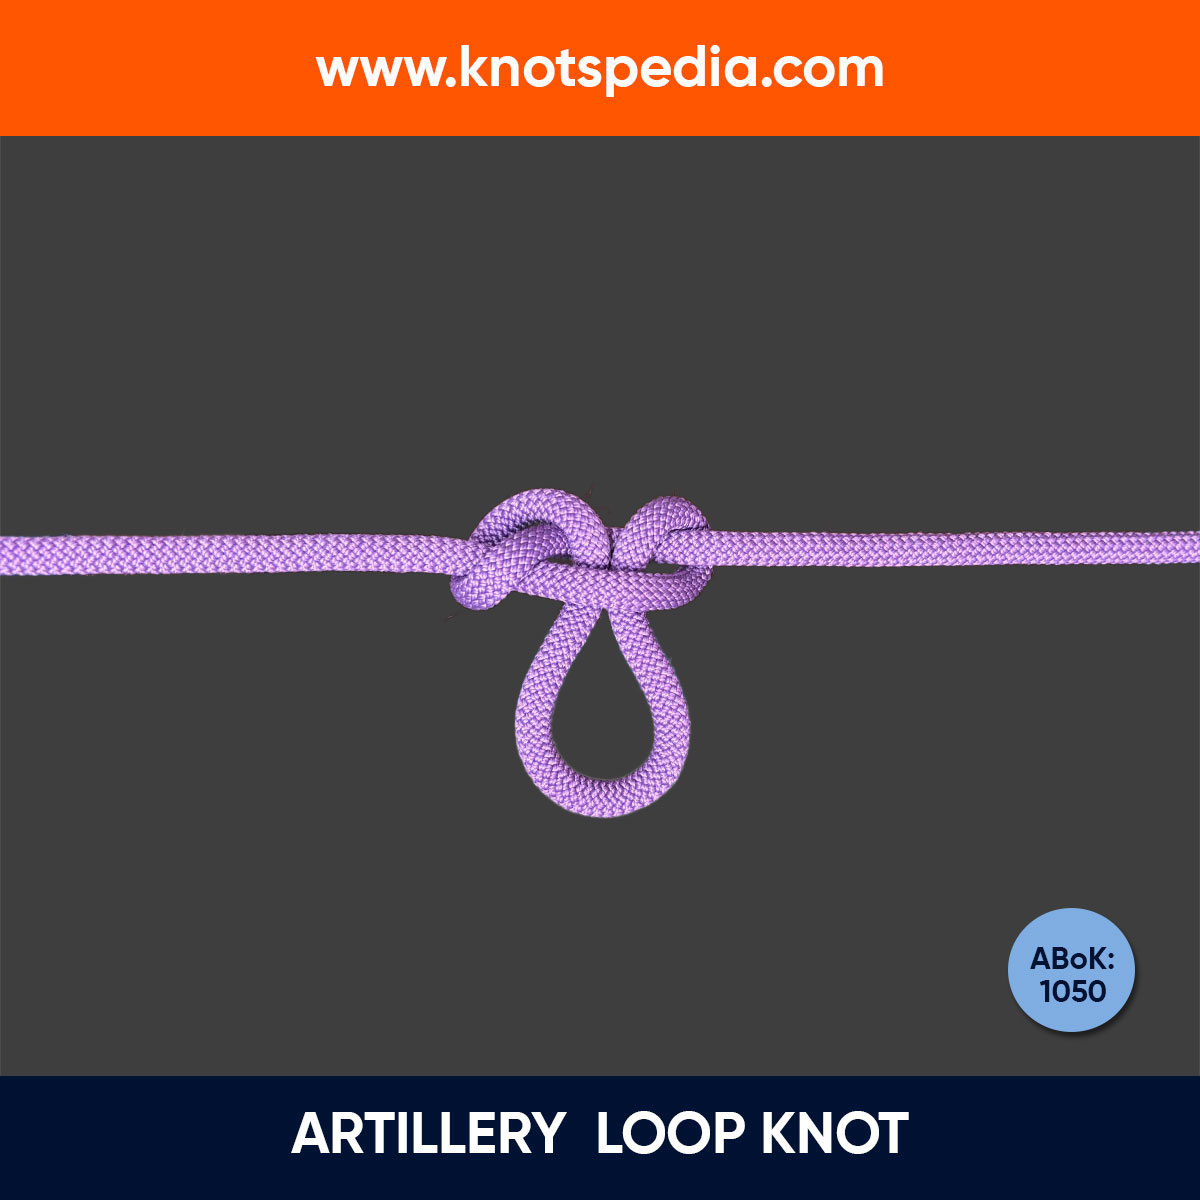
Artillery Loop
The Artillery Loop (Artilleryman's Loop or Harness Loop) creates a single loop in the middle of the rope. It's easy to tie but not suited for critical tasks.
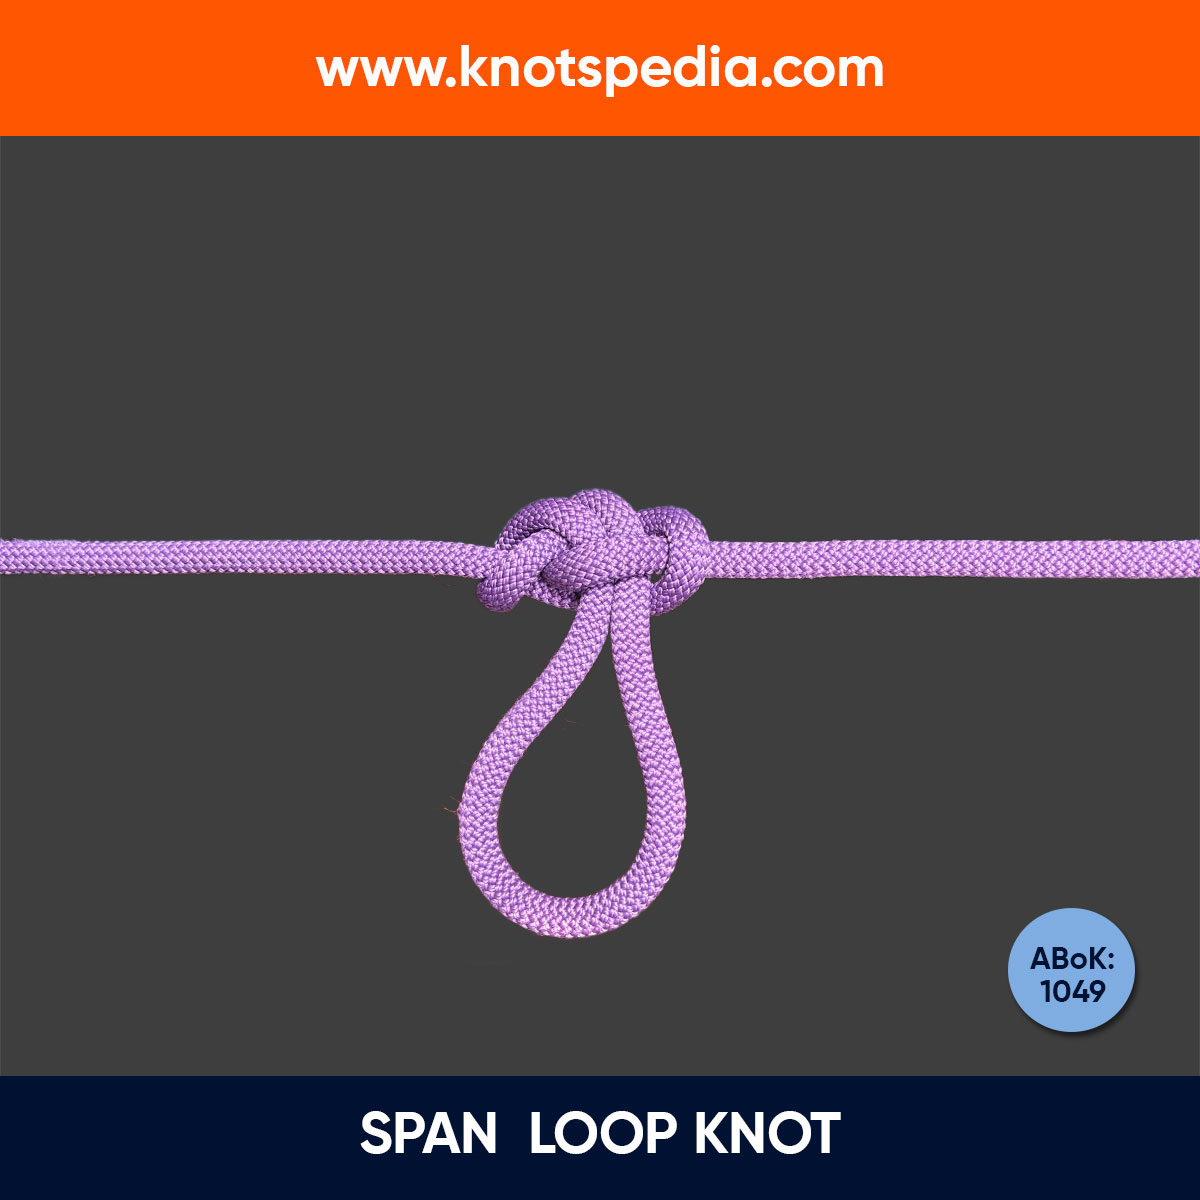
Span Loop
The Span Loop is a reliable, non-jamming knot that creates a secure loop in the middle of a rope. Easy to untie, it’s ideal for rigging and tackle systems.

Farmer’s Loop
The Farmer’s Loop is an easy-to-tie knot that creates a fixed loop in the middle of a rope. Ideal for household utility, camping, and isolating rope sections!
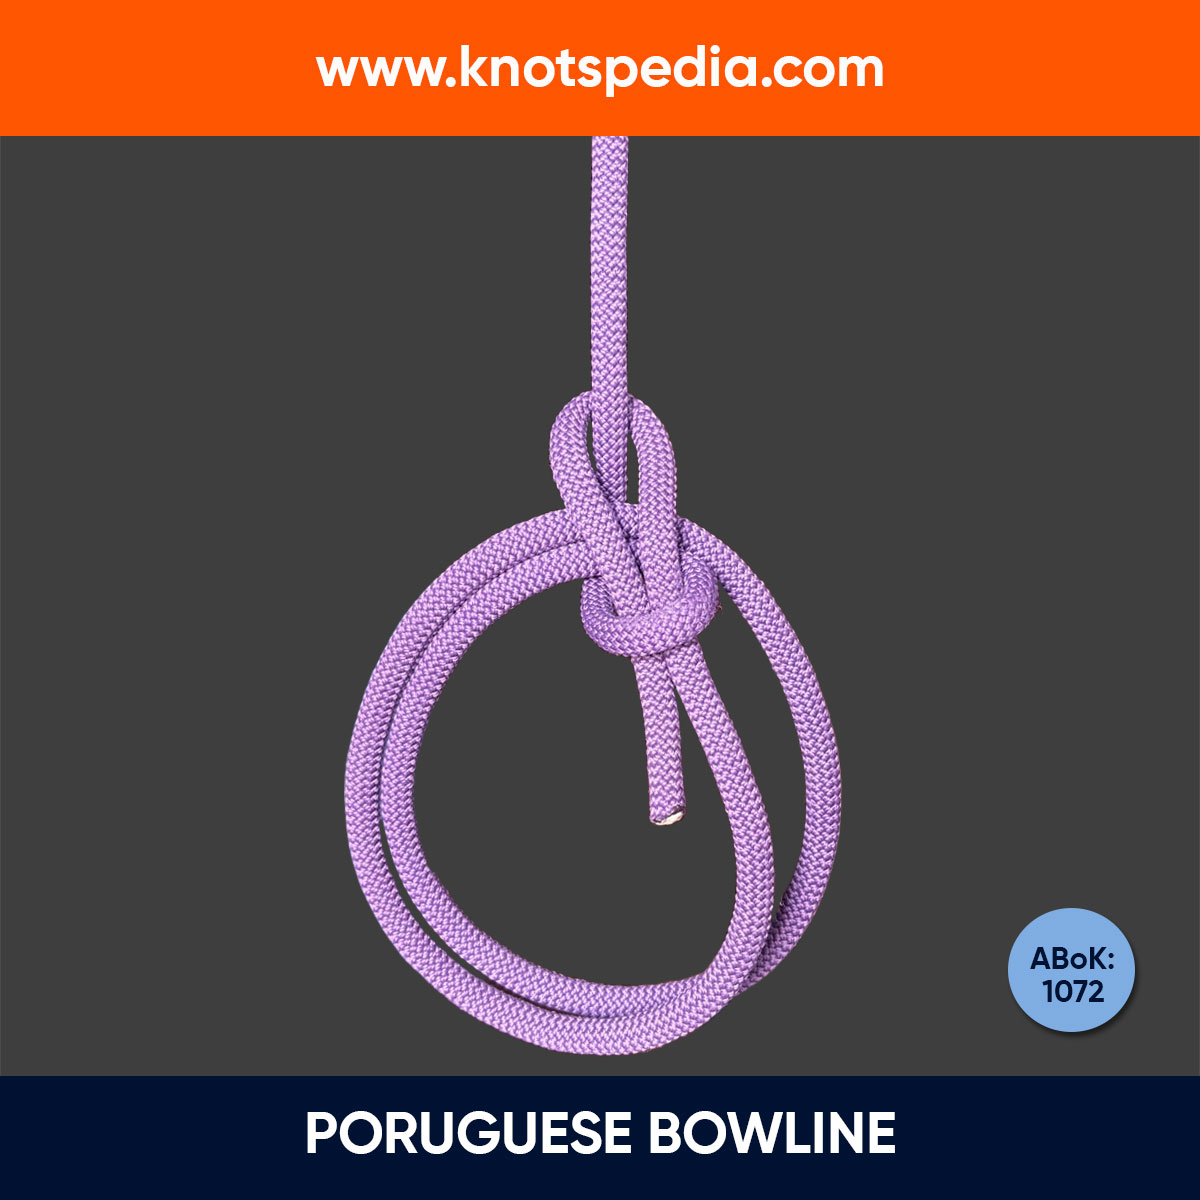
Portuguese Bowline
The Portuguese Bowline (ABoK #1072) is a variant of the bowline with two adjustable loops! Perfect for lifting, towing, or makeshift seats.
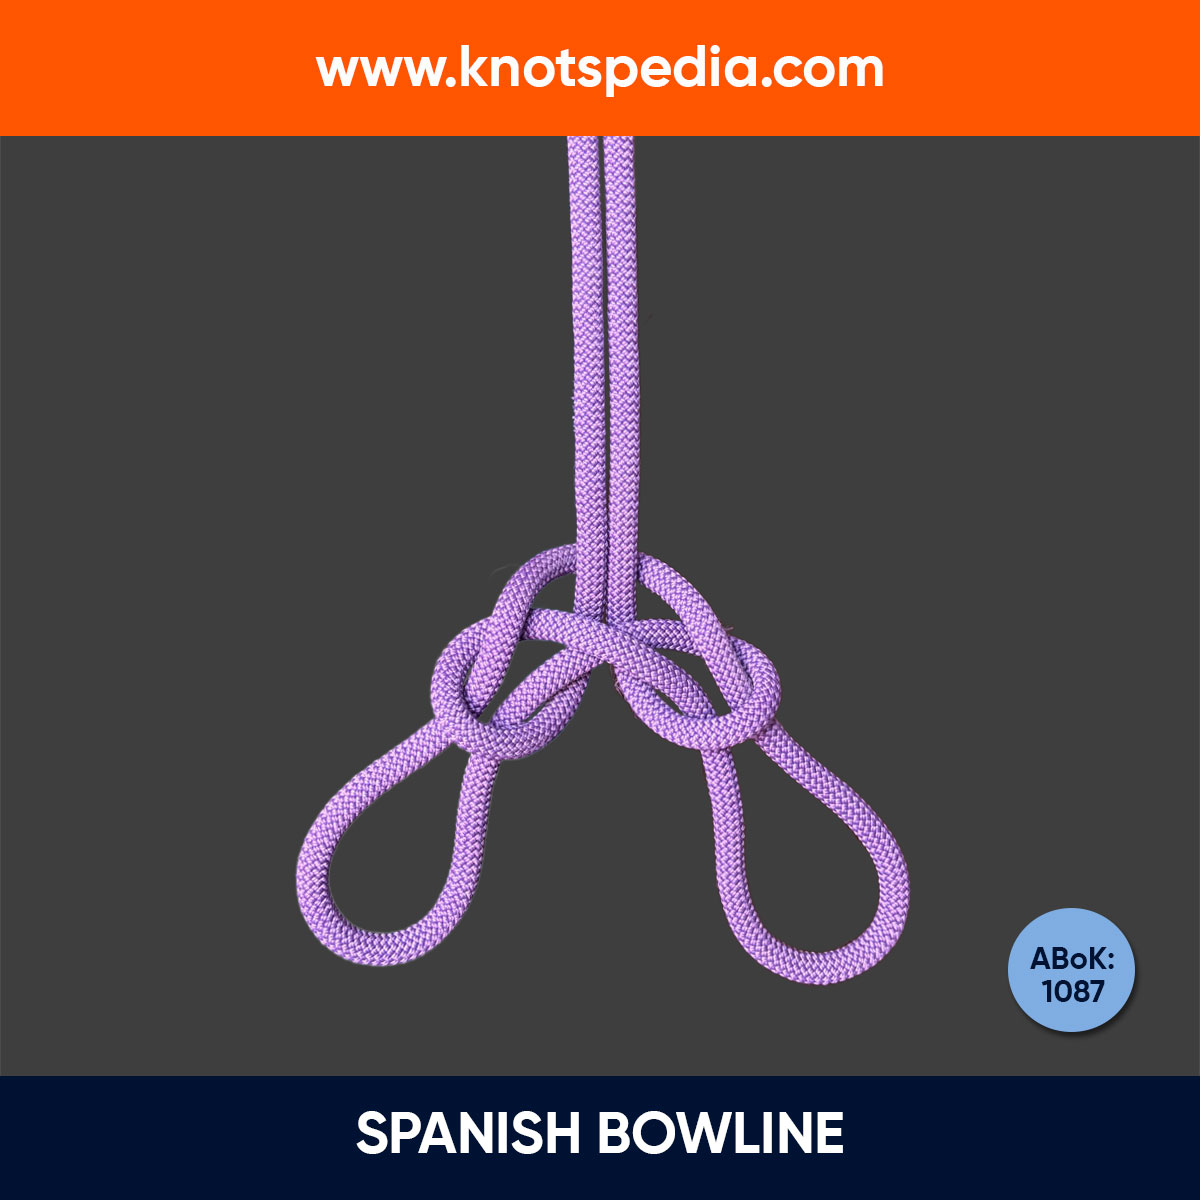
Spanish Bowline
The Spanish Bowline (ABoK #1087) is a must-know for safe rescues. Step-by-step guide, uses, and tips to master this versatile double-loop knot!
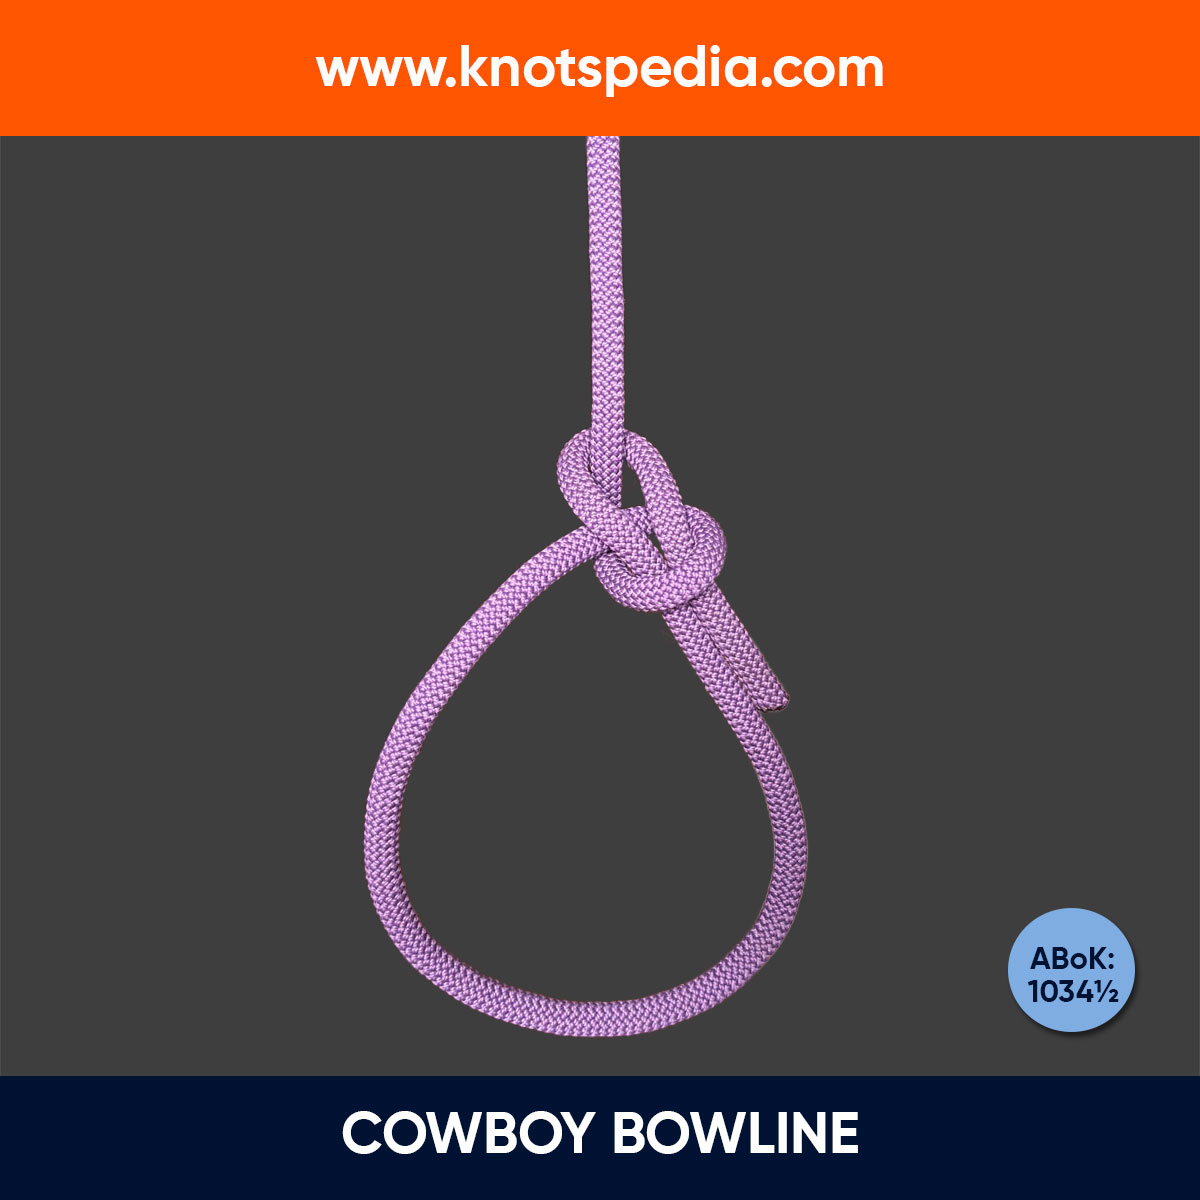
Cowboy Bowline
The Cowboy Bowline (ABoK #1034½) aka Dutch Bowline or Left hand Bowline handles transverse loads better but isn't safe for critical applications like climbing.
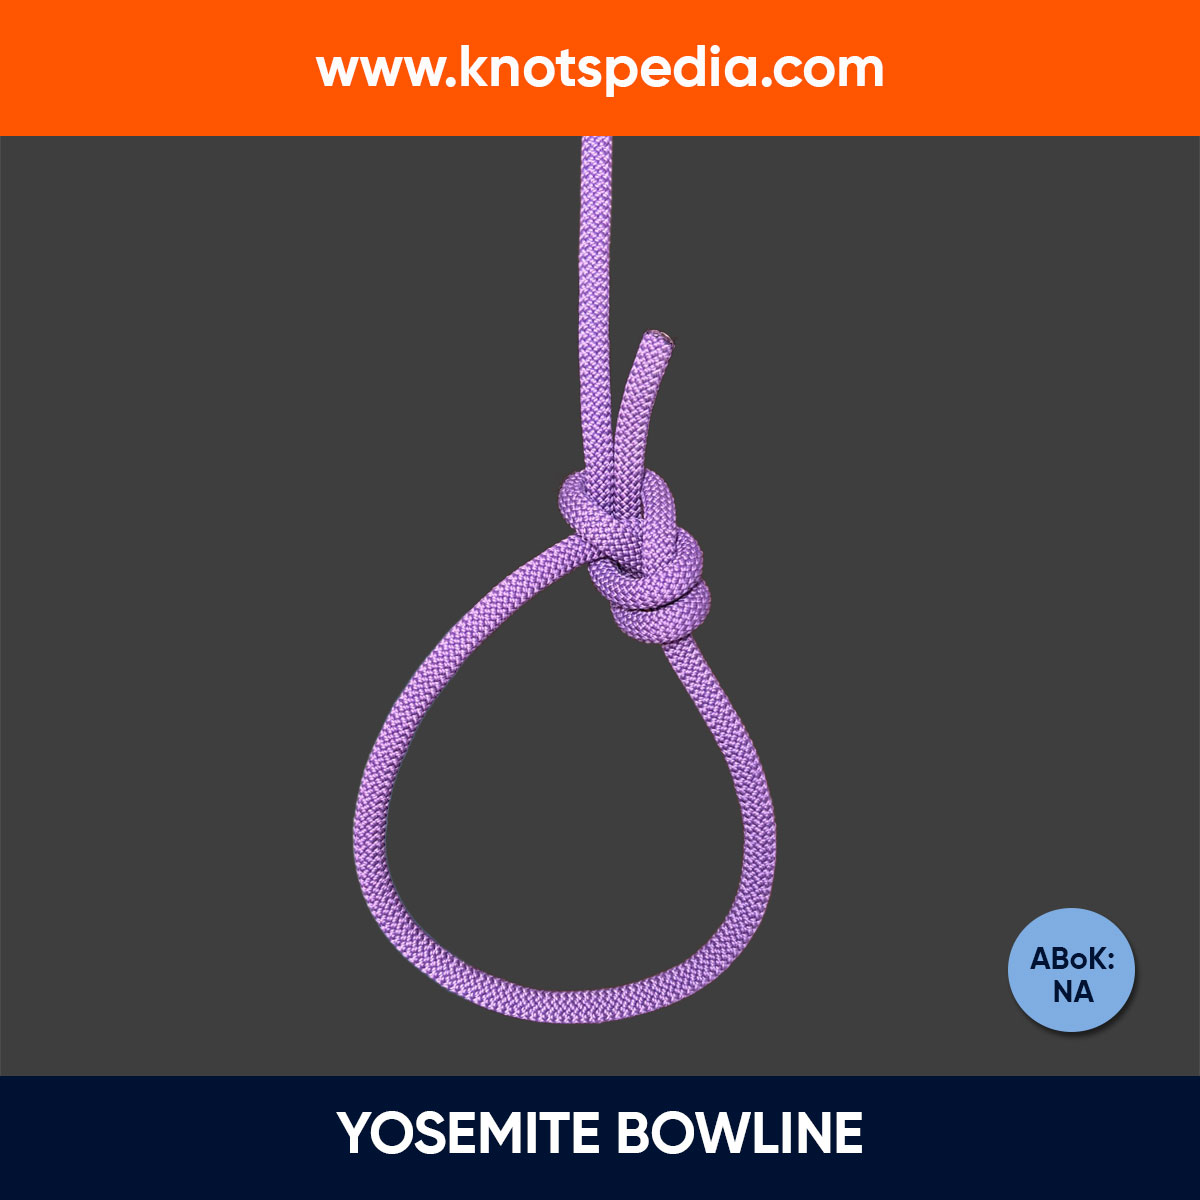
Yosemite Bowline
The Yosemite Bowline is a secure Bowline variation with a “Yosemite Finish” for added strength and stability, but tricky if not tied properly.
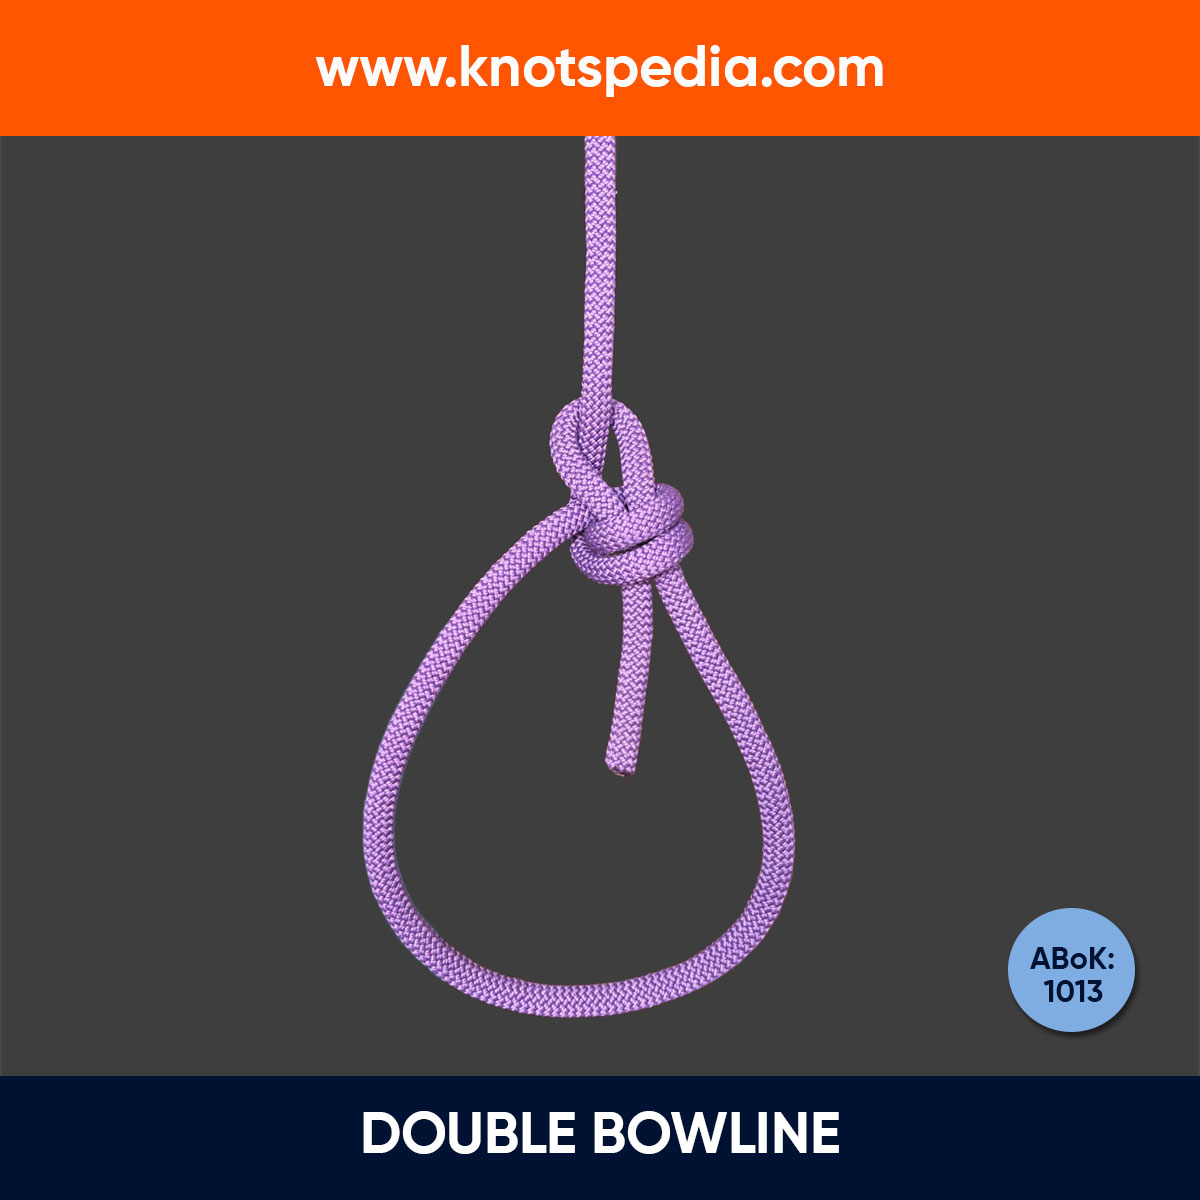
Double Bowline
The Double Bowline (ABoK #1013) forms a strong, single loop with an extra turn for added security. Ideal for climbing and securing ropes.
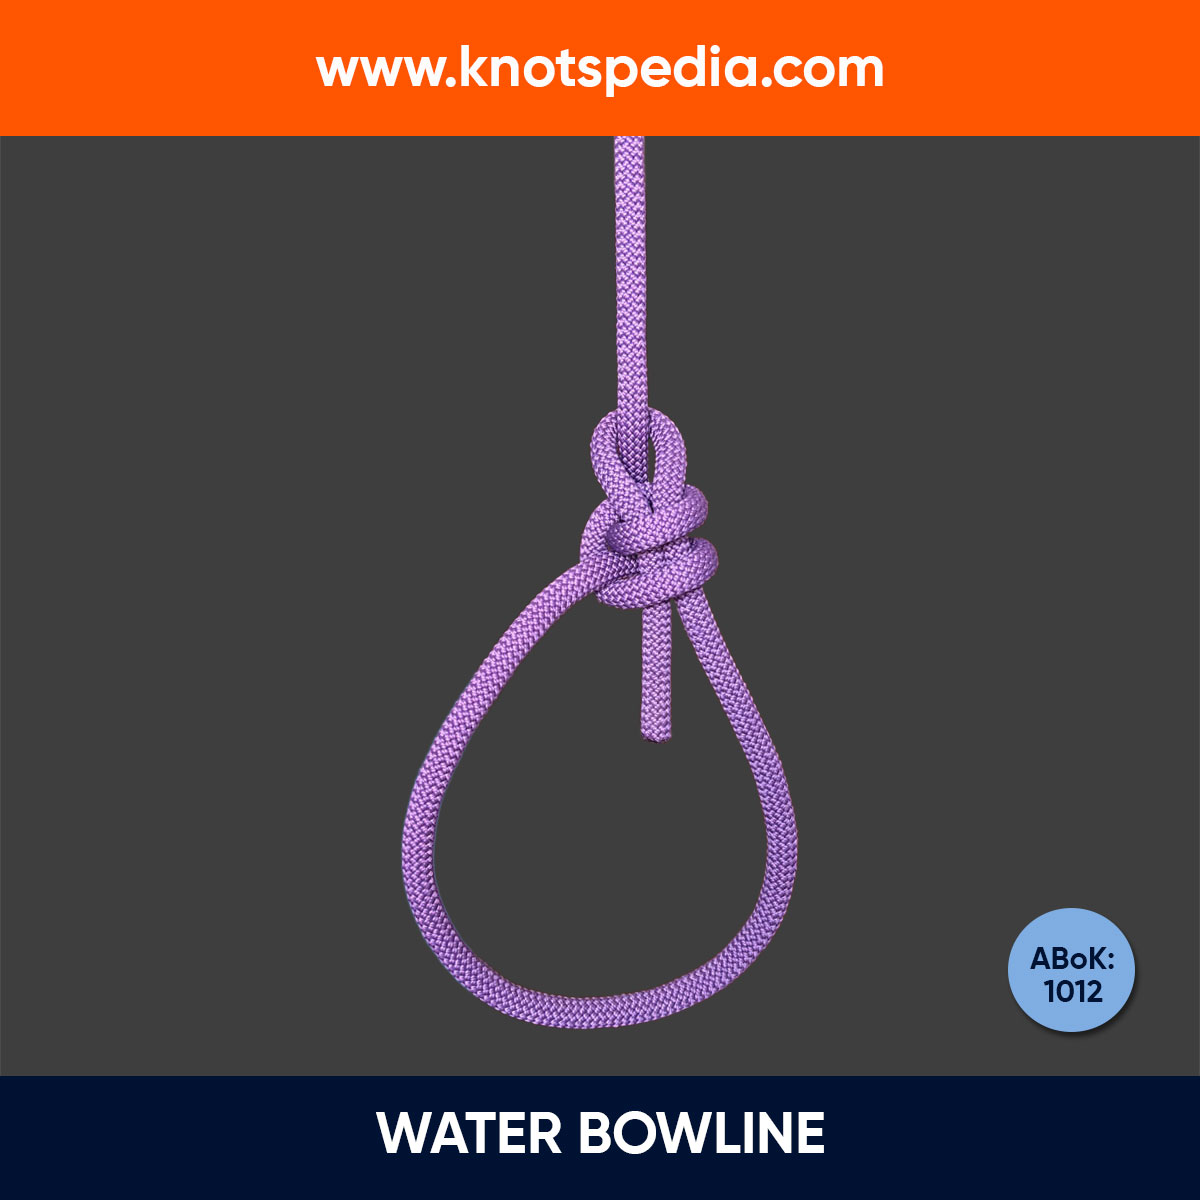
Water Bowline
The Water Bowline knot is a secure variation of the Bowline designed for wet and slippery conditions. Perfect for rigging, towing, and more!
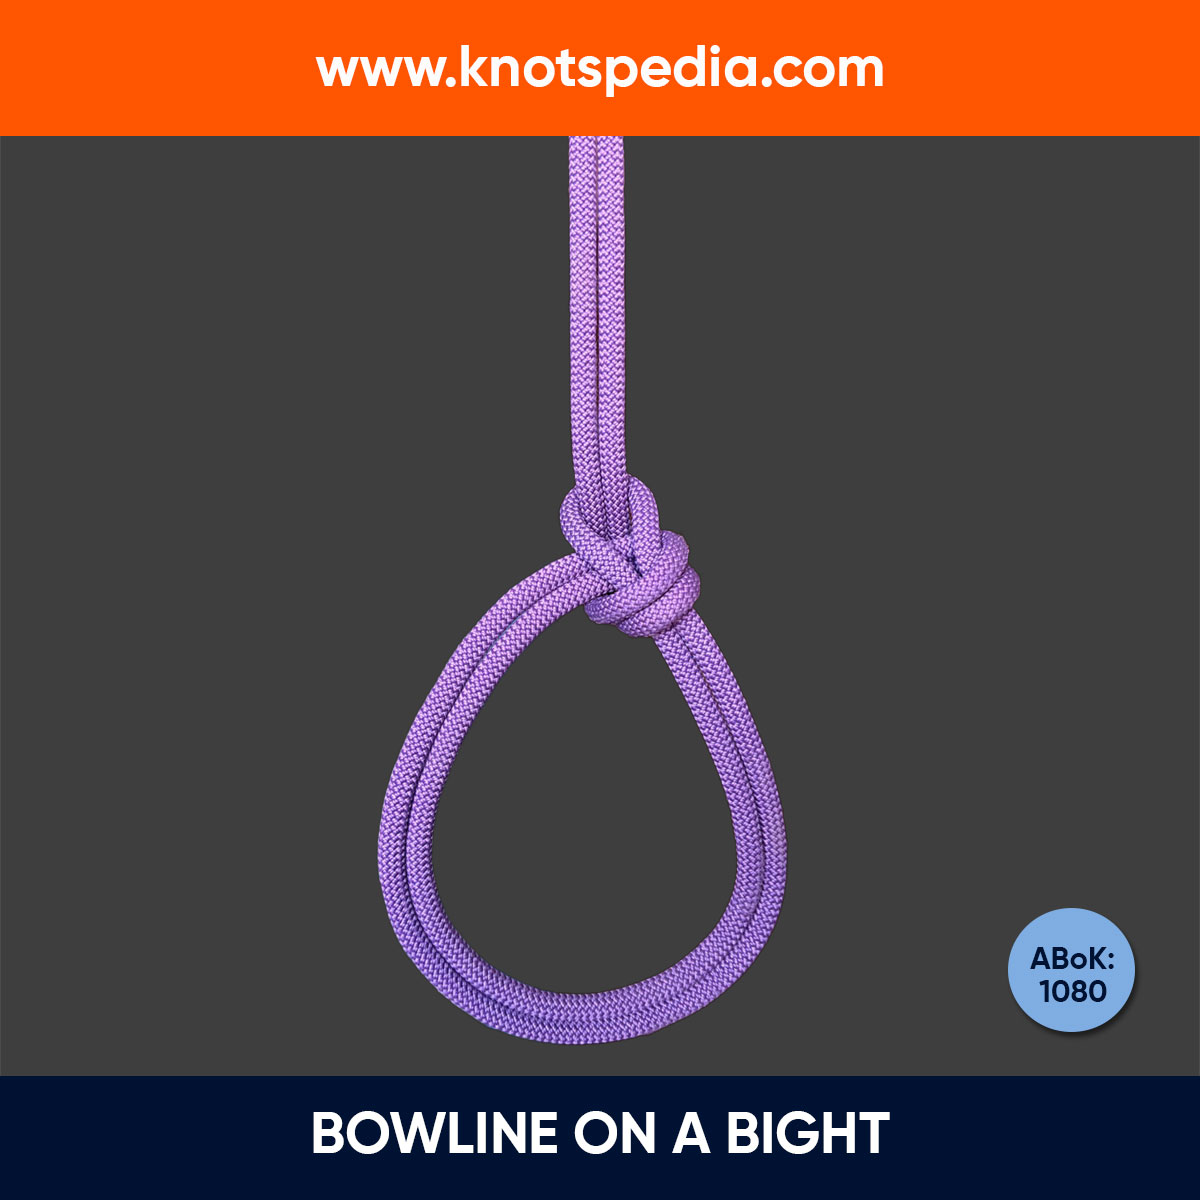
Bowline on a Bight
The Bowline on a bight (ABoK #1080) forms two secure loops in the middle of the rope. Perfect for climbing and hauling, it’s easy to tie but tricky to master!

Fireman’s Chair Knot
The Fireman’s Chair Knot (ABoK #1140) creates two secure, adjustable loops for emergency and rescue situations, supporting the upper body and legs.
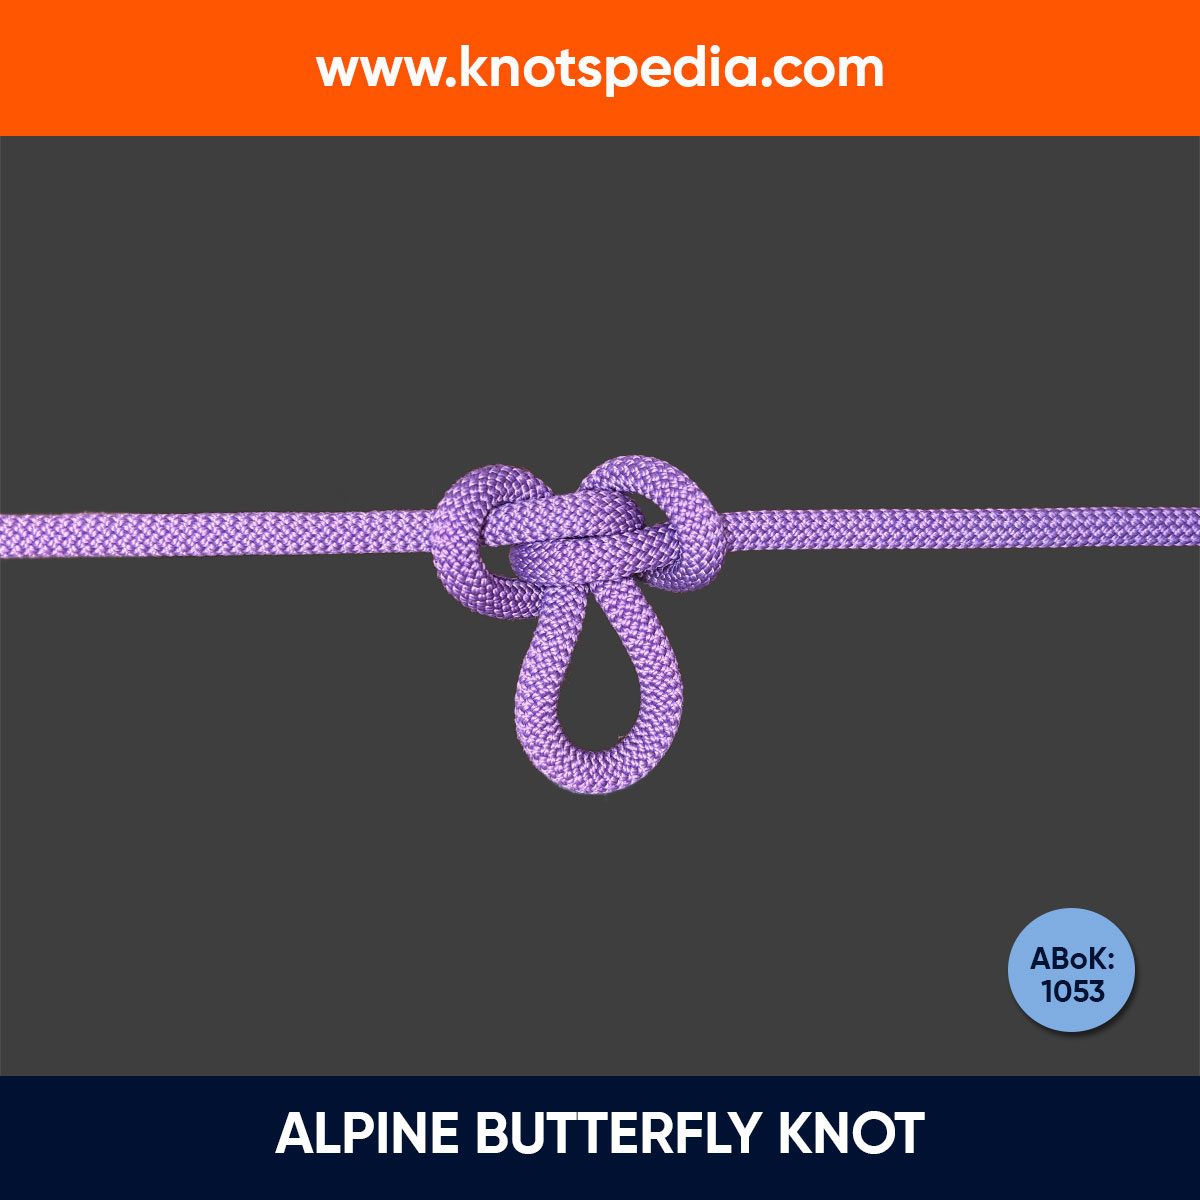
Alpine Butterfly Knot
The Alpine Butterfly Knot creates a secure loop in the middle of a rope, withstands multi-directional loads, and remains easy to untie after heavy use.
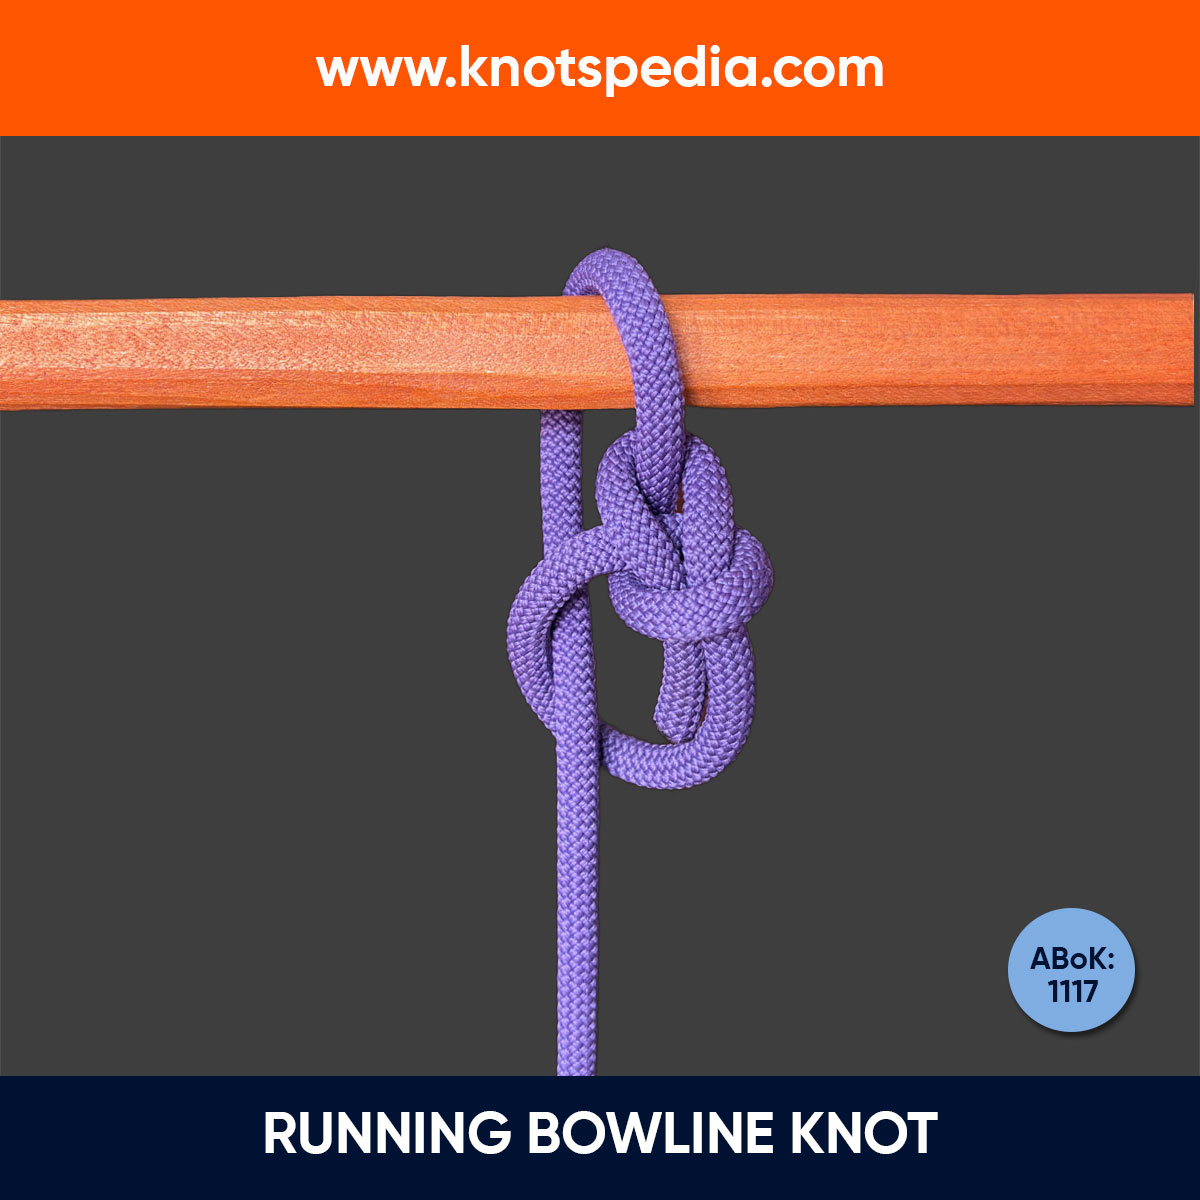
Running Bowline Knot
The Running Bowline knot (ABoK #1117) forms a secure, adjustable noose that's easy to untie. Perfect for tree work, hoisting, or anchoring.
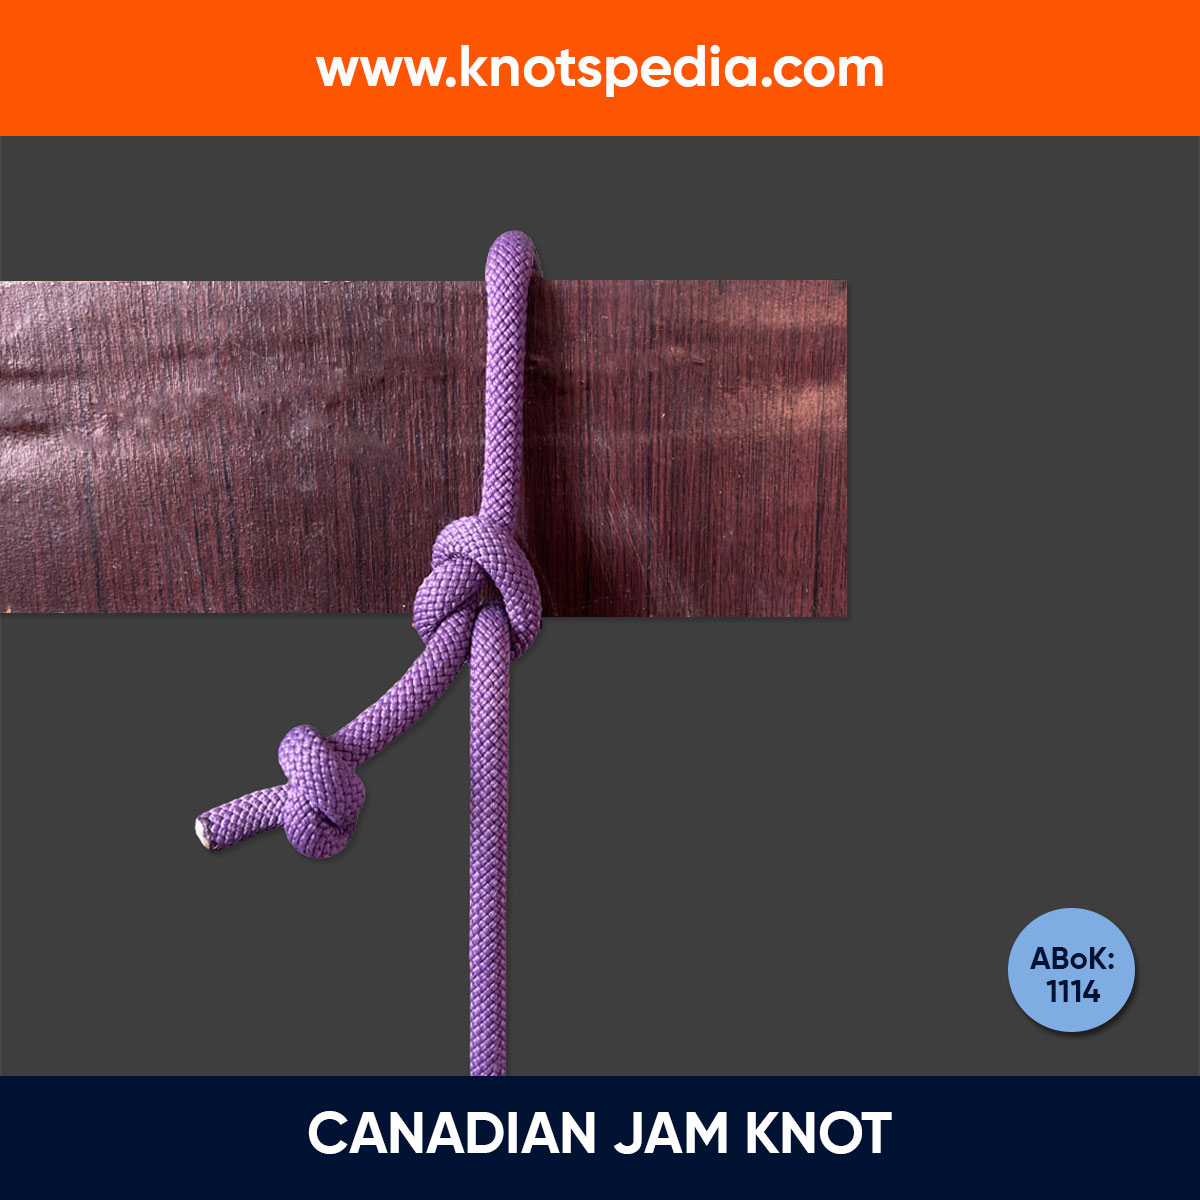
Canadian Jam Knot
The Canadian Jam Knot (ABoK #1114) is a bushcraft knot, perfect for securing gear, tying down tarps, or bundling items. Easy to tie, it tightens under tension!
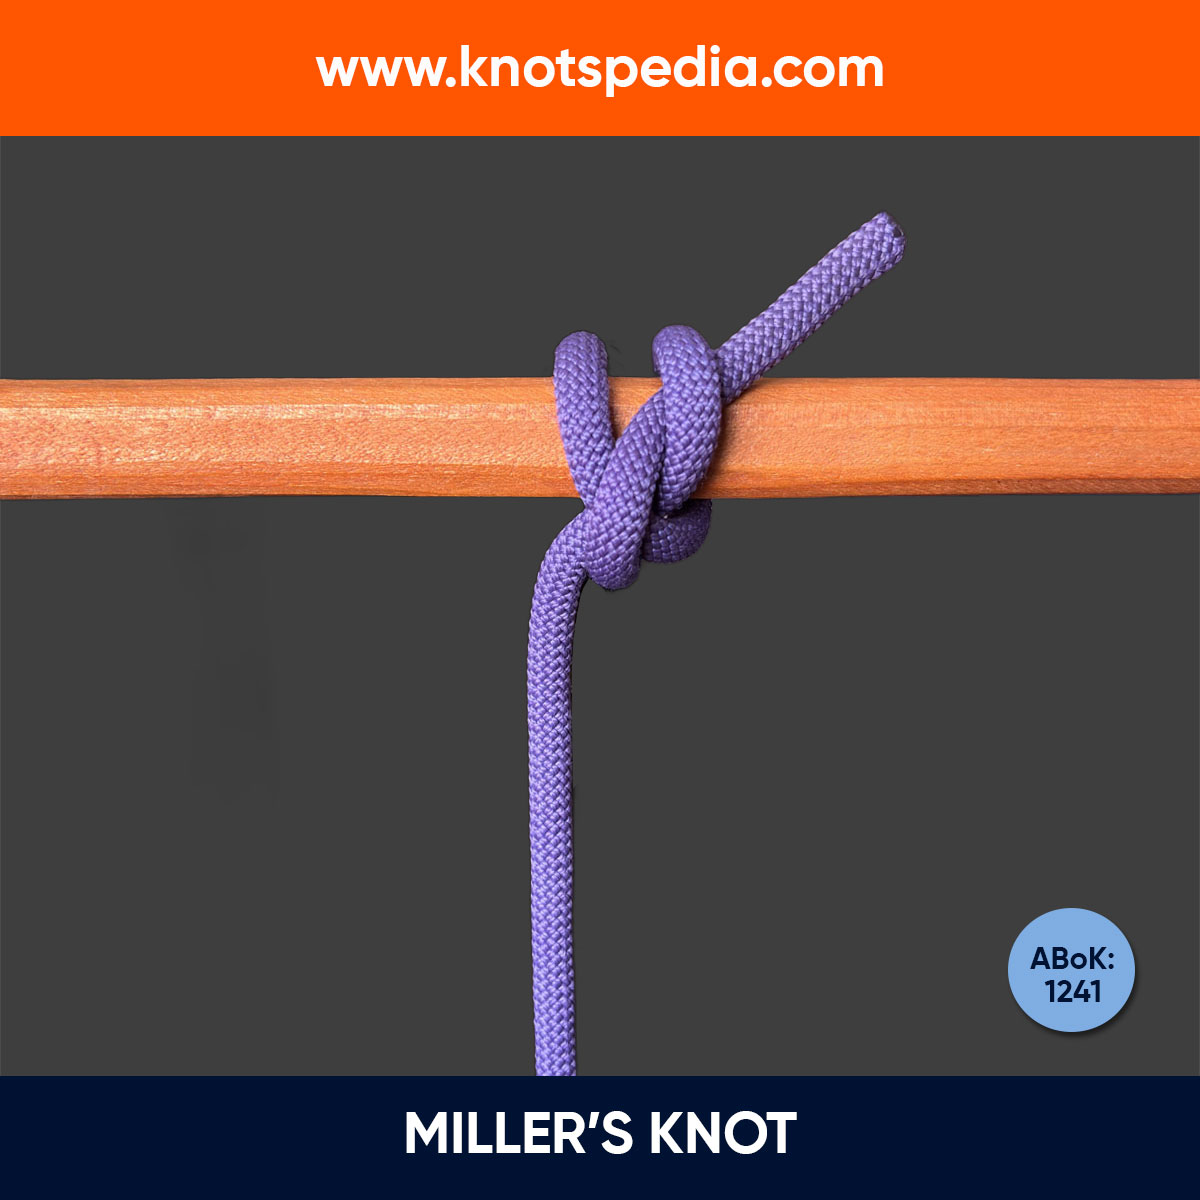
Miller’s Knot
The Miller’s Knot (ABoK #1241), also known as the Bag Knot or Sack Knot, is a secure binding knot used for tying the necks of sacks, bags, and bundle items.
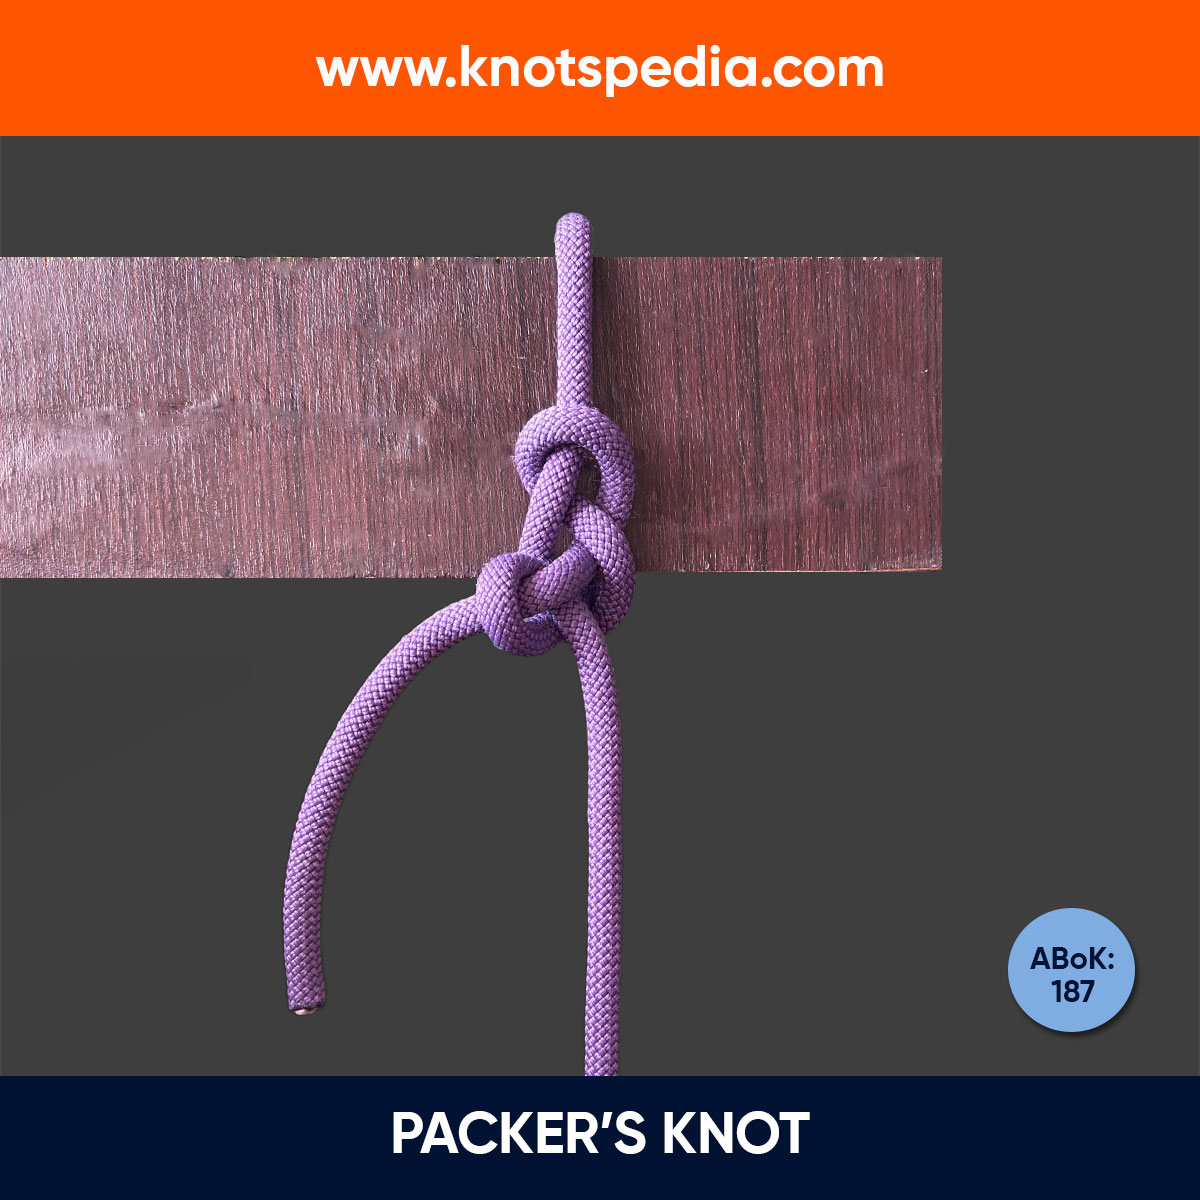
Packer’s Knot
The Packer's Knot is a secure binding knot, easy to tighten like a zip tie, ideal for packing, bailing, and roasting meat.
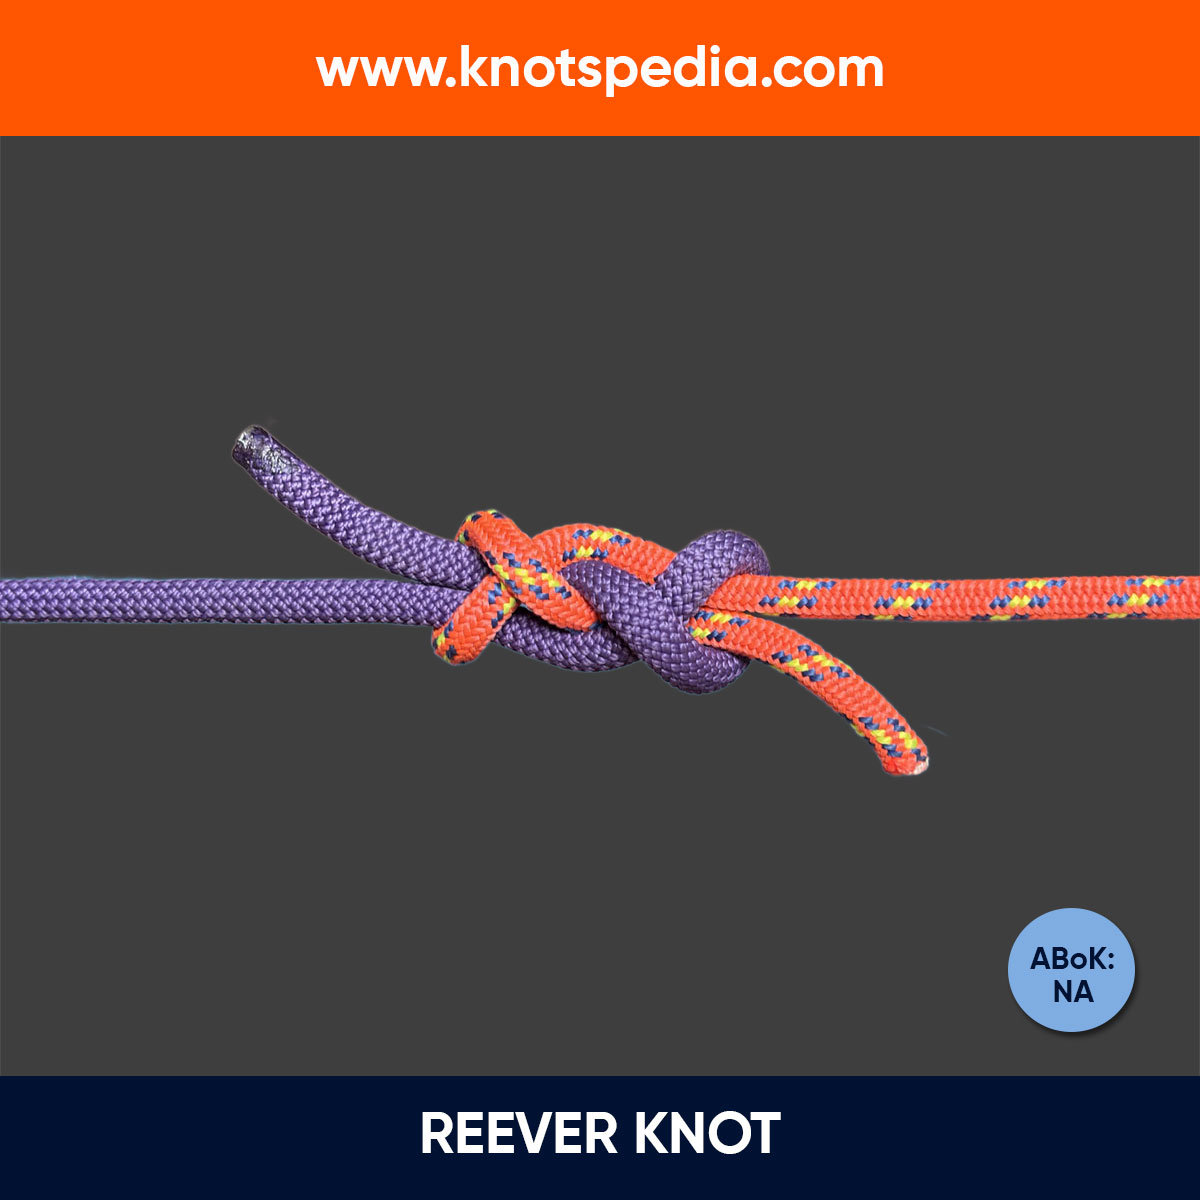
Reever Knot
The Reever Knot is a secure bend perfect for joining two ropes. Its symmetrical design ensures strength, even with slippery or wet ropes.
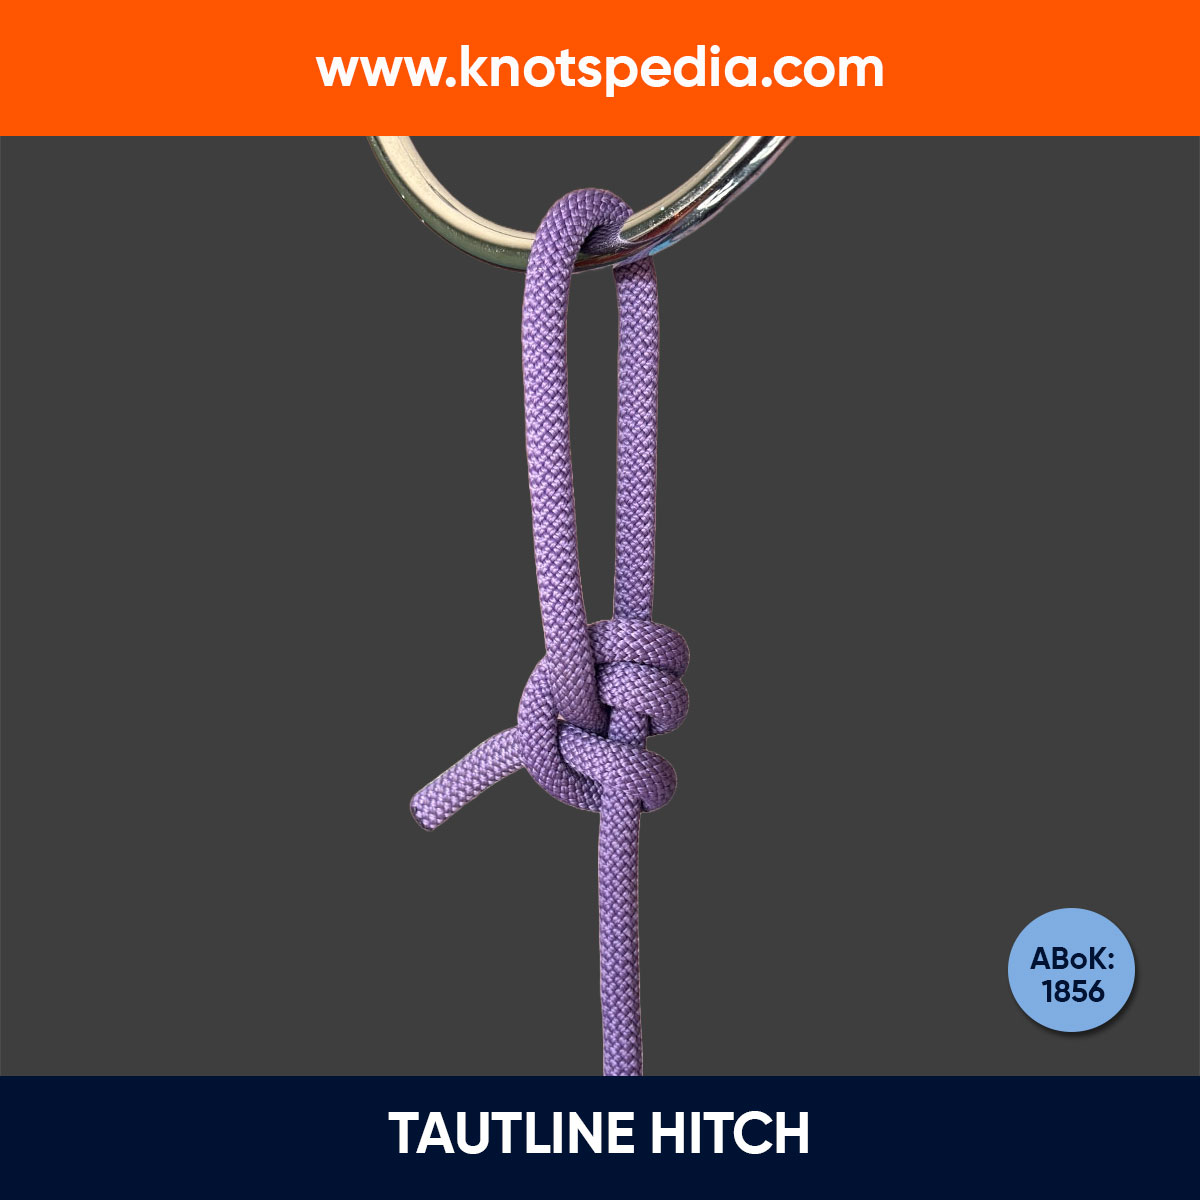
Tautline Hitch
The Tautline Hitch is an adjustable loop knot, ideal for camping, tarps, and guy lines. Easy to tie and adjust, but less secure for heavy or slippery ropes.
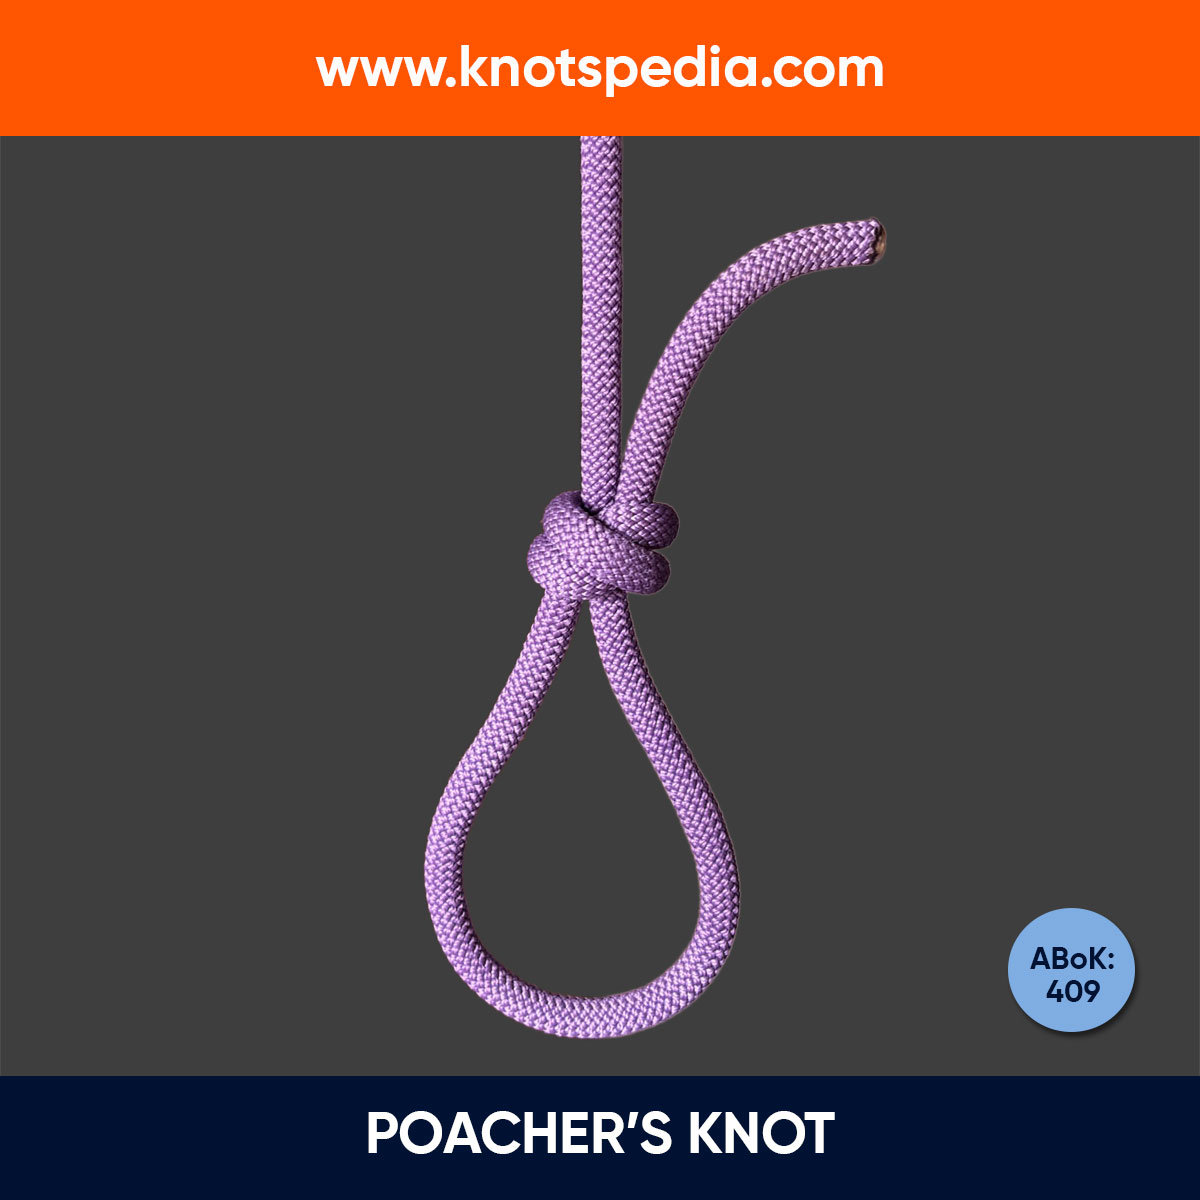
Poacher’s Knot
The Poacher’s Knot, also known as the Double Overhand Noose, forms a strong, adjustable loop. Ideal for slippery ropes, it’s simple to tie but tough to untie.
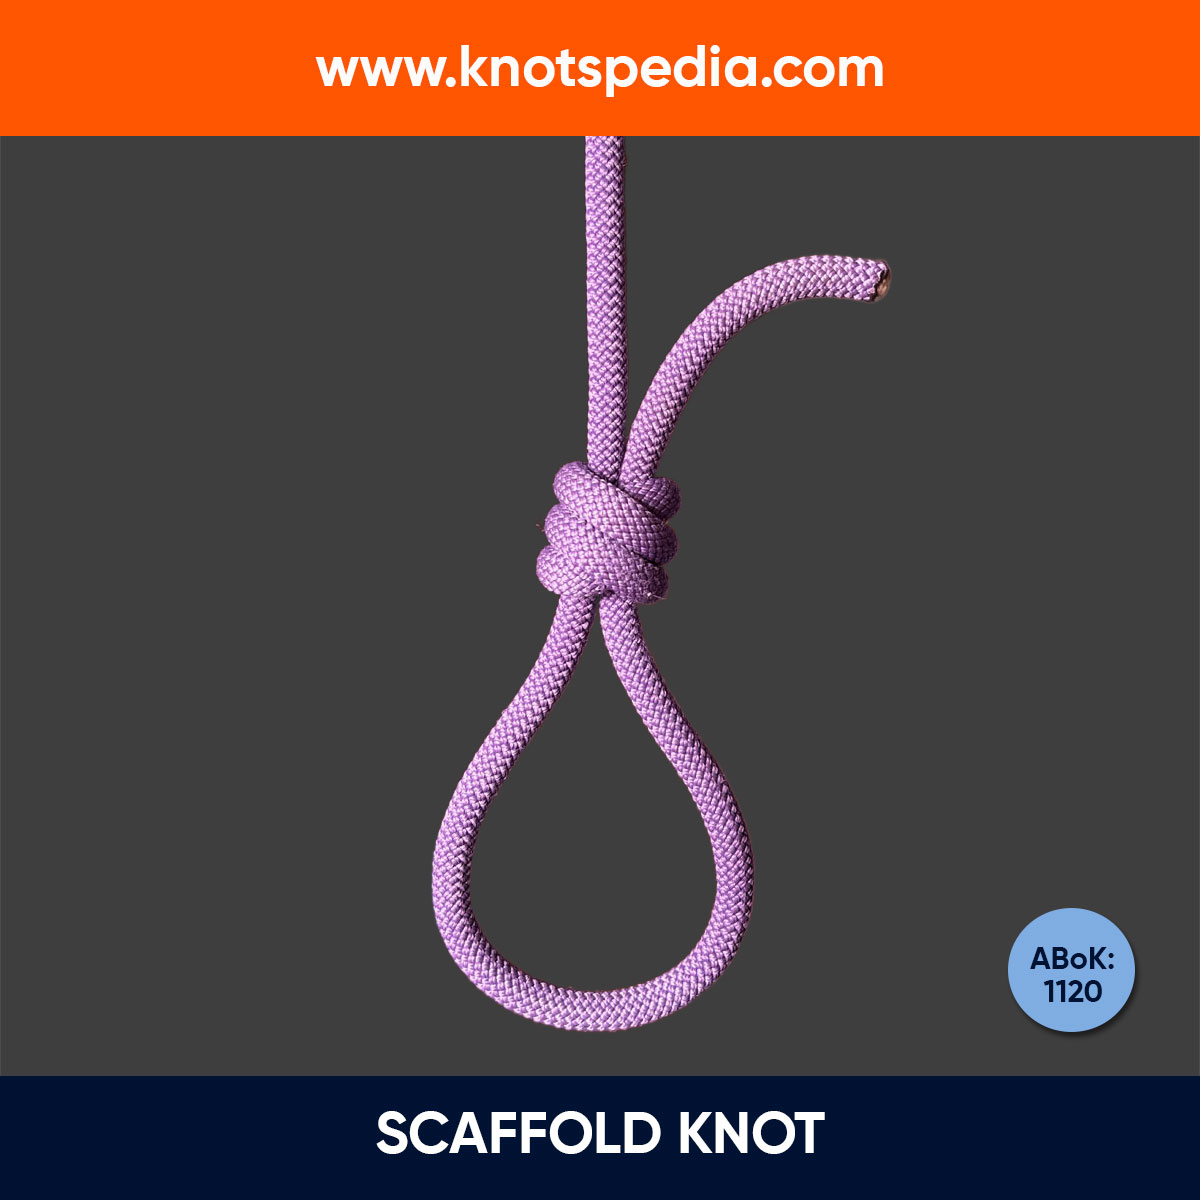
Scaffold Knot
The Scaffold Knot is a strong, adjustable Noose knot that grips securely on carabiners or rings. Perfect for climbing, boating, fishing and other general use.
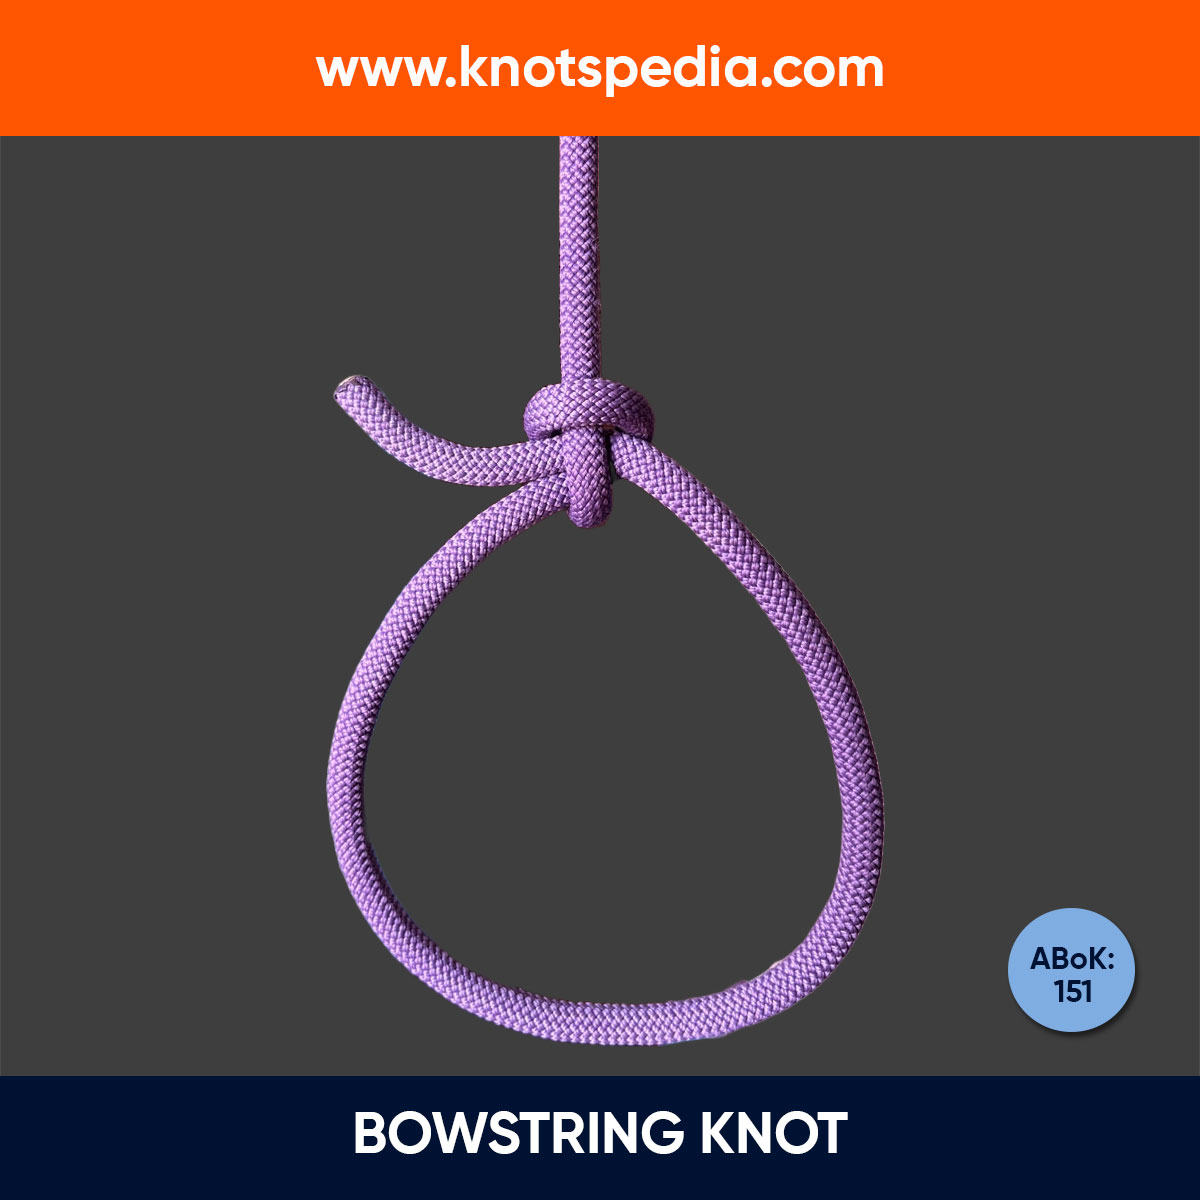
Bowstring Knot
The Bowstring knot (or an Archer's knot) is an ancient knot used by the aboriginal groups to attach the bowstring to the bow.
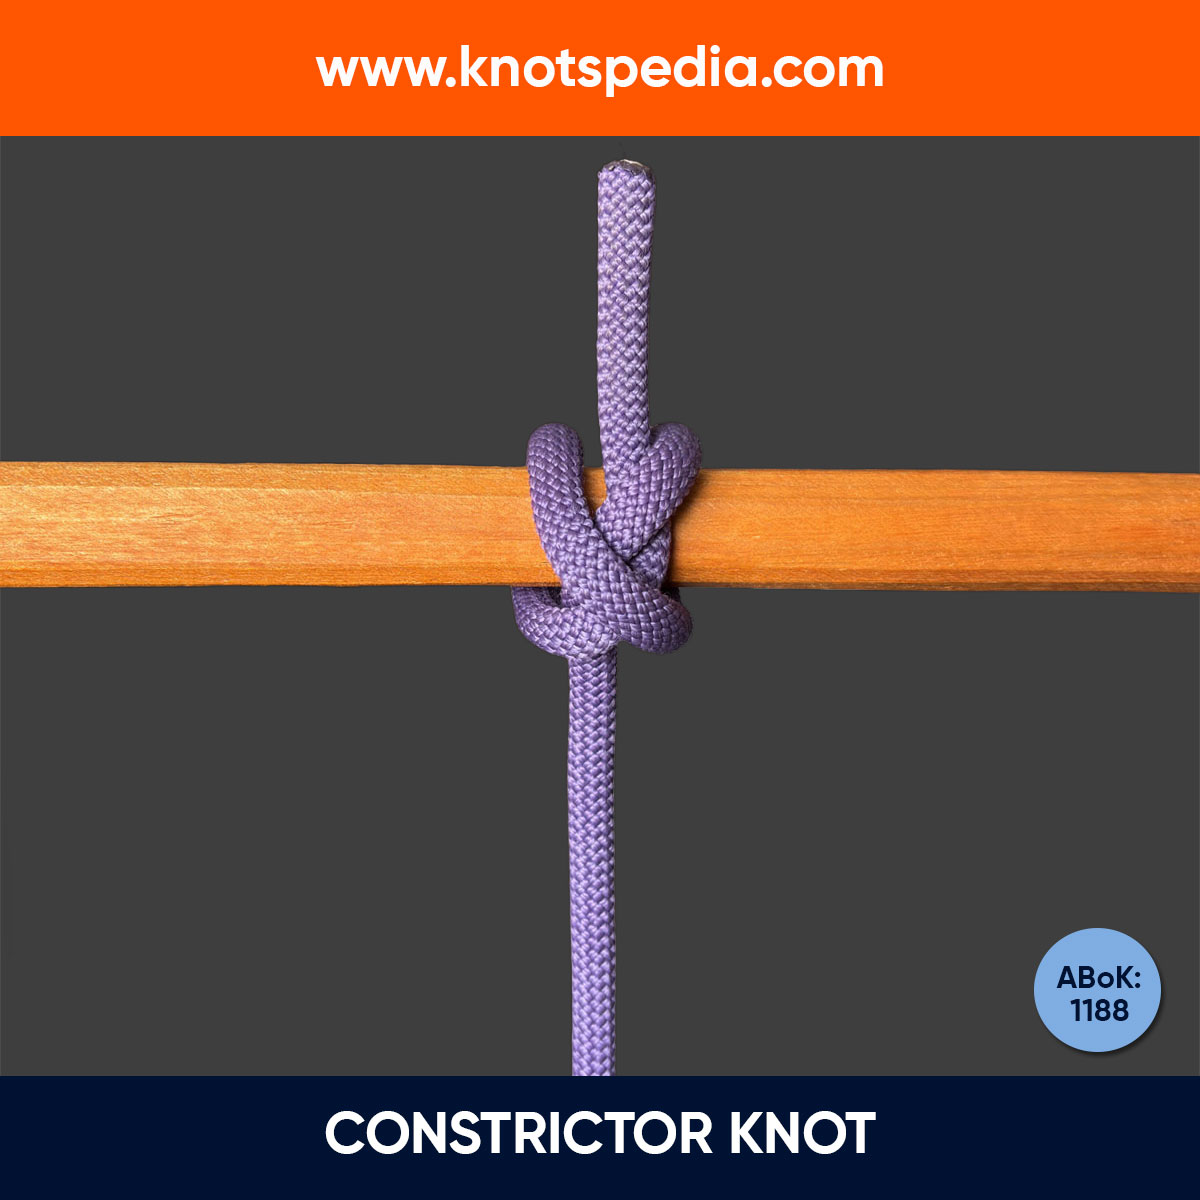
Constrictor Knot
The Constrictor Knot is a secure binding knot, ideal for tying bags or binding materials tightly. Reliable but tough to untie!
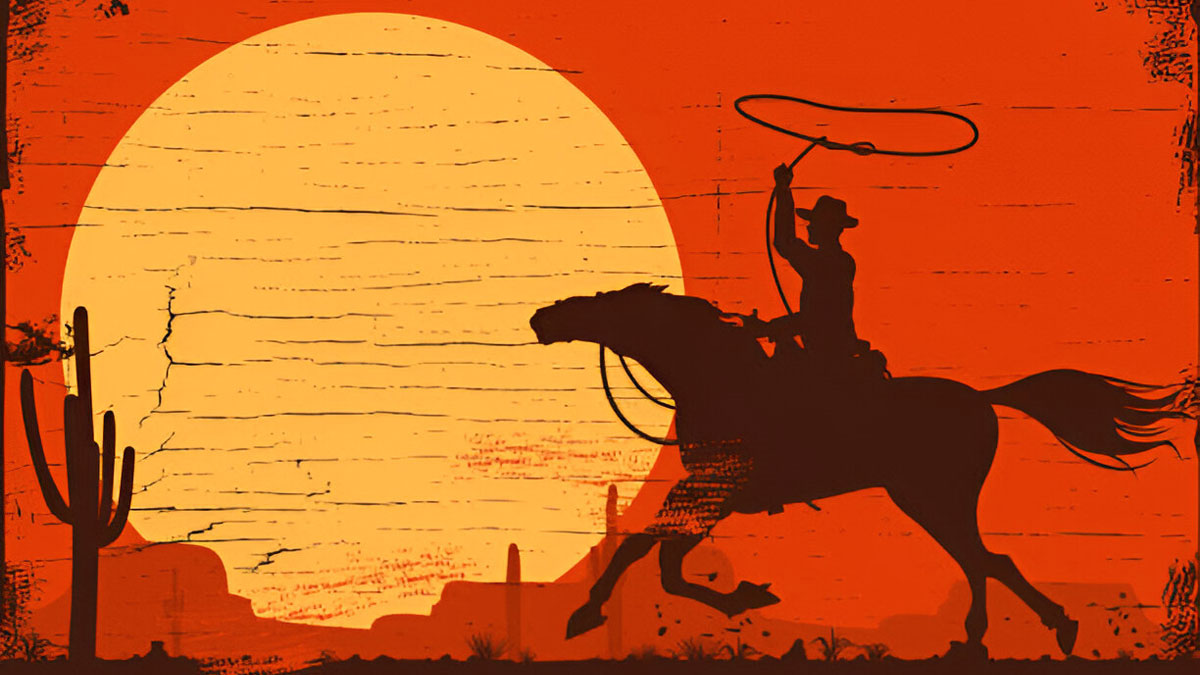
How to Tie a Lasso
How to tie a lasso: Start by tying a Honda Knot to create a fixed loop. Then, thread the long end of the rope through the loop and you’ve got yourself a lasso!
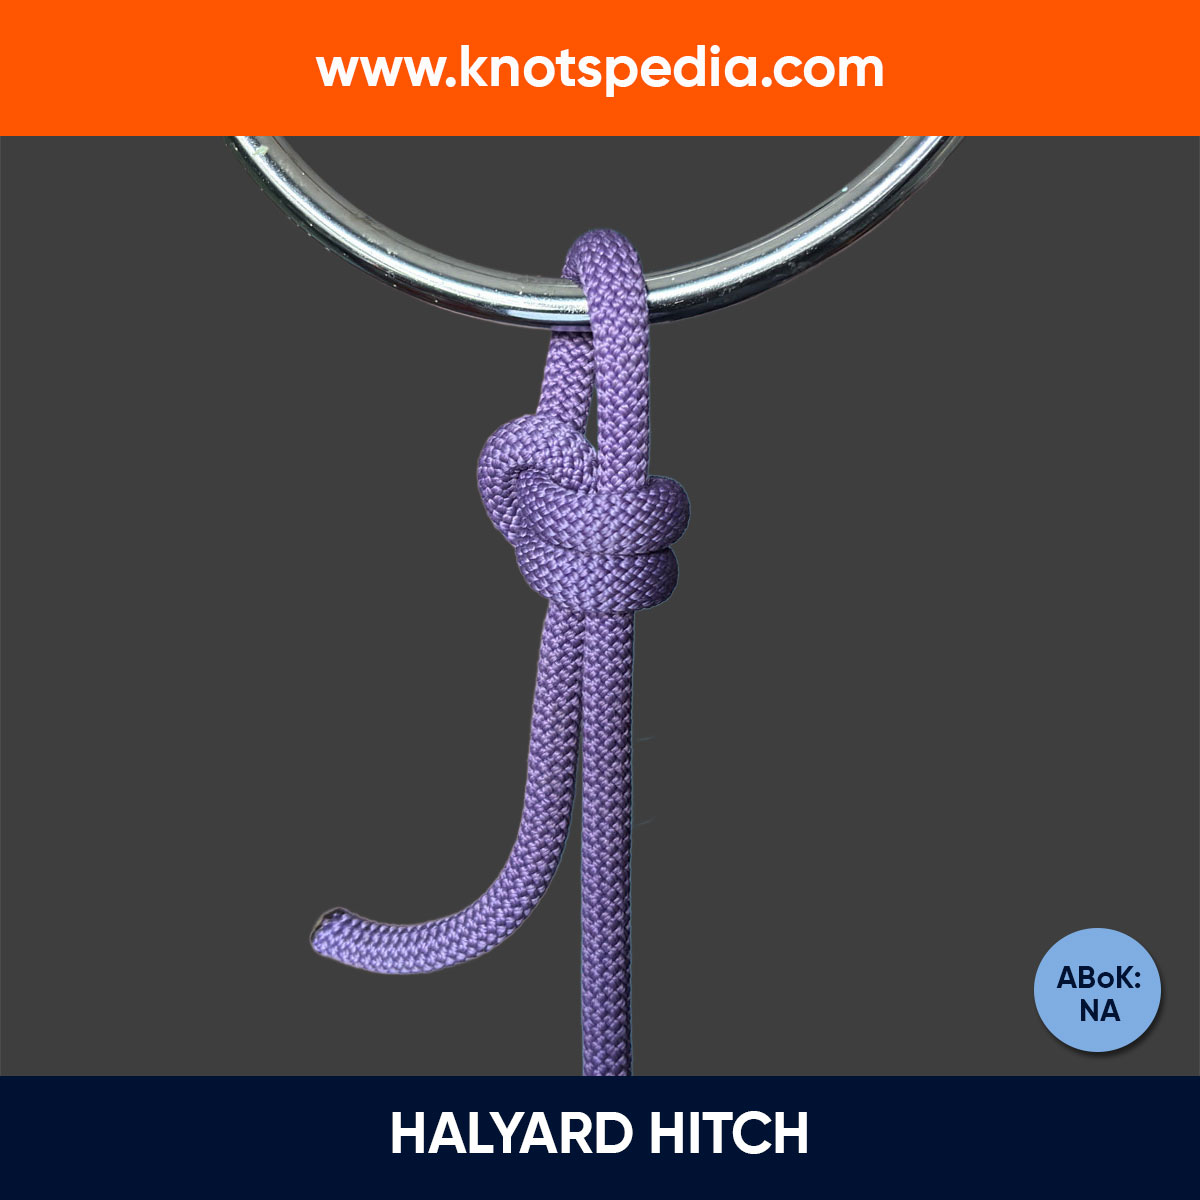
Halyard Hitch
The Halyard hitch connects halyard to a shackle, especially when you need to hoist an object like a mainsail, a flag up a flag pole, a ladder, or a yard.
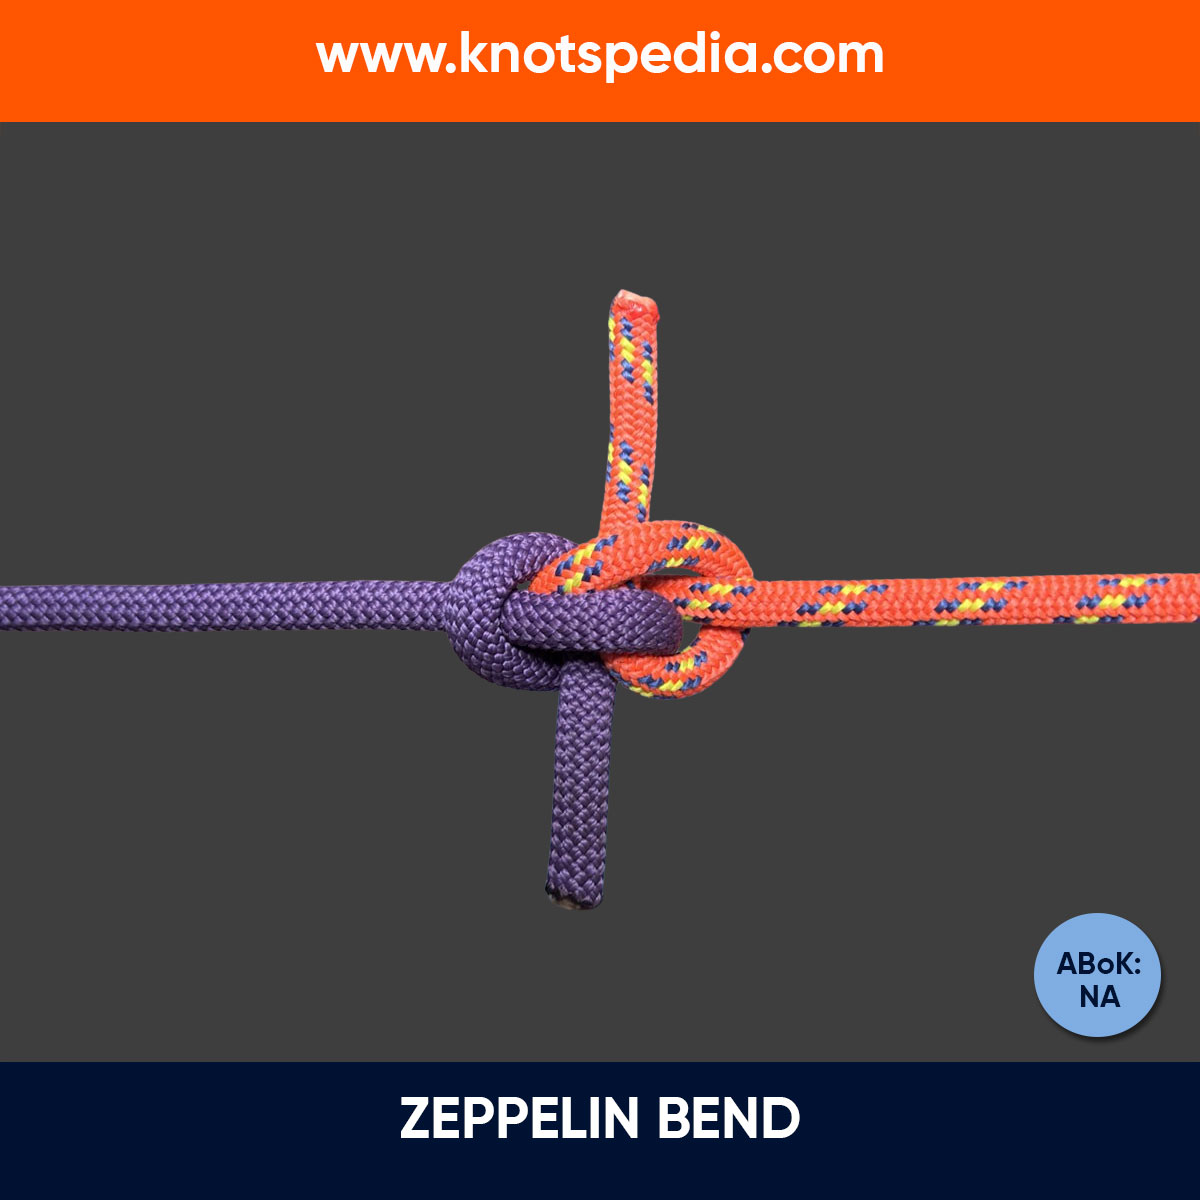
Zeppelin Bend
The Zeppelin Bend is a secure, non-jamming knot perfect for heavy loads. Easy to untie and reliable for climbing, rigging, and more.
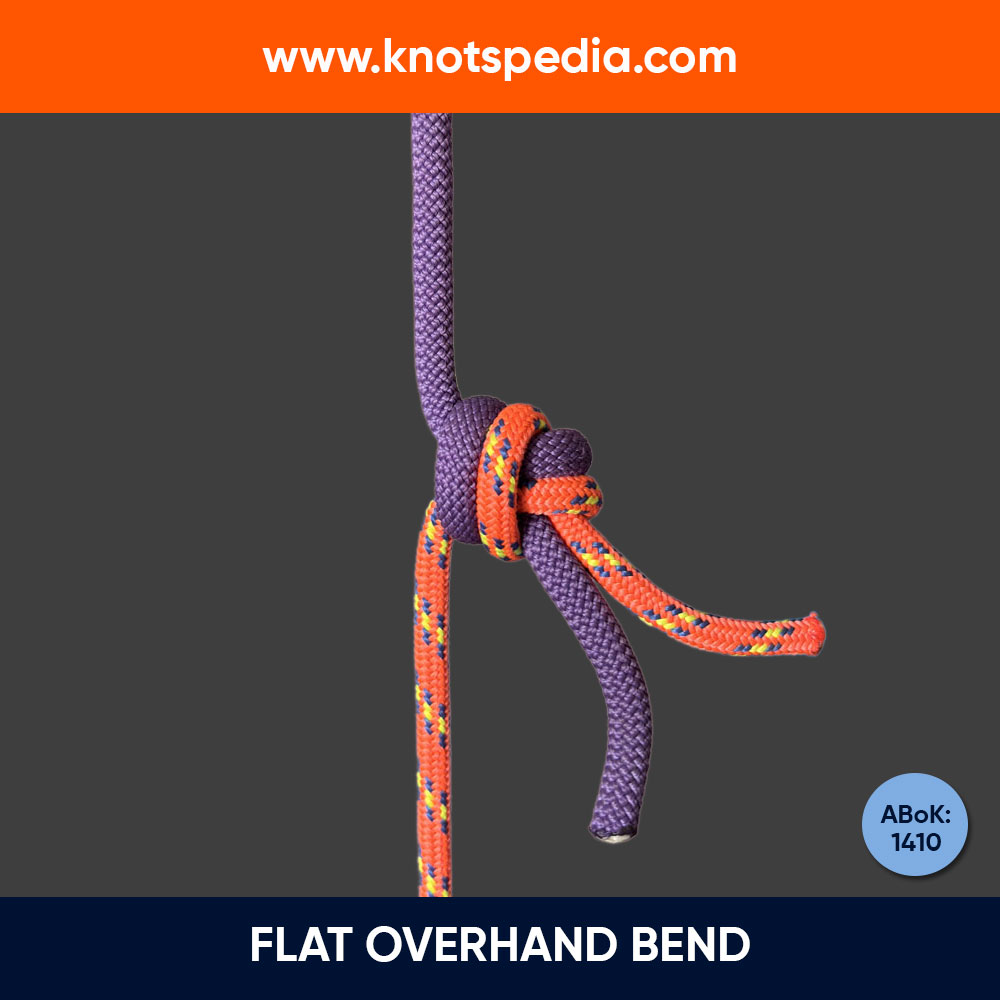
Flat Overhand Bend
The Flat Overhand Bend (European Death Knot) is used to join two ropes together in climbing. Learn its uses, safety tips, and variations to improve security.
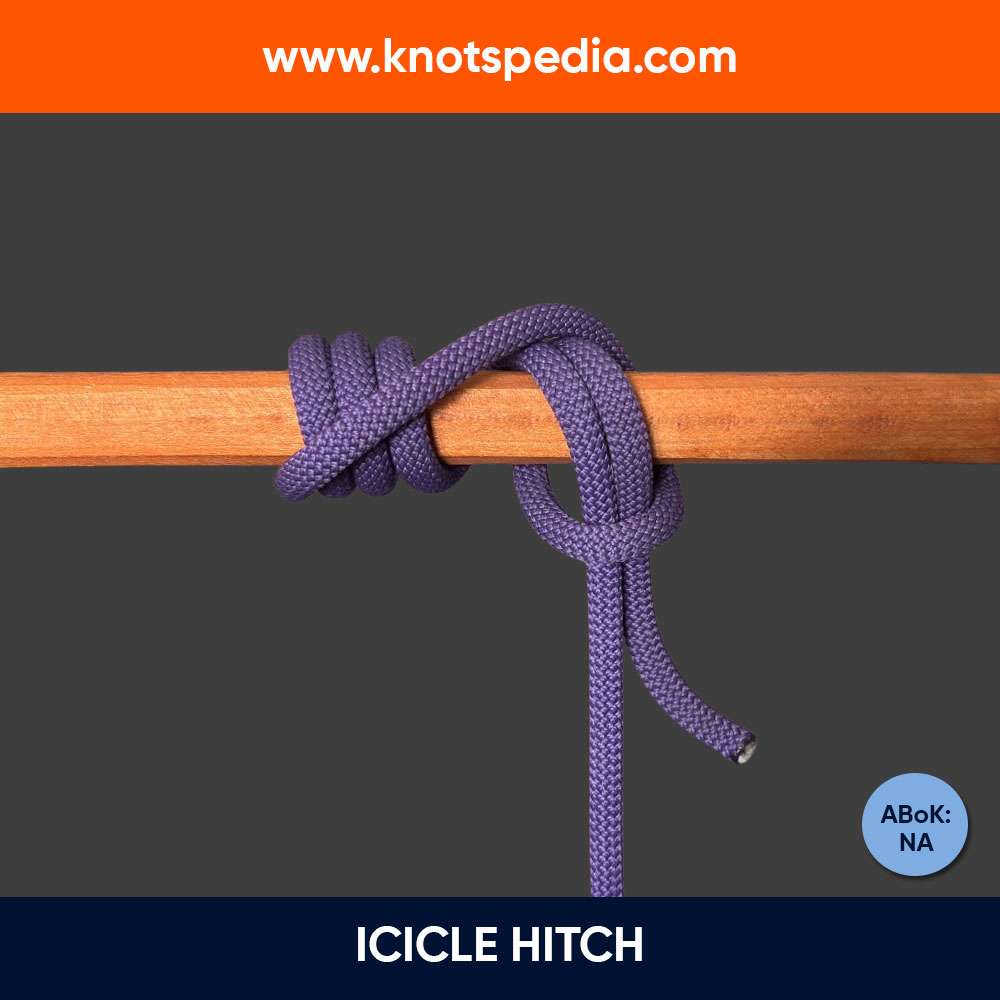
Icicle Hitch
The Icicle Hitch is a secure knot ideal for gripping smooth, tapered surfaces like poles. It’s perfect for hoisting or pulling objects lengthwise without slipping.
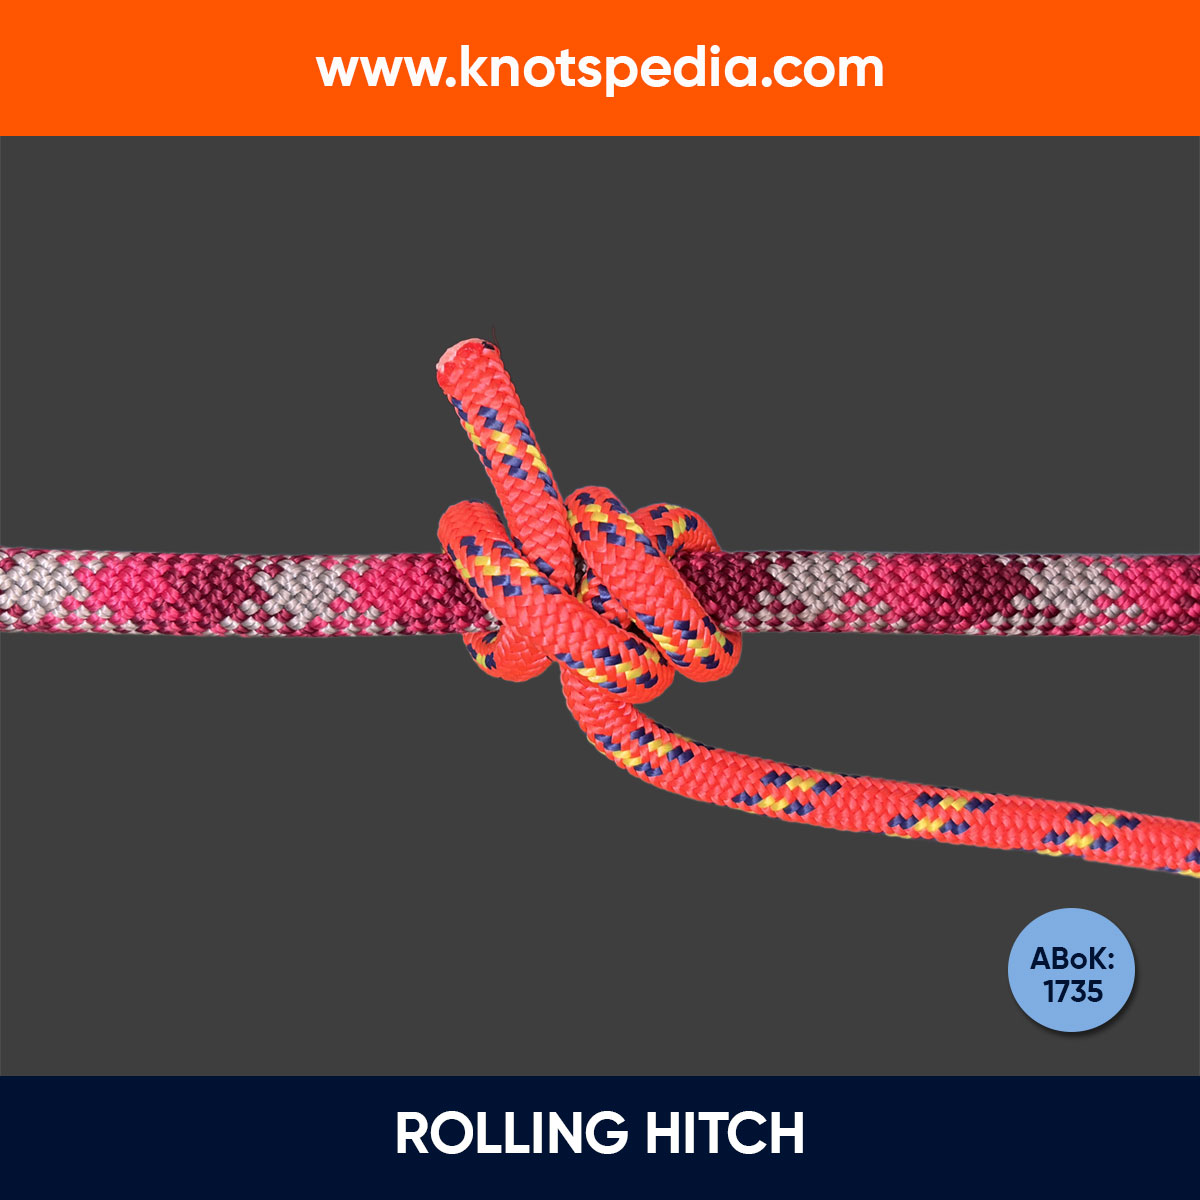
Rolling Hitch
The Rolling Hitch is a reliable knot used to secure a rope to another line or pole, ideal for lengthwise pulls. It's great for sailing, hauling, and tension adjustments.
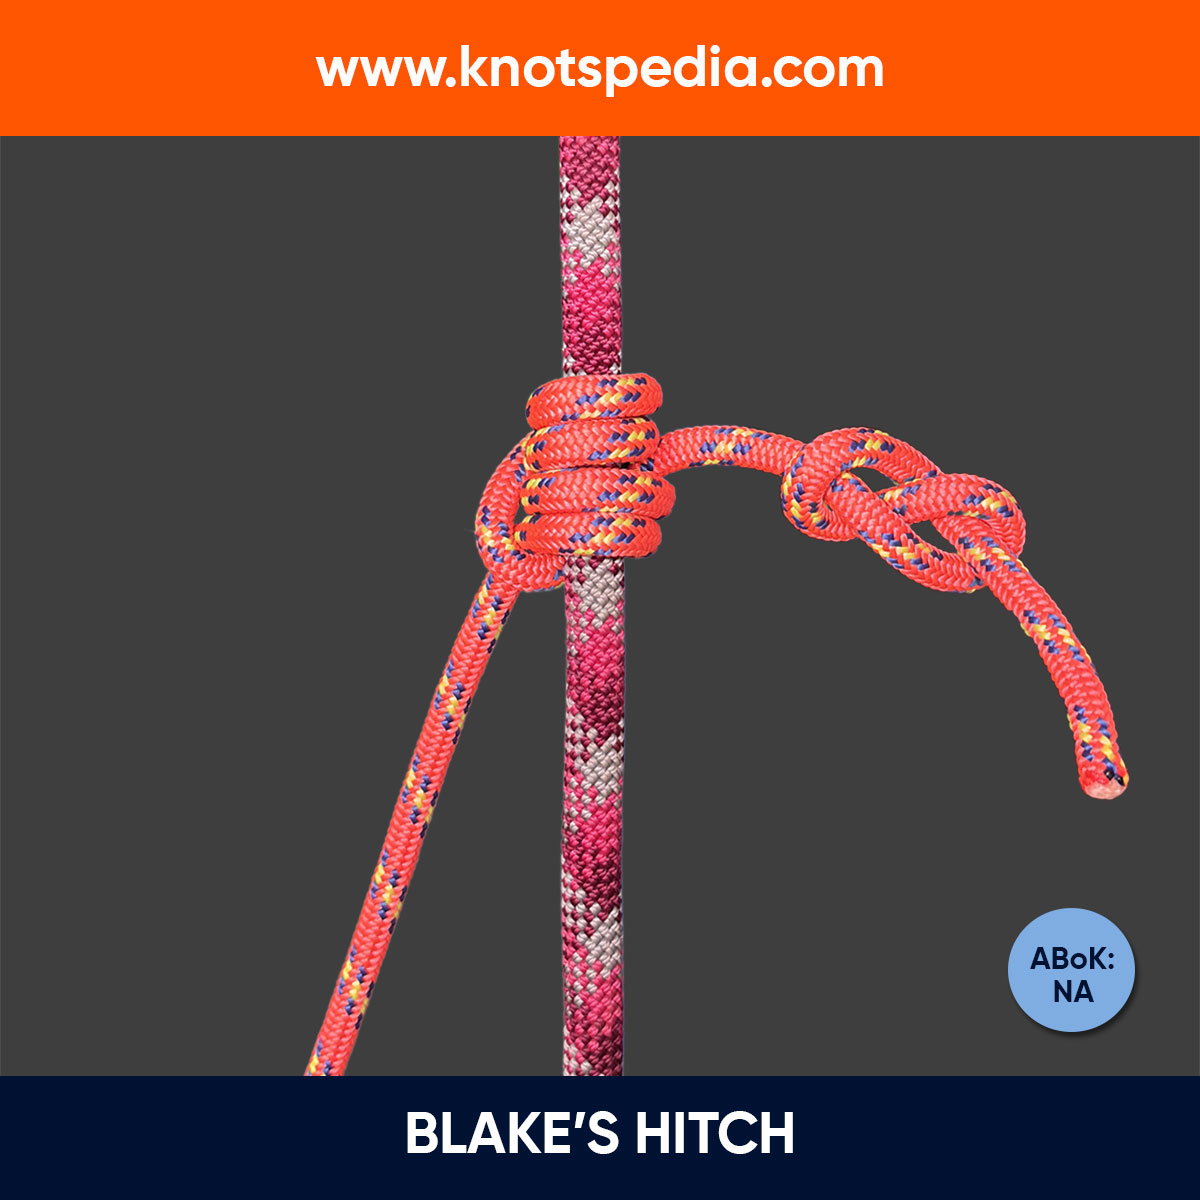
Blake’s Hitch
The Blake's Hitch a friction knot used for climbing. Learn the step-by-step instructions, history, variations, and tips for safe use in arborist tasks.
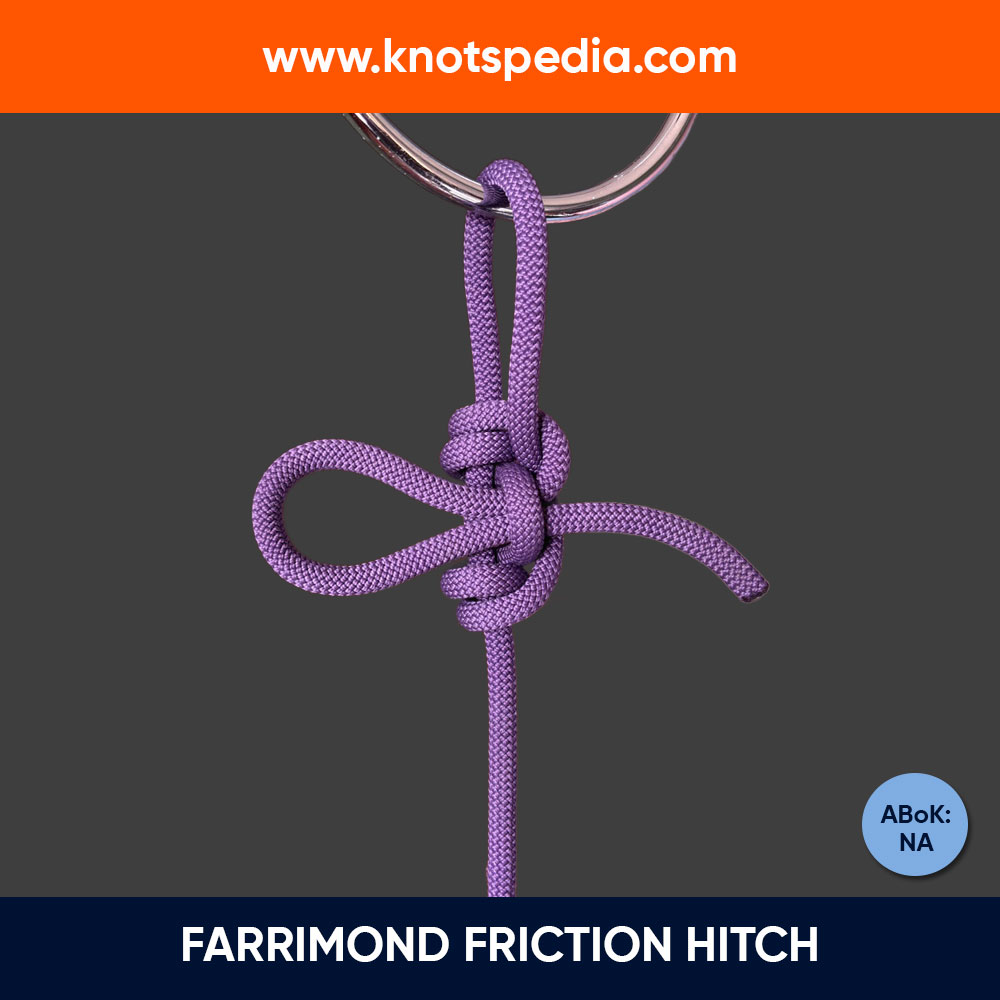
Farrimond Friction Hitch
The Farrimond friction hitch is an adjustable, quick-release knot perfect for camping, tarps, and clotheslines. Easy to untie with one hand.
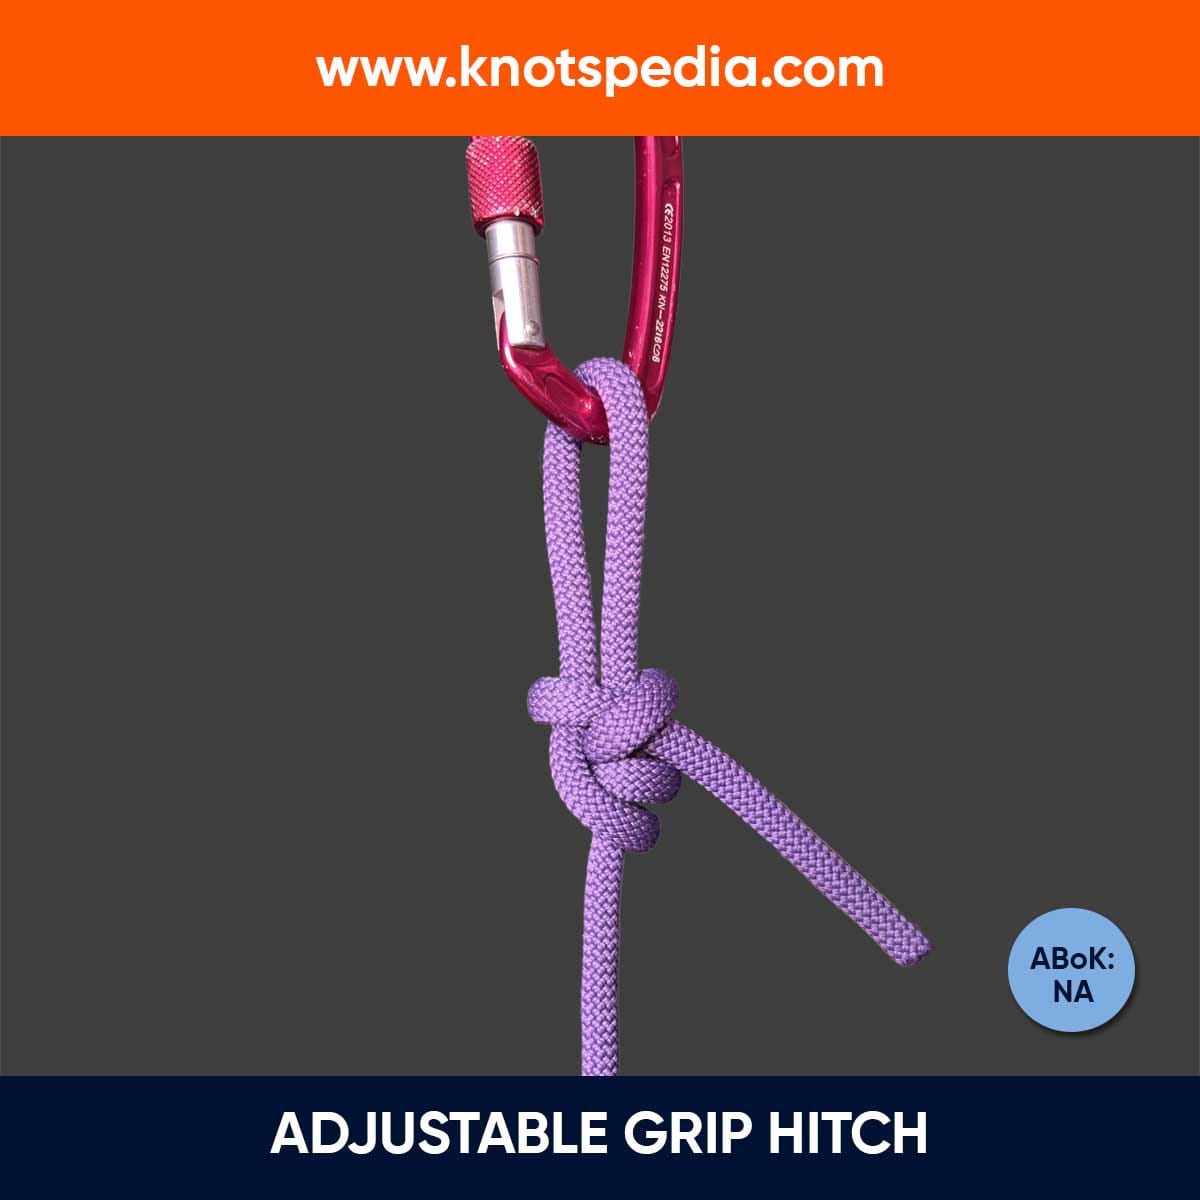
Adjustable Grip Hitch
The Adjustable Grip Hitch is a slide and grip hitch used for tensioning lines. It locks under load and slides when slack, ideal for camping and outdoor tasks.

Figure 8 Bend Knot
The Figure 8 Bend, also known as the Flemish Bend, is a secure knot used to join two ropes of similar size. It’s easy to inspect and untie after heavy loading.
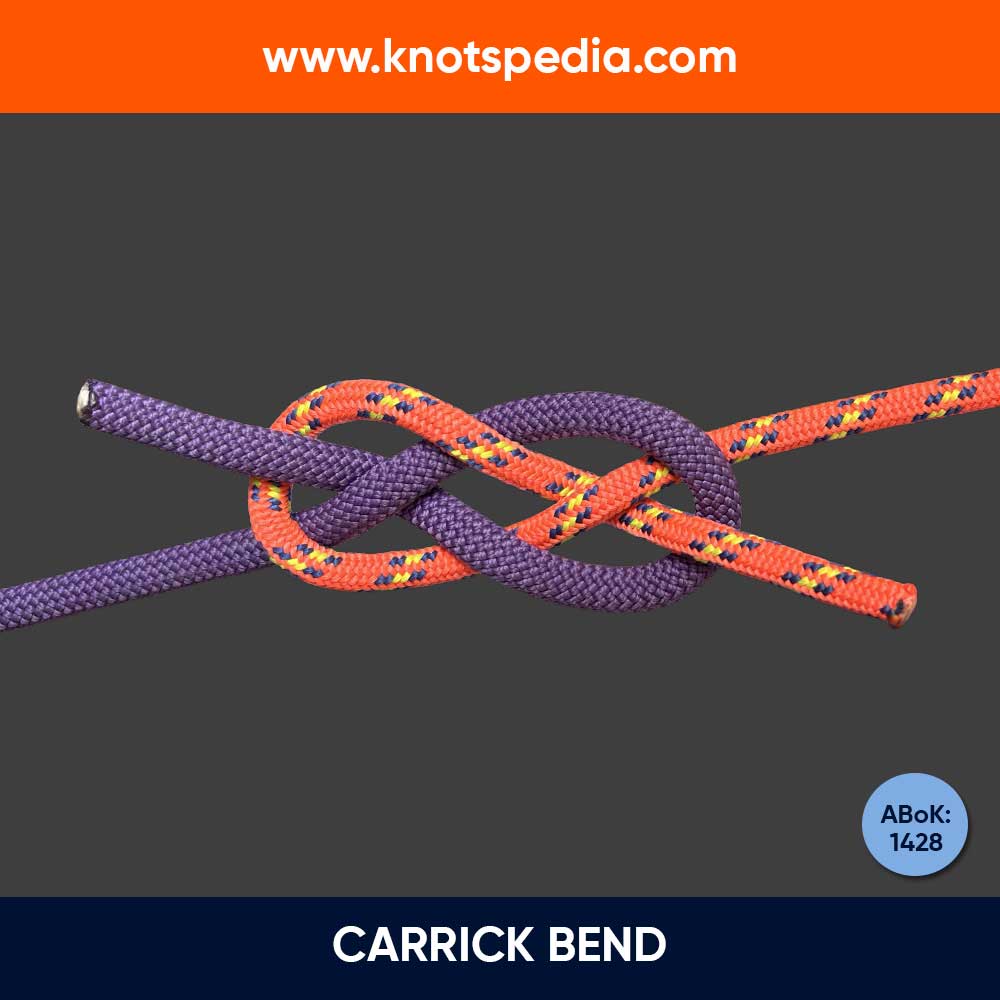
Carrick Bend
The Carrick Bend is a secure knot for joining two heavy ropes. It’s easy to untie under load, and its symmetrical form makes it a proper decorative knot.
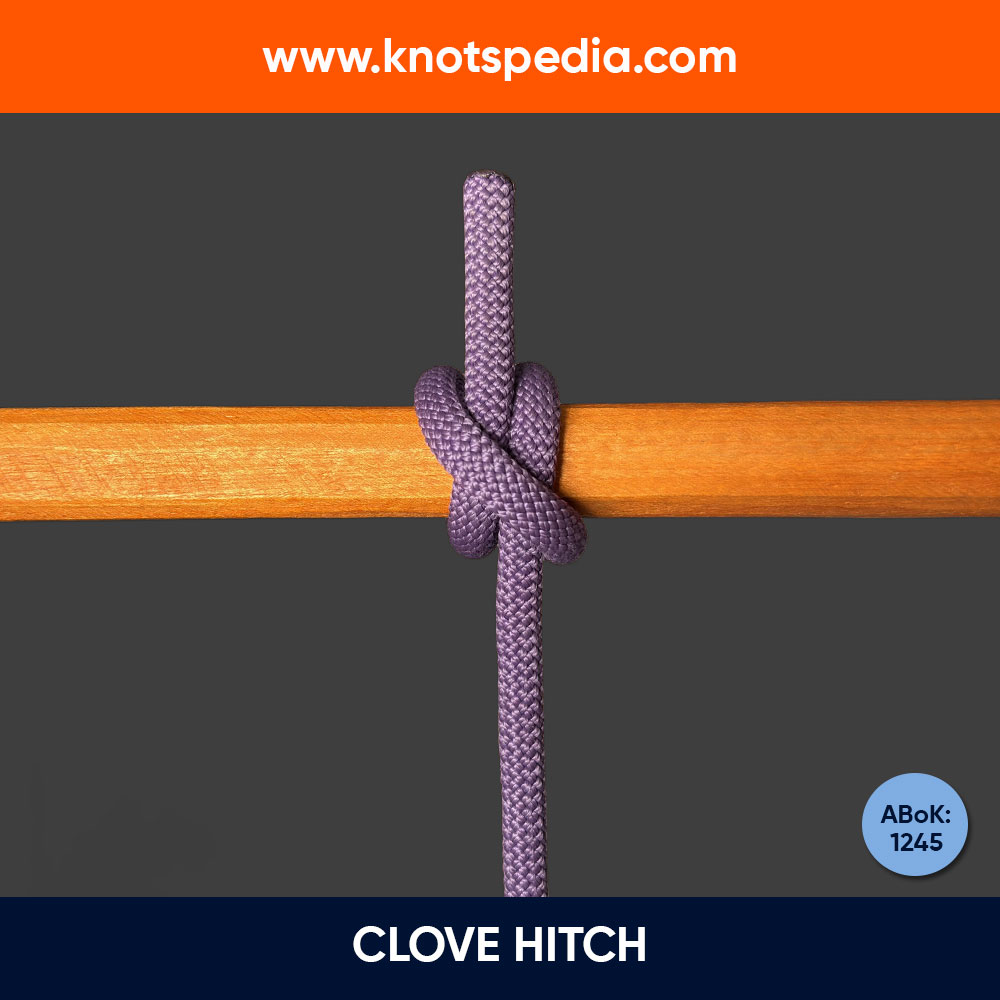
Clove Hitch
The Clove hitch is one of the most common knots people learn to tie along with the Bowline knot and the Sheet bend knot. Easy to tie, untie and remember.
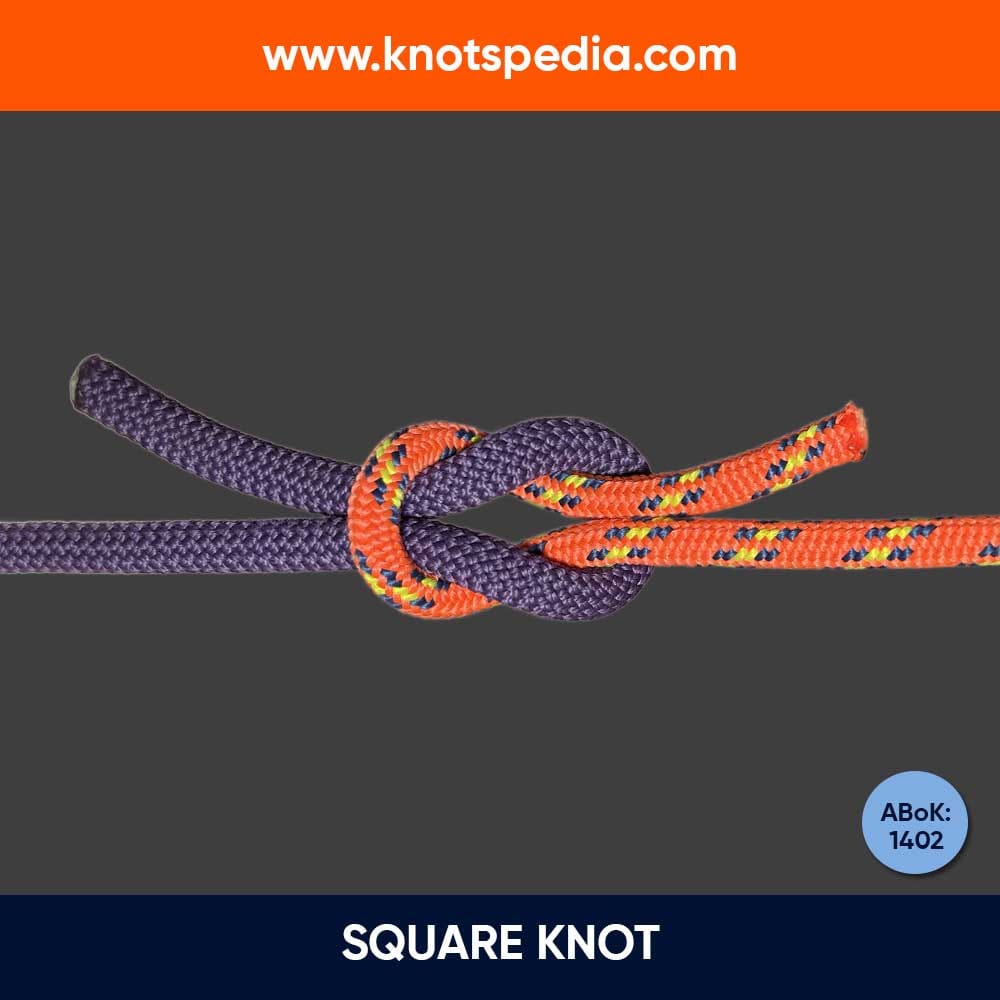
Square Knot
The square knot (Reef knot) is a simple binding knot used for shoelaces and packages. It's quick to tie but not suitable for critical or heavy loads.
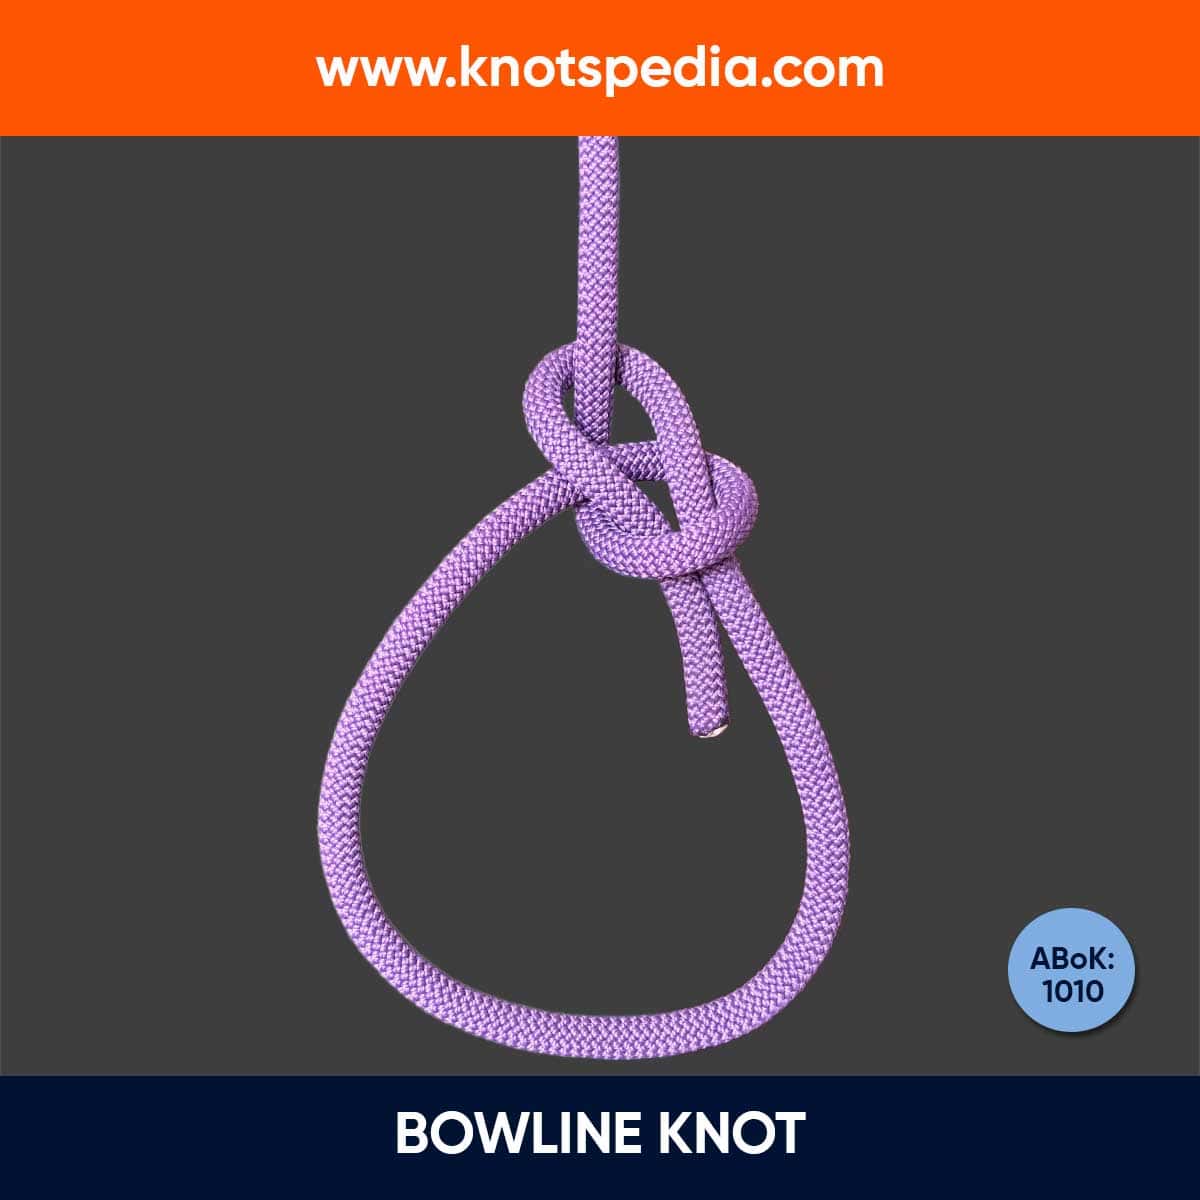
Bowline Knot
The Bowline Knot (ABoK #1010) forms a secure, non-slip loop at the end of the rope that’s easy to tie and untie. Ideal for sailing, climbing and general use.
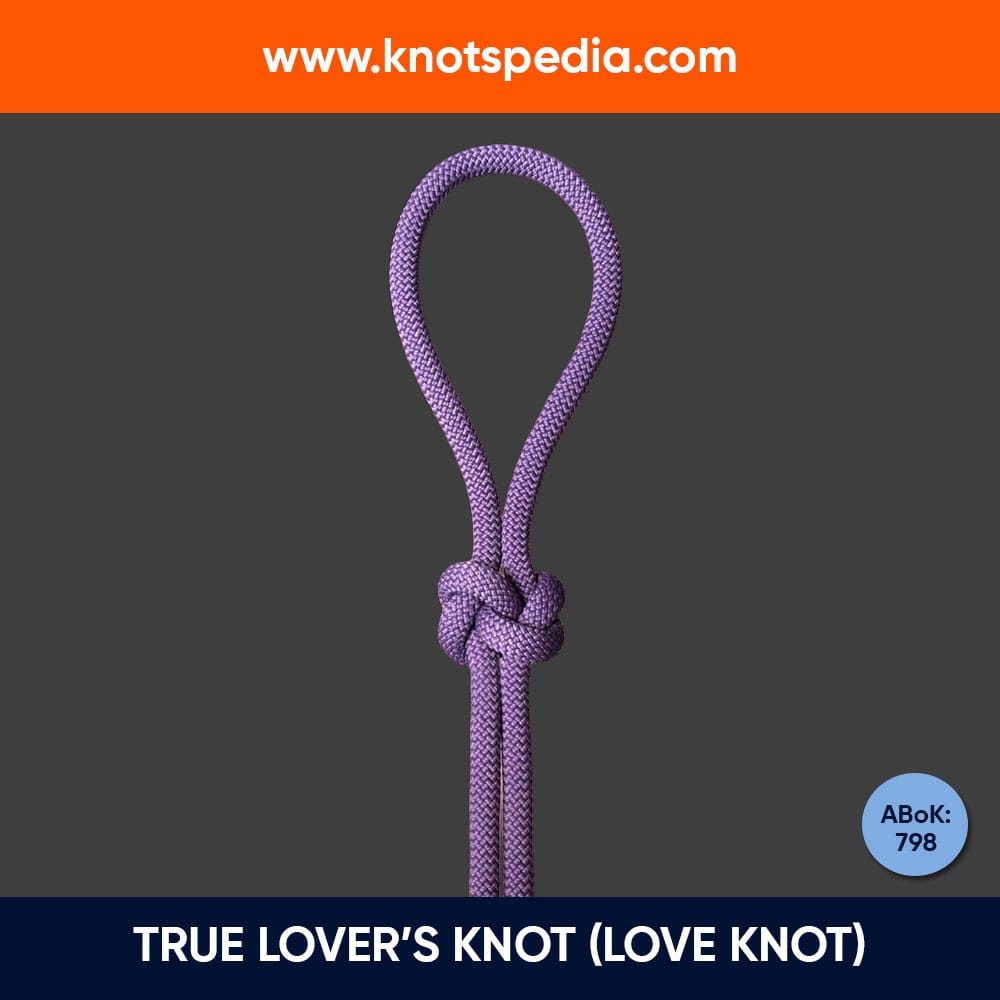
True Lover’s Knot
The True Lover’s Knot (Love Knot) is made from two interlocking Overhand knots that symbolizes love and unity. It’s used in jewelry and traditions like weddings.
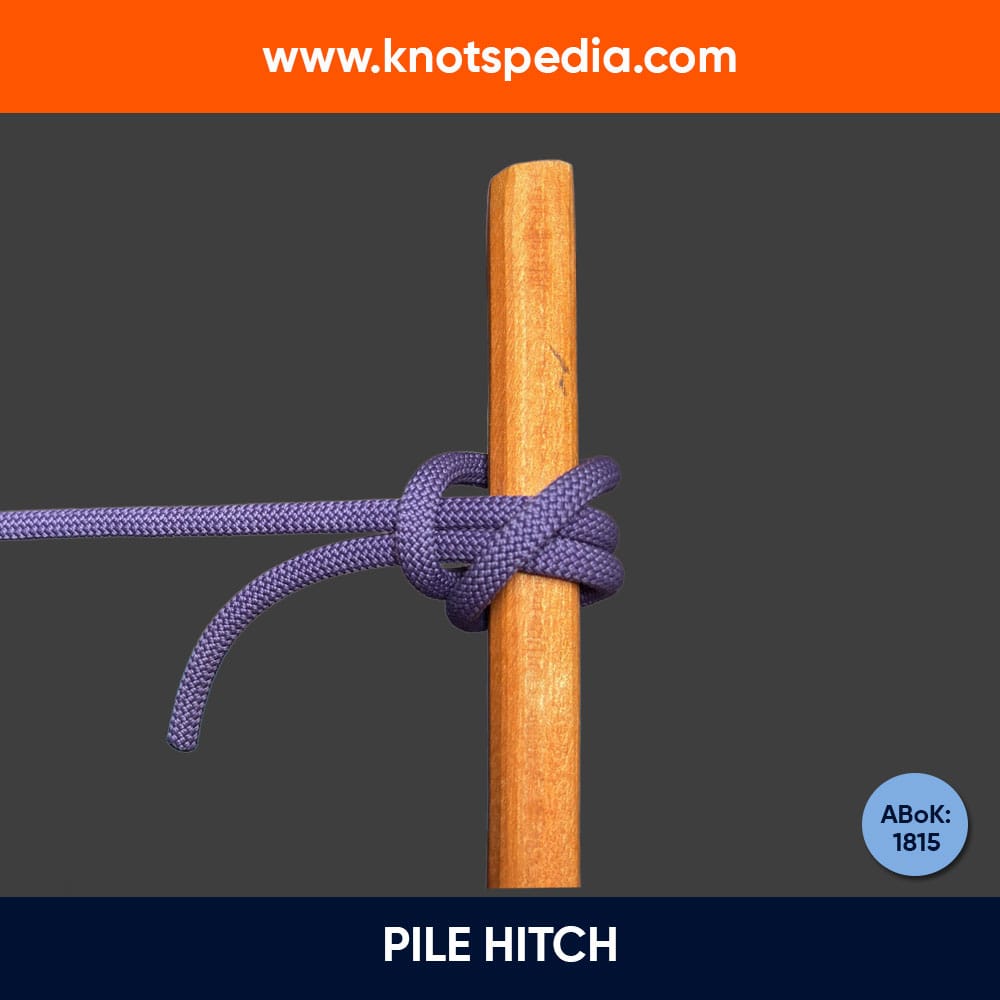
Pile Hitch Knot
The Pile Hitch Knot is a secure mooring hitch ideal for medium and heavy lines. Easy to cast off and adjust, perfect for docks, posts, and temporary fences.
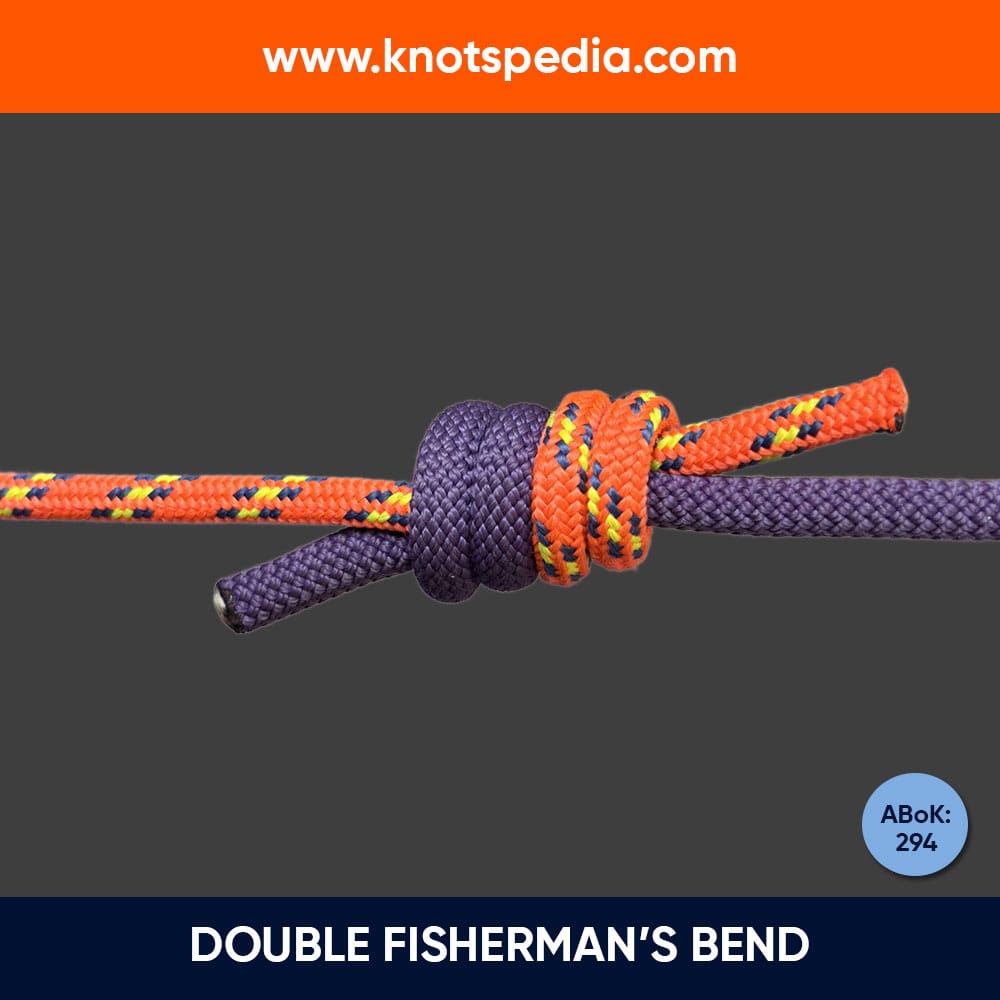
Double Fisherman’s Knot
The Double Fisherman’s Knot securely joins two ropes or forms loops. Used in climbing and rescue, it's strong but hard to untie after loading.
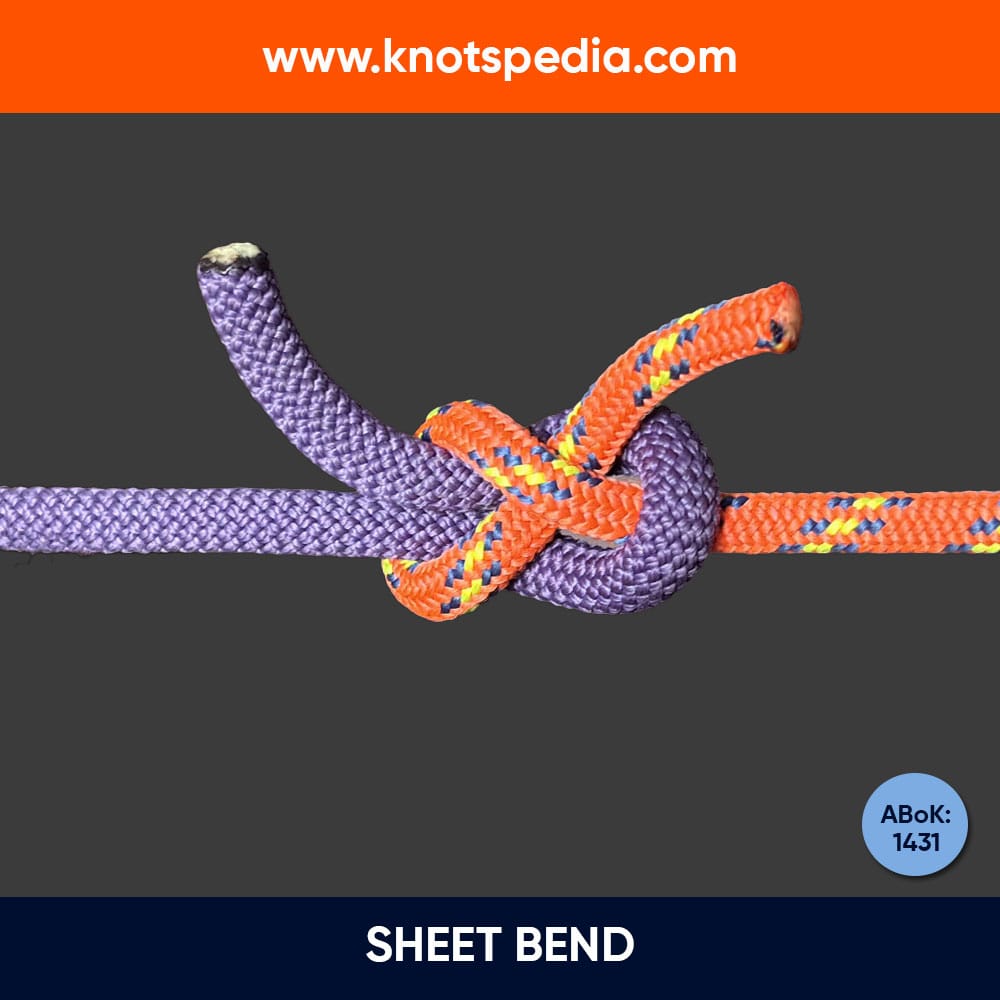
Sheet Bend
The Sheet Bend (ABok #1431) or Weaver's Knot is perfect for joining ropes of different sizes. It’s reliable, easy to tie, and quick to untie.

Handcuff Knot
The Handcuff Knot (ABoK #1140) forms two adjustable loops ideal for temporary restraints. Popular in firefighting, rescue, and role-play.
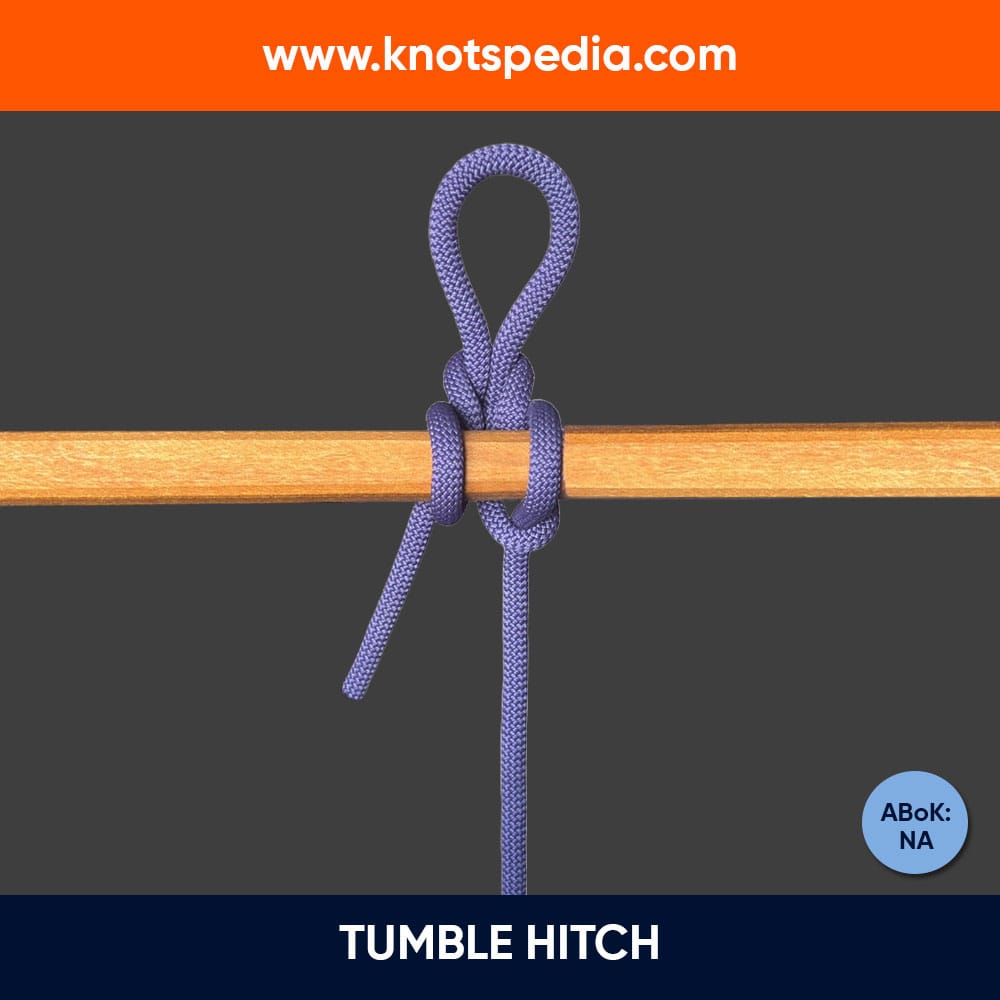
Tumble Hitch
The Tumble Hitch is a quick release knot used to secure loads under tension. It offers reliable hold and fast release, especially in non critical situations.